
A spoon dragged through the filling leaves a clean line, cool and dense, before it slumps back against itself. What separates individual no-bake cheesecakes from a baked one is margin for error, and most of it lives in the cream cheese. Cold blocks stay lumpy no matter how long the mixer runs, and those lumps survive the whipped cream.
Blocks, not the spreadable tub, are what set firm enough to unmold. From there, the graham base and the chocolate truffle on top do their work, and the filling has to be read by eye and hand, not clocked. Get one of those readings wrong and the cheesecake still tastes fine, though it spoons instead of slices.
That’s the honest limit of a no-bake set.
Press the Crust Firmly for a Clean Release
Graham cracker crumbs, sugar, and melted butter stirred together should look like wet sand, clumpy and cohesive when you squeeze a handful. That texture tells you the butter is evenly distributed, not pooling at the bottom of the bowl.
When you press 1 ½ tablespoons of that mixture into each mold, apply real pressure with the back of a spoon or your fingers. Firm pressure compacts the crumbs into a solid base that won’t crumble when you lift the cheesecake out. A loose press leaves a fragile crust that breaks apart on the plate.
The crust also acts as a sturdy foundation for the filling, so a well-packed base keeps the whole thing intact. You’ll know it’s right when the crust feels hard and compact, not sandy or shifting. That’s your cue to move on to the filling.
Fold the Whipped Cream Gently to Keep the Air
Whipping heavy cream to soft peaks traps air bubbles that lighten the dense cream cheese base. If you beat the cream cheese and sugar until fluffy, you’ve already added some air, but folding in whipped cream takes it further. The goal is a mousse-like consistency that will set softly in the fridge.
When you fold, use a spatula and cut down through the middle, then sweep up and over. Stop as soon as no white streaks remain. Overmixing deflates the cream, and the filling turns into a heavy brick.
You want it to still look light and billowy. Once it’s combined, divide it over the crusts right away, before the air starts to escape.
The texture you’re after is airy but stable, so it holds its shape when spooned.
Four Hours in the Fridge Firm Up the Filling
The filling needs a full 4 hours in the refrigerator to firm up. During that time, the cream cheese and whipped cream set into a sliceable texture. If you rush it, the filling stays soft and runny, and it won’t hold its shape when you unmold it.
The crust also firms up as it chills, making it easier to remove from the muffin wrappers or ring molds without breaking. So plan ahead: make these in the morning or the night before. The wait is hands-off, but it’s not optional.
After 4 hours, the cheesecakes should feel firm to the touch and look set. That’s when you know they’re ready for the topping.
Don’t be tempted to serve them sooner, or you’ll end up with a spoonable dessert instead of neat individual cheesecakes.
Add the Chocolate Topping Just Before Serving
Chocolate sauce and truffles go on at the last minute, after the cheesecakes have chilled. If you add them earlier, the sauce seeps into the filling and turns it soggy, and the truffle can sink or melt.
Waiting keeps the sauce glossy on top and the truffle intact. The contrast between the cool, creamy cheesecake and the rich chocolate is what makes each bite interesting. You’ll get a clean presentation with distinct textures.
So hold off until you’re ready to serve. Drizzle 1 tablespoon of sauce over each cheesecake and set a truffle on top.
The sauce should pool slightly on the surface, not soak in. That’s your sign it’s time to dig in.
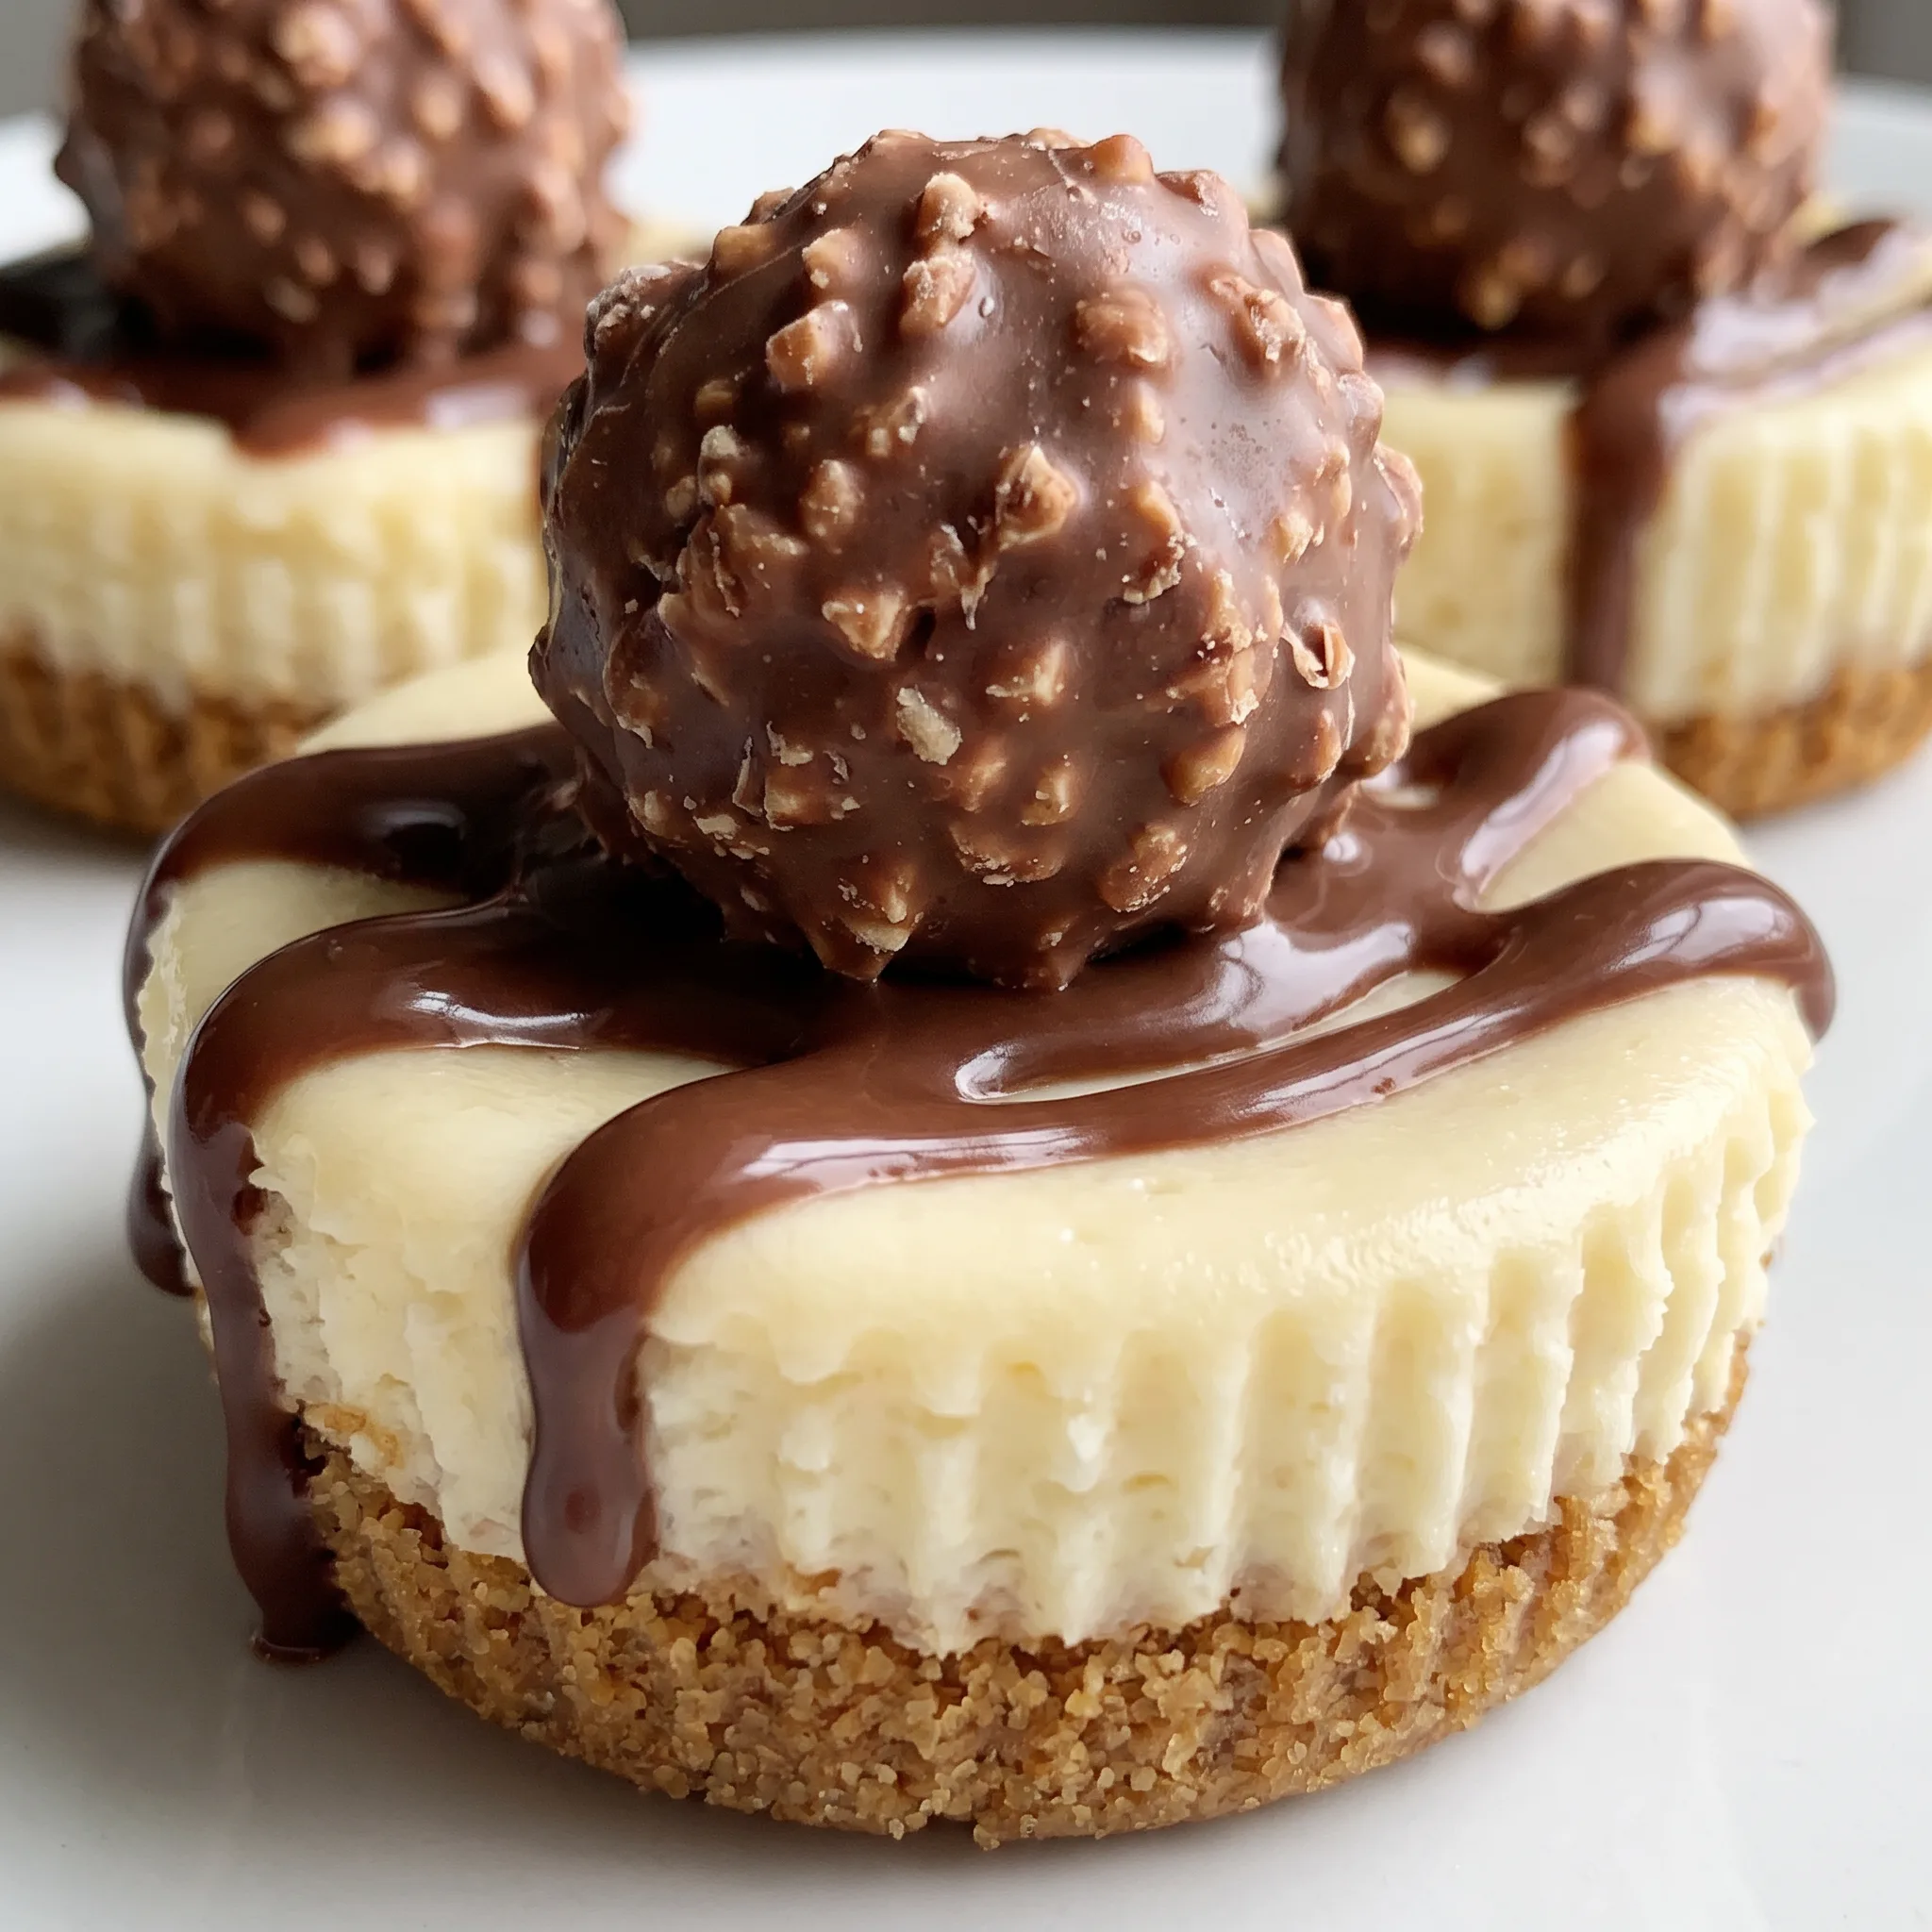
The Ingredients That Make or Break a No-Bake Cheesecake
Ground graham crackers: Buy the crumbs already ground, or pulse whole crackers until fine, since coarse pieces leave a loose crust.
Cream cheese: Full-fat blocks give the firmest set, and the softer spreadable tub style never firms up enough.
Heavy whipping cream: Look for a carton labeled heavy whipping cream with at least 36 percent fat, because lighter cream won’t hold peaks.
Chocolate sauce: A thick, glossy sauce clings to the top, while thin syrup soaks in and leaves the surface wet.
Chocolate truffles: Choose firm truffles that hold their shape at room temperature, not soft ganache centers that slump.
Read the Filling at Three Points Before It Ever Hits the Fridge
When the cream cheese is soft enough to beat smooth
Cold cream cheese stays lumpy no matter how long the mixer runs, and those lumps never fully smooth out once the whipped cream goes in. Press a piece with your thumb: it should give easily, no cool firm center. If it’s still cold, leave it on the counter until it does.
Beating cold cream cheese also splashes grit against the bowl, and you’ll chase those lumps through the whole mix.
Judging the cream cheese and sugar at three minutes
After about 3 minutes the mixture should look lighter in color, feel softer against the beaters, and pull away from the bowl in a slow ribbon when you lift the paddle. That ribbon is your sign it’s fluffy enough.
Stop short and the base stays dense, so the finished filling eats heavy. Go long and you warm the cheese, which softens the set.
The exact point where the whipped cream disappears
Fold until you see no white streaks, then stop. The streaks are your gauge: while they’re visible, keep folding; the moment the mixture is one even color, every extra turn costs air. Overfold and the filling turns loose and slack, and it won’t hold a clean edge when you unmold it.
Underfold and you get pockets of plain whipped cream that taste thin next to the sweet base.
How the filling should mound when you portion it
Spoon 4 to 5 tablespoons over each crust and watch how it sits. It should mound slightly and hold a soft peak, not spread flat and run to the edges.
If it spreads, the cream was underwhipped or the folding went too far, and the set will be soft. A gentle tap of the pan settles it; a filling that still sloshes won’t firm up the way you want.
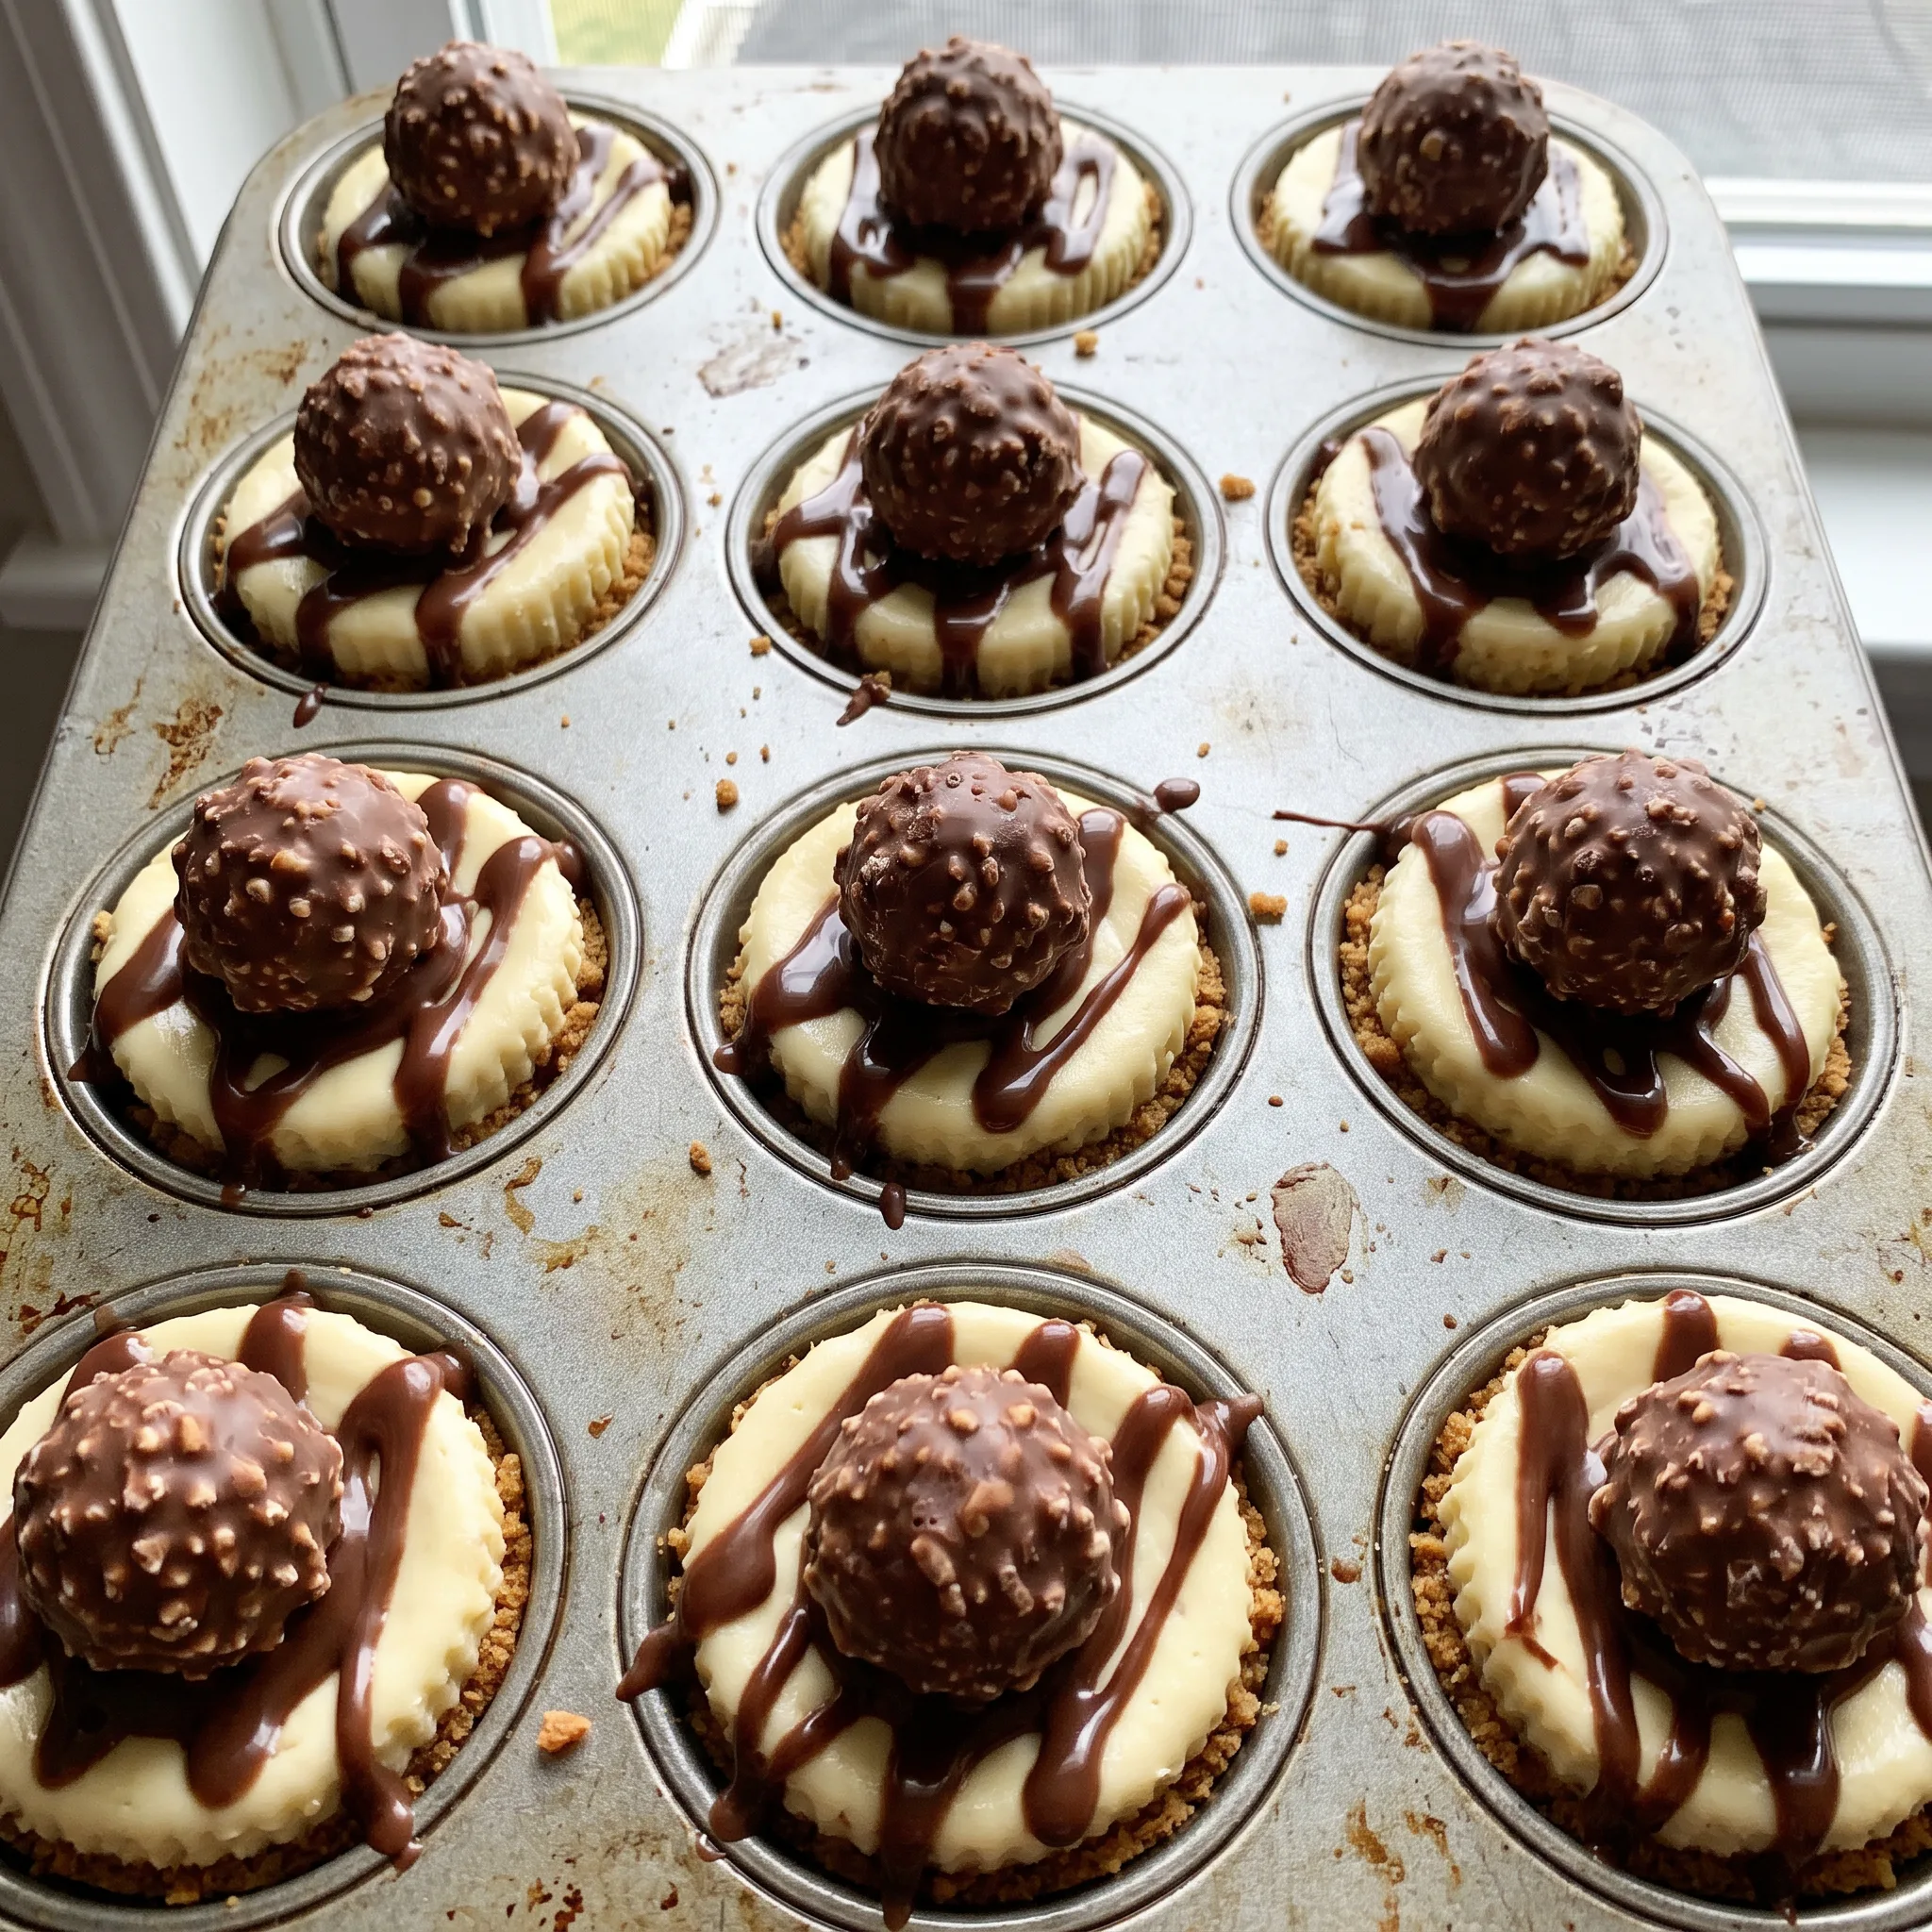
Individual No-Bake Cheesecakes with Chocolate Truffles
Ingredients
Method
- In a small bowl, stir together graham cracker crumbs, 1 tablespoon sugar, and melted butter until the texture resembles wet sand.
- Use muffin wrappers to line a mini muffin pan, or use parchment paper to line ring molds.
- Press 1 ½ tablespoons of the crust mixture firmly into the bottom of each mold to create the crust.
- In the bowl of a stand mixer, beat cream cheese and sugar until light and fluffy, about 3 minutes. Mix in vanilla extract.
- In a separate bowl, whip heavy cream until soft peaks form.
- Gently fold the whipped cream into the cream cheese mixture until no streaks remain.
- Divide 4–5 tablespoons of the filling over the crusts. Chill for 4 hours or until fully set.
- Just before serving, drizzle each cheesecake with 1 tablespoon chocolate sauce and place a chocolate truffle on top.
Cold From the Fridge, Topped at the Last Second
These set cheesecakes are at their best straight from the fridge, within the first day or two. The filling is a fresh dairy mix of cream cheese and whipped cream, so it holds its shape and clean texture for about 2 days in a sealed container, then the cream starts to weep and the crust softens against the filling. Eat them cold; leaving one on the counter for long slackens the set and the base loses its snap.
Keep leftovers covered in the fridge and skip the freezer, since the whipped cream breaks on thaw and the crust goes soggy. The chocolate sauce and truffle go on only at the moment of serving, never before storage, so the topping stays glossy and the truffle stays whole. If you’re making these ahead, chill the plain cheesecakes and hold the chocolate until you plate.
A stored portion needs nothing more than a return to the cold for 20 minutes if it sat out.
What You Can Change and What Has to Stay Put
Cream cheese: Leave this one alone if you want a sliceable cheesecake. Full-fat block cream cheese is the only version that sets firm enough to unmold. Light cream cheese and the spreadable tub style carry more water and less fat, so the filling stays loose even after a full 4 hours in the fridge.
The cheesecakes won’t release cleanly from the wrappers or ring molds, and they’ll spoon out soft instead of holding an edge. If you’re set on a lighter option, expect a softer set and serve them in the wrappers or small cups rather than unmolding.
Ground graham crackers: Chocolate wafer crumbs work cup for cup in the same 1 cup measure, and gingersnap or shortbread crumbs do too. Pulse them to the same fine texture as graham crumbs.
Chocolate wafers push the whole dessert toward a darker, more bitter note that plays well against the truffle. Gingersnaps bring a little heat and spice. Shortbread reads sweeter and buttery.
Any of them press into a firm crust the same way, so the method doesn’t change.
Heavy whipping cream: For a dairy-free take, chill a can of full-fat coconut cream overnight, scoop the solid part, and whip that in place of the 1 cup heavy cream. Keep it cold and whip just to soft peaks. Coconut cream whips to a similar billowy texture, though it carries a faint coconut taste that reads through the vanilla.
It sets a touch softer than dairy cream, so give the filled molds the full chill and then some before you unmold. Use the same 1 cup the recipe calls for as your starting point, then adjust after you taste the folded filling.
Melted butter: In the crust, swap the 5 tablespoons melted butter for the same amount of melted coconut oil or a neutral oil. Coconut oil firms up hard in the fridge, so the crust sets even more solid than with butter, which is fine for a pressed base. A liquid neutral oil leaves the crumbs a little softer and less cohesive, so press harder and chill the crusts before you fill them if you go that route.
Tips
- Press the crust with the flat bottom of a small measuring cup or a shot glass instead of your fingers. A 1 ½ tablespoon portion fills a mini muffin cup to an even depth, and the flat disk compacts the whole surface at once, so no corner of the base sits higher than another. Uneven pressure leaves one side loose, and that side is where the crust cracks when you lift the cheesecake out.
- Wipe the cup or glass clean between molds. Crumb and butter build up on the bottom after two or three presses, and the next crust sticks to the tool and pulls up as you lift it. A quick swipe with a paper towel keeps every crust level and keeps the butter in the pan, not on the glass.
Whipping the heavy cream to soft peaks incorporates air bubbles that physically lighten the dense cream cheese base. Folding gently preserves those bubbles; stirring or beating deflates them, collapsing the foam. Without that trapped air, the filling stays heavy and dense, and it will not set into a sliceable mousse-like texture when chilled.

Frequently Asked Questions
Can I make these individual no-bake cheesecakes ahead of time?
Yes, and that’s the sane way to do it. The crust and filling need the full 4 hours in the fridge to set, so you can build them the night before and leave the chocolate sauce and truffles off until you’re ready to serve. Just keep the plain cheesecakes covered in the fridge; they hold their shape and clean texture for about 2 days, then the cream starts to weep and the crust softens against the filling.
If you’re making them ahead, that’s the move: chill the plain versions and hold the topping.
Why is my no-bake cheesecake filling runny?
Nine times out of ten it’s the cream cheese: the spreadable tub style carries more water and less fat, and it never sets firm no matter how long it chills. If you used full-fat block cream cheese, check your whipped cream. Heavy whipping cream needs at least 36 percent fat to trap air; lighter cream won’t hold peaks, so the filling stays loose.
Another possibility is that the cream was underwhipped or the folding went too far and knocked out the air. Fixes depend on which one it is: if the filling is still in the bowl and looks slack, you can whip a little more cream and fold it in before portioning. Once it’s in the molds, the only fix is more cold time, but if the base was wrong, no amount of chilling will save it.
How do these individual no-bake cheesecakes differ from a classic baked cheesecake?
Baked cheesecake relies on eggs to set into a dense, sliceable custard, and it goes into a water bath and a low oven. These skip the eggs and the oven entirely; the set comes from cold cream cheese and whipped cream, so the texture is lighter, more mousse-like, and it never develops a browned top or a custardy tang.
The crust is a simple pressed graham mixture rather than a baked one, and you portion them in a mini muffin pan or ring molds instead of a springform. They eat cold and fresh, best within a day or two, where a baked cheesecake can sit for days and often tastes better on day two.
