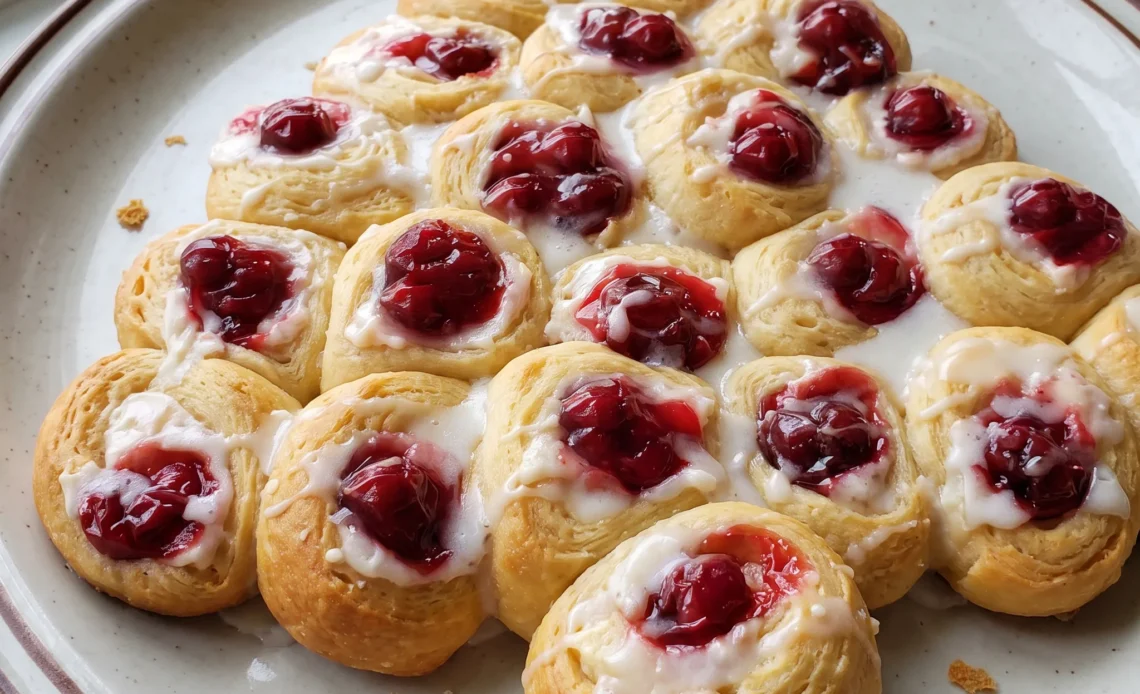
Pull one round from the baked tree and the dough gives a soft tug before it separates, edges browned, centers still tender under their cream cheese pockets. The cherry sits on top in small, glossy spoonfuls, and a thin glaze catches the light across the whole shape. What throws people off is the assembly, not the baking.
Crescent roll dough wants to tear along its perforations, and if it does, the tree won’t hold together. Slicing each roll whole, then arranging the rounds wide at the bottom and narrow at the top, is what keeps this christmas tree danish in one piece when you lift it off the pan. Get the shape right and the rest is forgiving.
Get it wrong and you’re serving loose pastry triangles with filling that slid off in the oven.
The single mistake most cooks make is pulling the crescent roll dough apart at the perforations before slicing it. It is tempting because the dough is sold pre-cut, but those perforations are designed for separating triangles, not for making a solid sheet. Once separated, each piece bakes as an isolated triangle, so the tree falls apart and the filling leaks out between the gaps.
Keep the Dough Rolled to Hold the Tree
Those crescent roll perforations look like a guide, but they’re a trap. Each triangle is separated by a cut that weakens the sheet.
If you pull the dough apart at those lines, you end up with a pile of skinny triangles that won’t stack into a tree. Slicing the roll as a whole, perforations and all, gives you solid circles with no weak seams. A serrated knife does the job without crushing the dough.
The teeth glide through the soft layers, leaving clean edges that hold their shape. You want even slices, because uneven pieces bake at different rates. The result is a set of uniform rounds that behave like a single sheet when arranged.
That’s what keeps the tree from splitting apart in the oven. When you pull the baked tree from the pan, it should lift in one piece, not crumble into separate triangles.
Arranging for the Shape
Building the tree is a visual exercise as much as a baking one. Start with a single circle at the top, then add a row of two beneath it, then three, and so on. The shape grows wider as it goes down, like a real evergreen.
Save one circle for the stem. That lone piece at the bottom anchors the design, making the tree look intentional rather than just a blob of dough. Even baking matters here: a uniform shape with consistent thickness means the edges brown at the same time as the center.
If you cluster the circles too tightly or overlap them, some parts will be thicker and take longer to cook. Spread them just enough so they touch but don’t stack.
The final tree should look like a triangle with a short trunk, and it should bake evenly across the whole surface.
The Well That Holds the Filling
A shallow indentation in each dough circle creates a little reservoir. Without it, the cream cheese mixture and cherry filling sit on top of a flat surface.
As the dough puffs in the oven, the filling slides off, leaving bare spots and a mess on the pan. Pressing a dip into the center gives the filling a place to settle.
The sides of the well act as low walls. They don’t need to be tall, just enough to contain a spoonful. When the dough rises, those walls rise too, keeping the filling in place.
If you skip this step, you’ll see the cherry pie filling bleed over the edges and burn on the baking sheet. The cream cheese will spread and thin out, losing its creamy pocket.
The indentation is small effort for a big payoff: each bite delivers the full filling.
Balance Cream Cheese and Cherry
Beating the cream cheese with sugar and vanilla until smooth does two things. It eliminates lumps that would otherwise bake into grainy spots, and it lightens the mixture so it spreads easily into the wells.
A lumpy filling sits unevenly and can cause the dough to bake around it unevenly. As for the cherry pie filling, a little goes a long way.
Each circle gets just a small spoonful. The cherries are tart and intensely flavored, and too much would overwhelm the delicate cream cheese and the buttery dough.
The cream cheese provides a cool, tangy base; the cherry adds a bright, fruity pop. Together, they create a balanced bite where neither dominates. You want to taste the dough, the creaminess, and the fruit in balance.
That balance is what makes these Danish feel light rather than heavy.
Glaze It Just Before Serving
Wait until the Danish are slightly cooled before drizzling the glaze. On a hot surface, the glaze melts and runs off, leaving a thin, uneven coating.
At room temperature, it sets into a glossy sheen that clings to the dough and filling. The ratio of powdered sugar to milk determines how thick the glaze is. More sugar gives a stiffer drizzle that holds its shape; more milk makes it thinner and more pourable.
You want a consistency that ribbons off a spoon but doesn’t disappear into the crevices. A proper glaze adds a sweet finish and a pretty shine, making the tree look finished.
It also adds a final touch of sweetness that ties the flavors together. Drizzle it in thin lines back and forth, and serve the Danish while the glaze is still slightly tacky.

What to Grab and What to Watch
Refrigerated crescent rolls: Buy two 8-ounce cans and check the date, because older dough tears and bakes unevenly.
Cream cheese: Full-fat blocks soften into a smooth mixture, while tub spread stays loose and bakes into wet pockets.
Granulated sugar: Three-quarters of a cup sweetens the cream cheese and helps it set as the Danish cool.
Cherry pie filling: The canned kind has whole cherries and thick gel, so it holds its shape in the wells; you’ll use about 3/4 cup.
Powdered sugar: Sift it if lumpy, because the glaze won’t smooth out once the milk is added.
Reading the Dough, the Filling, and the Glaze as You Go
When the cream cheese mixture is smooth enough
Lumps in the cream cheese won’t disappear in the oven. They bake into grainy pockets that sit unevenly in the wells and can push the dough up around them.
Keep beating until the mixture looks like thick cake frosting, with no streaks of plain cream cheese and no dry sugar at the bottom of the bowl. If you still see small bumps after a minute, scrape the bowl and keep going. Soft cream cheese blends faster; cold cream cheese will fight you.
Judging the slice on each crescent roll
The roll needs to be cut into 11 equal pieces, and the only way to know you’re on track is to look at the first few slices. They should be the same thickness, about the width of two stacked coins, with clean edges. If the knife squashes the dough flat, it’s too dull or you’re pressing too hard.
If the slices are ragged, the tree will have weak spots that split in the oven. Adjust your pressure before you finish the roll.
Knowing how deep to press the wells
Press until you feel the dough give and the center dips, but stop before you break through the bottom. A well that’s too shallow lets the filling slide off as the dough puffs; one that’s too deep tears and leaks.
The right depth looks like a shallow spoon print, with the rim still higher than the center. If you go through, pinch the dough back together and press again more gently. The wells don’t need to be, just consistent.
When the filling threatens to overflow
A small spoonful of cream cheese and a small spoonful of cherry pie filling should sit inside the well, not mound above it. If the well looks full to the rim before baking, you’ve overfilled it.
The dough rises and the filling will spill over the edges, burning on the pan and leaving bare dough behind. You can scoop a little out with a spoon before the oven.
The cherry pie filling is strong; a little goes a long way.
Telling when the tree is baked through
At 350°F, the tree needs 18 to 20 minutes, but the clock is only a guide. Look for the dough to turn golden brown at the edges and feel firm when you touch the center of a circle. If the center still looks pale and doughy, give it another two minutes.
Underbaked dough tastes raw and collapses when you lift it; overbaked dough turns hard and the filling dries out. Pull it when the color is even and the surface springs back.
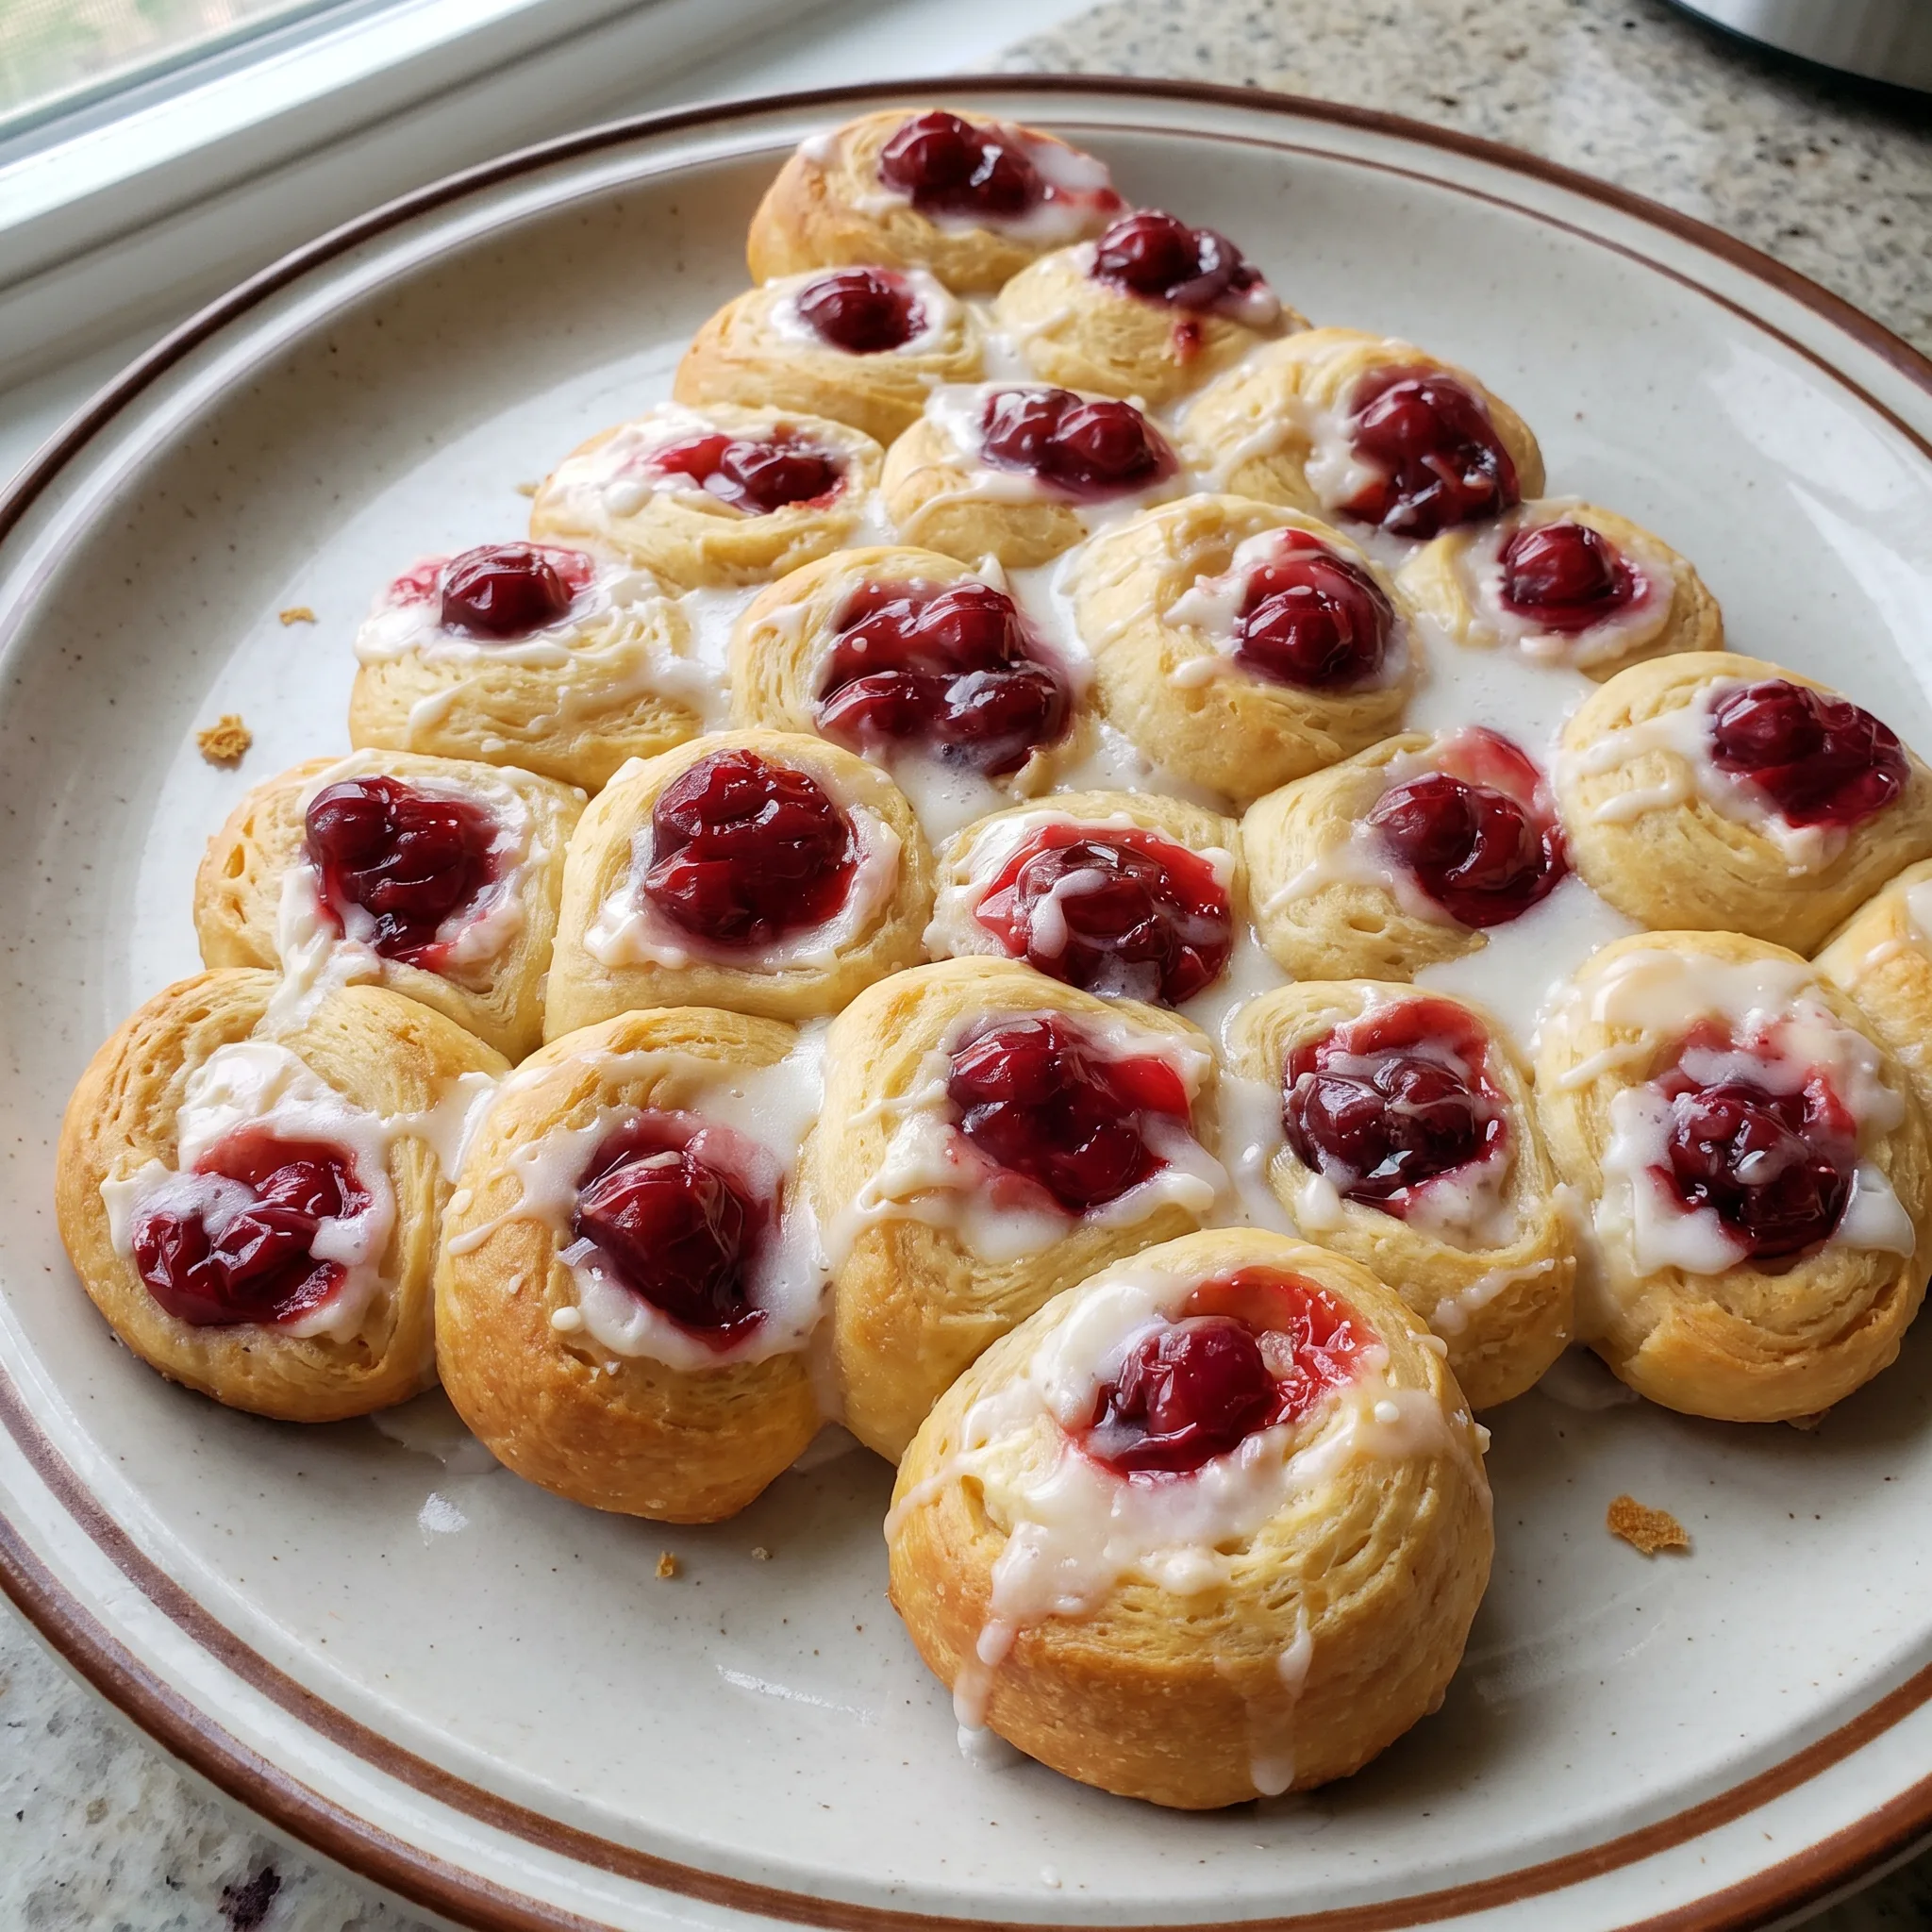
Christmas Tree Cream Cheese Danish
Ingredients
Method
- In a mixing bowl, combine the cream cheese, granulated sugar, and vanilla extract. Beat until smooth, then set aside while preparing the crescent rolls.
- Open the packages of crescent rolls but do not separate them. Using a serrated knife, slice each roll into 11 equal pieces.
- Arrange the dough circles into the shape of a Christmas tree: start with one circle at the top and work downward, increasing the number of circles as you go. Reserve one circle for the tree stem.
- Using your thumb, a tart tamper, or the back of a spoon, gently indent the center of each circle to create a space for the cream cheese mixture.
- Place a small spoonful of the cream cheese mixture into the center of each crescent circle.
- Top each with a small spoonful of cherry pie filling. You will not use all the cherry pie filling.
- Bake in a preheated 350°F (175°C) oven for 18–20 minutes, or until golden brown. Allow the Danish to cool.
- In a small bowl, combine the powdered sugar and milk. Drizzle the glaze over the slightly cooled Danish and serve immediately.
Storing Leftovers and the Best Window to Eat Them
The glaze turns tacky within an hour or two, and once it hits the fridge, the dough gives up its crisp edges. Eat these the same day they’re baked and glazed. The glaze goes on when the tree is slightly cooled, and the serving window closes a few hours later.
After that, the pastry softens and the shine dulls. Leftovers keep in the fridge, covered, in a single layer so the circles don’t press into each other and the glaze doesn’t smear. Don’t stack them.
Cold dough goes dense and chewy, and the cream cheese filling stiffens. Eat within two days. To bring one back, warm it in a 350°F oven for 4 to 5 minutes, just until the edges firm up and the glaze softens again.
A microwave makes the dough rubbery, so skip it. The baked tree freezes poorly: the filled dough weeps on thaw and the glaze never recovers its sheen.
If you must, freeze unglazed portions and add fresh glaze after reheating.
Tips
- Let the cream cheese sit out for 30 to 45 minutes before you beat it, until a finger pressed into the block leaves a dent with no resistance. Cold cream cheese stays in firm bits that the beaters push around instead of smoothing, and those bits bake into pale, grainy specks against the cherry filling. Softened cream cheese blends with the sugar and vanilla in about a minute, so the filling goes into the wells smooth and bakes into an even pocket.
The Dough Is the Only Swap Worth Making Here
Refrigerated crescent rolls: Use a different brand of crescent roll dough, or a sheet of refrigerated puff pastry cut into rounds. Not all crescent roll doughs slice the same. Some rolls are softer and stickier, so a serrated knife drags and the 11 pieces come out ragged.
If you switch to puff pastry, you lose the perforated structure that makes the circles easy to shape. Puff pastry also rises higher and shatters more when you bite, which changes the whole feel of the Danish. Stick with the cans if you want the tree to lift in one piece.
Cream cheese: Use a dairy-free cream cheese alternative, or full-fat Greek yogurt in the same amount. Dairy-free cream cheese often stays softer and can turn watery in the oven, so the wells may not set as firmly.
Greek yogurt brings a tangier flavor and a looser texture, and it can weep liquid into the dough. If you try either, start with the same 4 ounces the recipe uses and beat it smooth.
The filling won’t be as stable, so expect a softer center.
Cherry pie filling: Use another fruit pie filling, like blueberry or apple, or a thick fruit preserve. Cherry pie filling has whole fruit and a thick gel that holds its shape in the wells.
Blueberry or apple will work, but the pieces may be larger and heavier, so chop them a bit if needed. A runny preserve will bleed into the cream cheese and make the tree look messy.
You still only need a small spoonful per circle, about 3/4 cup total.
Granulated sugar: Use the same amount of light brown sugar or coconut sugar. Brown sugar adds a molasses note that fights the cherry and vanilla. Coconut sugar is less sweet and slightly darker, so the filling will taste less bright.
White sugar keeps the cream cheese clean and lets the fruit lead. If you swap, start with 3/4 cup and taste the mixture before filling the wells.

Frequently Asked Questions
Can I make this Christmas tree cream cheese Danish ahead of time?
Eat them the day you bake them. The glaze goes tacky within a couple of hours, and the dough loses its crisp edges after that, so building the tree in advance means you’re serving a softer pastry than the one the recipe describes.
If you want a head start, you can shape the tree on the pan and hold it covered in the fridge, then bake and glaze it fresh, though the dough will be cold and take longer to turn golden. Unglazed leftovers keep in the fridge, covered, in a single layer, for up to two days.
Why did my cream cheese filling sink into the dough?
You almost certainly overfilled the wells. A small spoonful of the cream cheese mixture and a small spoonful of cherry pie filling should sit inside the dip, not mound above the rim; when the dough puffs, anything above that line slides down the sides and leaves a bare circle behind. The other check is the well itself.
If you pressed too shallow, the filling had no walls to sit in once the dough rose. A second pass with your thumb, stopping before you break through the bottom, gives the filling somewhere to stay.
How do I keep the cherry pie filling from bleeding into the cream cheese?
Use less of it. The cherries and gel are strong and heavy, and a small spoonful per circle is all each well needs, so you’ll finish with cherry pie filling still left in the can. The cream cheese layer goes in first and the cherry sits on top of it, which keeps the two distinct instead of stirred together.
If the fruit still creeps, the well was too full or too shallow, and the filling had nowhere to go but sideways.
What’s the difference between this and a classic cream cheese Danish?
A classic Danish is built from laminated pastry, often folded and shaped by hand, and it bakes up shattery and flaky with a chew. This one starts with refrigerated crescent roll dough sliced as a whole roll into rounds, so the base is softer and more uniform, and the tree shape comes from arranging those rounds rather than from folding dough.
The filling stays simple, just cream cheese, sugar, and vanilla, with cherry pie filling spooned over the top instead of a fruit layer baked through. It’s a faster, more forgiving version, and the tradeoff is a tender, buttery round rather than a flaky laminated one.
