
Cut a square cold and the knife passes through smooth chocolate, then gives slightly where a marshmallow sits whole inside. That contrast is the whole reason this works, and it’s also where a batch goes wrong: fold the minis too hard and they collapse into the base, sweetening it and erasing the pockets. A short melt, a chill, and patience at the cutting stage decide whether the slab reads as studded or streaked.
The window is narrow but forgiving if you watch the surface rather than the clock. Most marshmallow chocolate fudge fails on feel, not on ingredients, which is why the timing here is less rigid than it sounds once you know what to look for.
Melt Chocolate Gently in the Microwave
Chocolate is fussy about heat. Push it too hard and the cocoa butter separates, leaving a grainy, oily slick that never smooths out, no matter how much you stir. Short bursts in the microwave with a pause to stir keep the temperature climbing slowly, so the chocolate melts without crossing that line.
Stirring matters as much as the bursts: it moves the warmer spots into the cooler ones and lets the residual heat do the rest of the work. Once the last lumps disappear, give the bowl a minute or two to sit. The mixture will still look a little loose, but the heat already in it keeps working, and you avoid the risk of another burst pushing it too far.
What you end up with is a glossy, even base that folds cleanly around the marshmallows and sets up with a clean snap.
Keep Marshmallows Whole for Pockets of Softness
Miniature marshmallows earn their place here because of size. Each one is small enough that a square of fudge holds several, so every bite gets a few soft spots instead of one big blob. Large marshmallows would need chopping, and the cut surfaces turn sticky and gummy, plus the pieces are too big to distribute evenly.
Folding, not stirring, is what keeps the minis intact. A stir would drag them through the warm chocolate, and they’d start to dissolve, sweetening the base and losing their shape.
A fold lifts the chocolate over them and lets them settle in without working them. That’s what gives you the contrast: smooth, dense chocolate around distinct, soft bits.
The finished slab should look studded, not streaked, when you cut into it.
The Pan and Parchment Set the Structure
An 8×8-inch pan is the right size for this batch. Spread the mixture in a larger pan and the fudge sets too thin, so the marshmallows dominate and the squares feel flimsy. A smaller pan makes it too tall, and each square becomes a mouthful of chocolate with barely any marshmallow.
At 8×8, the depth lands where a 1½-inch square gives you a solid bite with a few marshmallows in every piece. Parchment with an overhang turns the whole slab into something you can lift out in one go.
That matters for cutting: you can set it on a board and slice straight down without wrestling it from the pan. A light spray on the parchment keeps the paper from clinging to the fudge. The bottom stays smooth, and nothing tears when you peel it away.
Chill for Firmness, Then Cut at the Right Moment
Chilling isn’t about making the fudge cold. It’s about giving the chocolate and condensed milk time to set into a solid slab that holds its shape. As it cools, the mixture goes from a soft, glossy spread to something firm enough to lift.
That change happens gradually, and the texture you get depends on where you stop. Cut too soon and the knife drags, smearing chocolate across the marshmallows and flattening the squares. Wait too long and the slab turns hard, so the blade cracks through instead of slicing, and the marshmallows tear.
The sweet spot is when the surface feels set and a gentle press leaves no indent. At that point, a sharp knife goes through cleanly, and each square keeps its shape.
The fudge will continue to firm up in the refrigerator, so the texture you cut at is the texture you serve.
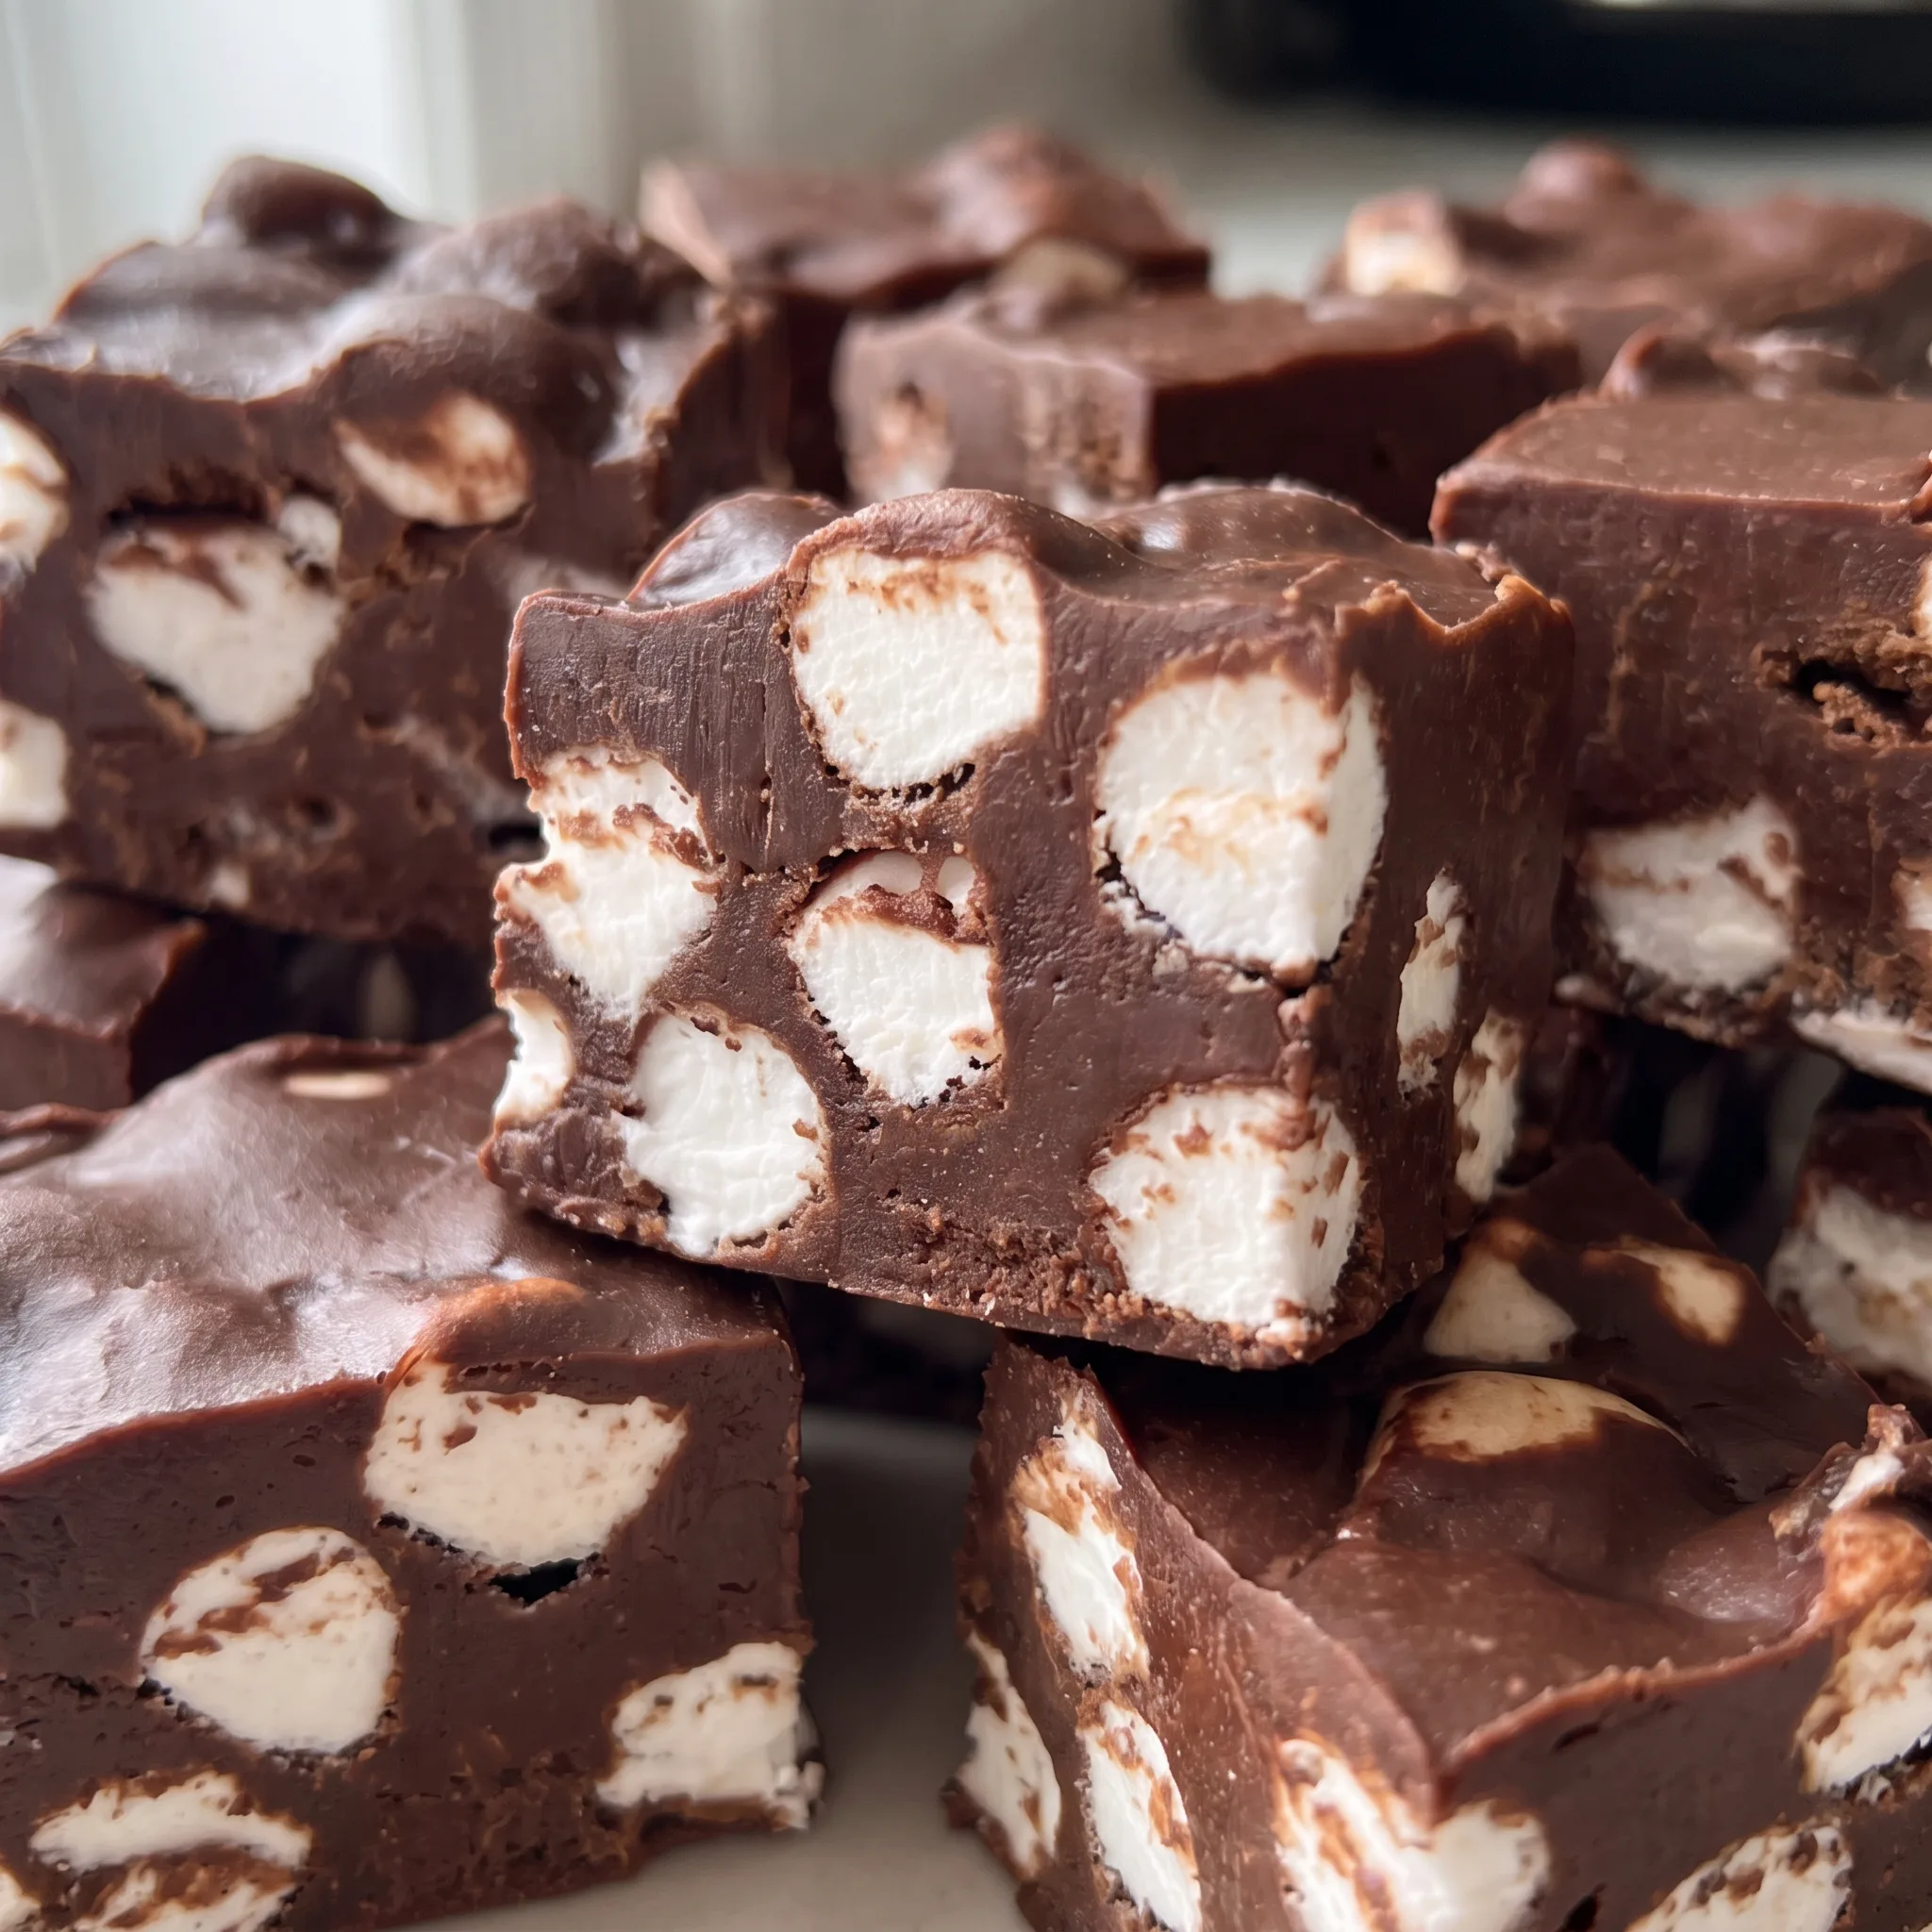
The Four Ingredients That Decide How This Fudge Sets
Semi-sweet chocolate chips: Chips are what most of us have, and they melt evenly in short bursts, but they carry stabilizers that make the base a touch less snappy than chopped bar chocolate.
Sweetened condensed milk: This is the only sweetness and the only liquid binder, so the 14-ounce can goes in whole and nothing gets drained or skimmed off.
Heavy cream: Two tablespoons loosen the melted chocolate just enough to fold around the marshmallows without dragging them, which is why the mixture looks glossy rather than stiff.
Miniature marshmallows: Buy the fresh, soft ones; stale minis are dry and chewy on the inside, and they won’t give you the soft pockets the squares are supposed to have.
The mistake is treating the marshmallows as an ingredient to mix in rather than a texture to preserve. When they hit hot fudge, their gelatin network softens and they collapse into the chocolate, erasing the pockets of contrast. The fix is to let the melted base cool and then fold gently, so the marshmallows stay whole and suspension is maintained.
Reading the Fudge at Each Stage, From Melted to Set
Knowing when the chocolate has melted without pushing it further
The mixture is ready when it stirs into a glossy, uniform liquid with no visible lumps and no graininess against the spoon. If it looks oily or speckled, the heat has gone too far and the chocolate has seized; the texture won’t recover. Stop the bursts the moment it reaches smooth, then let the residual warmth finish the last of it during the 1 to 2 minute rest.
Judging how much the marshmallows hold their shape as you fold
Each mini should still read as a distinct piece as it goes in, with the chocolate coating it rather than swallowing it. Press too hard or stir and the marshmallows collapse, turning the base sweet and losing the pillow texture. If they start to streak or dissolve, stop folding and accept a slightly softer bite; the set will still work, but the contrast won’t.
Telling when the slab is firm enough to cut
Press the surface after about 60 minutes of chilling. It should feel set with no give and no indent left behind. Too early and the knife drags, smearing chocolate through the marshmallows and flattening the squares; too long and the blade cracks instead of slicing.
If it’s still soft, give it another 15 minutes and check again. A sharp knife, straight down, one cut at a time.
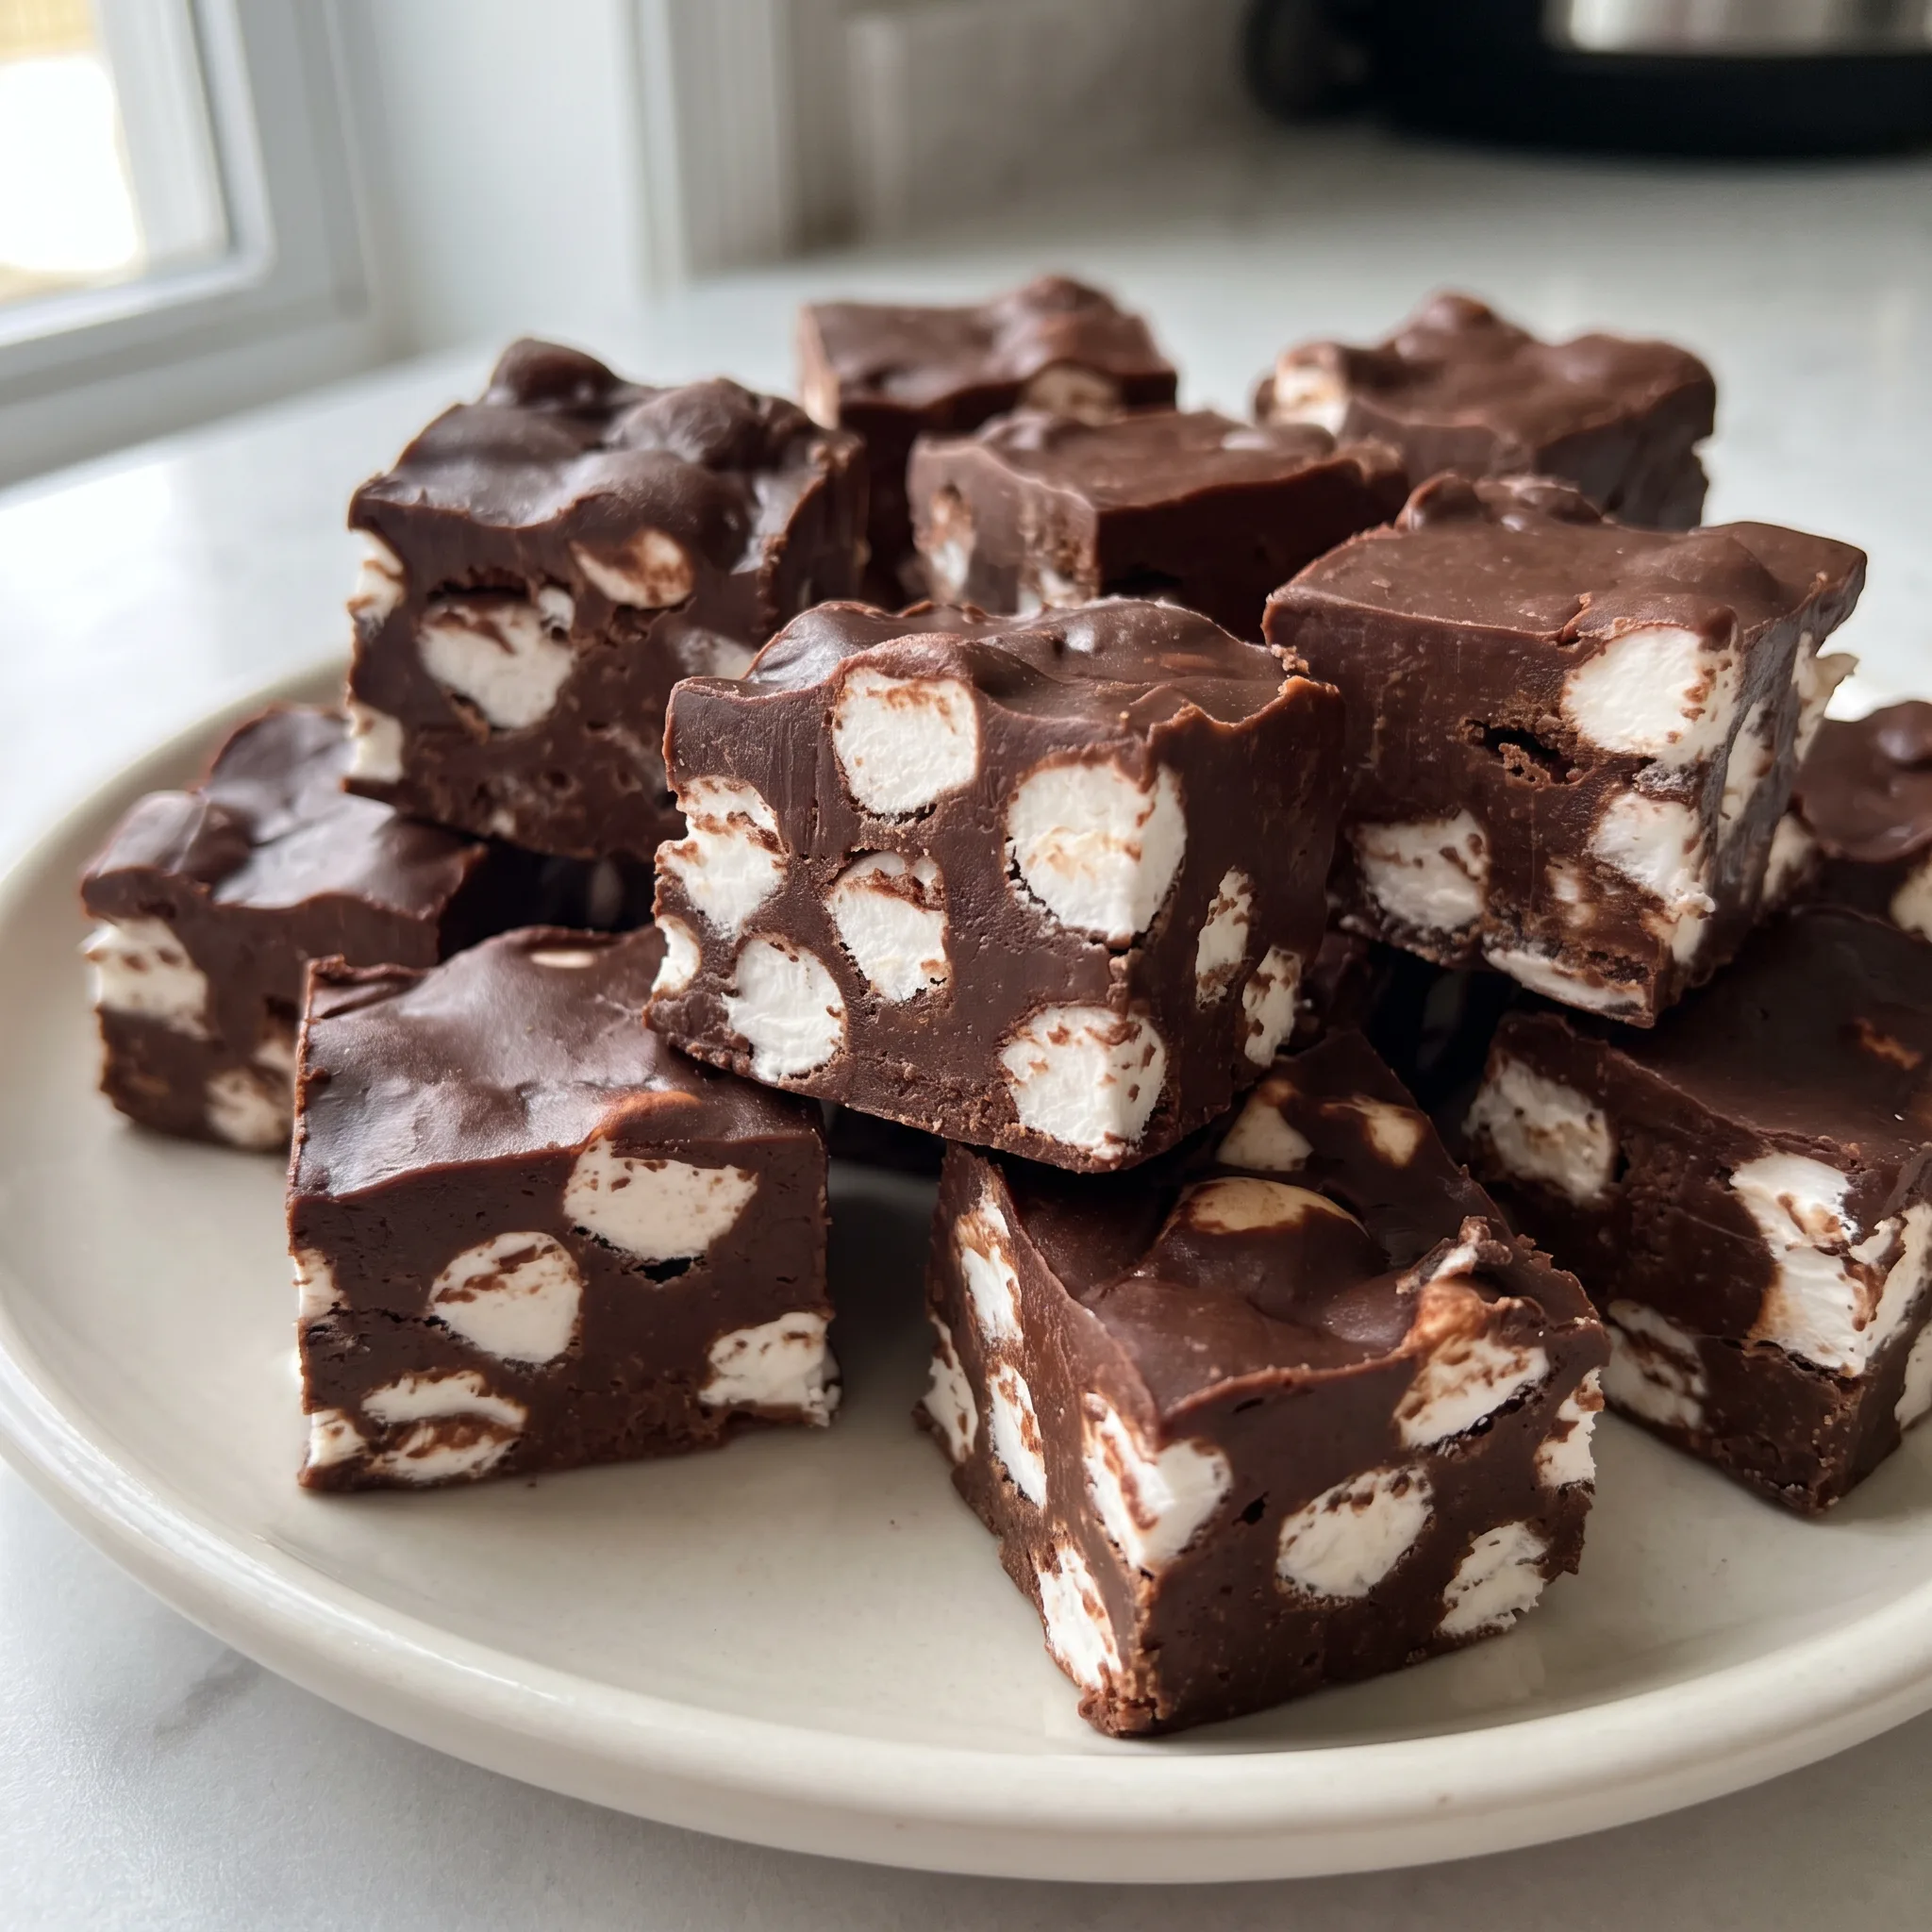
Marshmallow Chocolate Fudge with Condensed Milk
Ingredients
Method
- Prepare an 8×8-inch baking dish by lining it with parchment paper, allowing extra to hang over the edges for easy removal. Apply a light coating of nonstick cooking spray and set it aside.
- In a large microwave-safe bowl, mix together the chocolate chips, sweetened condensed milk, and heavy cream. Microwave in 30-second bursts, stirring between each, until the mixture is melted and smooth. Allow it to sit for 1 to 2 minutes.
- Fold in the miniature marshmallows.
- Evenly distribute the fudge mixture into the prepared baking dish. Place in the refrigerator for 2–3 hours, or until firm.
- Using the parchment overhang, lift the fudge out of the pan. Cut into twenty-four 1½-inch x 1½-inch squares. Store in the refrigerator until ready to serve.
Storing and Serving Marshmallow Chocolate Fudge
Fudge firms up over the first day in the refrigerator, so for the best texture, eat it within 24 hours. A square pulled at hour two bends slightly and smears; at hour 24 it cuts clean while the marshmallows stay soft. After three or four days, the base tightens and the marshmallows lose their give.
Keep squares in an airtight container in the refrigerator, separated by parchment so they don’t press together, and they hold five to seven days. Serve them straight from the fridge. At room temperature the chocolate softens and the squares turn sticky, so leave a portion out no more than fifteen minutes before serving.
Freezing works for the chocolate base but not the marshmallows, which thaw wet; if you freeze squares, eat them cold and expect a chewier bite. Let them thaw in the refrigerator, not on the counter, to keep the chocolate set.
Swaps That Work, Swaps That Wreck the Set
Semi-sweet chocolate chips: Dark chocolate, milk chocolate, or a chopped bar. For dark, reach for 60 to 70 percent and keep the same 3 cups; the fudge sets a little firmer and tastes less sweet, so the marshmallows read as the only soft note.
Milk chocolate softens the set, and the squares may need an extra 15 to 20 minutes in the fridge before they cut cleanly. Chopped bar chocolate melts into a glossier base with a cleaner snap than chips, which carry stabilizers. Use the same 3 cups by volume, but if you’re weighing, bar chocolate is denser, so go by the 510 g the card gives rather than assuming the cup measure matches.
Sweetened condensed milk: No true substitute. This is the only sweetness and the only liquid binder, so there’s no one-for-one swap that keeps the texture. Evaporated milk is thinner and unsweetened, and the fudge won’t set; coconut condensed milk can work but often stays softer, so plan on a longer chill and a gentler cut.
If you’re avoiding dairy, the cream is easier to replace than the condensed milk.
Heavy cream: Whole milk, coconut cream, or a dairy-free cream. Use the same 2 tablespoons. Whole milk loosens the base similarly, though the set will be slightly softer; coconut cream brings a faint coconut taste and a similar richness.
Anything thinner, like skim or a light plant milk, won’t give the glossy looseness that lets the marshmallows fold in without dragging.
Miniature marshmallows: Leave them as they are. Their size drives the texture, so chopping large marshmallows or swapping in flavored minis changes the bite. Cut large ones turn sticky and gummy, and flavored minis add a taste that fights the chocolate.
If you can’t find minis, use the same 3½ cups of the freshest large ones you can get and cut them into quarters, but expect a softer, sweeter result.
Tips
- After you spread the fudge mixture into the lined pan, press it firmly into the corners and level the top with an offset spatula. The mixture is thick and sticky, so it holds whatever shape you leave it in; air pockets or a domed center set that way, and a slab that isn’t level cuts into squares of uneven thickness. Pressing also packs the marshmallows into the chocolate so they don’t float up and leave bare patches on the bottom.

Frequently Asked Questions
Can I make this fudge ahead of time and how long does it keep?
Make it the day before you plan to serve it. Fudge firms over its first day in the refrigerator, so a square cut at hour two bends and smears, while one pulled at hour 24 slices clean and still has soft marshmallows; after three or four days the base tightens and the minis lose their give.
Stored in an airtight container in the fridge with parchment between the squares, it holds five to seven days. Serve it cold, and don’t leave a portion on the counter longer than about fifteen minutes.
Why is my fudge too soft or not setting?
Check the condensed milk first, since it’s your only binder and the whole 14-ounce can needs to go in, nothing poured off. If the can was right, the next suspect is the chocolate: chips carry stabilizers that set a touch softer than bar chocolate, and a batch made with them can need a longer chill before it cuts. Heavy cream is the other lever, and the two tablespoons are there to loosen the base just enough to fold, so more of it keeps the slab soft.
Slide the pan back in the fridge and give it more time rather than adding anything.
How is this marshmallow fudge different from traditional fudge?
Traditional fudge starts with sugar cooked to a precise stage and beaten until it crystallizes into that smooth, slightly grainy body. This one skips all of that: chocolate, condensed milk, and cream melt together in the microwave in short bursts, and the set comes from chilling rather than from sugar work. What you trade is that classic texture for a denser chocolate base studded with whole miniature marshmallows, which stay distinct because you fold rather than stir.
It’s a faster path to fudge, and the result reads more like chocolate with soft pockets than like candy-shop fudge.
