
Most people press three colors together and roll until it looks even, which is exactly what turns the marbling to mud. A christmas cake pops recipe lives or dies on restraint at that step: the portions have to match and the hand has to stop early, or the red, green, and white smear into one muddy tone before the first dip. Work the pieces any longer and the bands disappear, so the pop reads as a tie-dye accident instead of a deliberate tricolor bite.
Keeping the colors distinct is the whole trick to the look, and it’s where the batch usually goes wrong. Get that right and the reward is immediate: one bite through the glossy shell shows all three colors at once, the moment that makes a tray of these feel like Christmas. Skip it and you’ve got three cakes crammed onto a stick.
Build a Marbled Bite, Not Three Pops
Three bowls of batter are the setup for one pop, not three flavors. You color red, green, and leave one plain so each finished ball carries all three at once.
When the cooled cakes become dough and get scooped into 1-tablespoon balls, the real work starts: slice each ball into three equal portions. One from each color, pressed together and rolled, gives a clean tricolor read. Uneven portions or too much rolling smears the lines and the pop turns muddy.
Keep the portions close to the same size and stop rolling as soon as the surface smooths. The result should look intentional, like a ribbon of color wrapped through the cake, not a tie-dye accident.
That balance is what makes the pop look festive on a tray. Aim for distinct bands, and the bite delivers the effect.
Dip, Drip, and Dust While the Coating Holds
Melting red, green, and white candy melts separately keeps each color pure. Combine them and you lose the contrast that makes these pops worth the effort.
Once a pop is submerged and pulled out, let the excess drip back into the bowl. Wait about twenty seconds; the coating should turn tacky, not wet. Touch a sprinkle to the surface: if it sinks, the candy is too warm; if it bounces off, the shell has set too far.
You want the sprinkle to stick without sliding. Set each pop upright in a stand or candy-apple style so the coating hardens evenly without a flat side.
The finished shell should look glossy and hold the sprinkles in place. That brief rest before dusting is what keeps the decorations where you put them.
White Pops Get the Extra Flourish
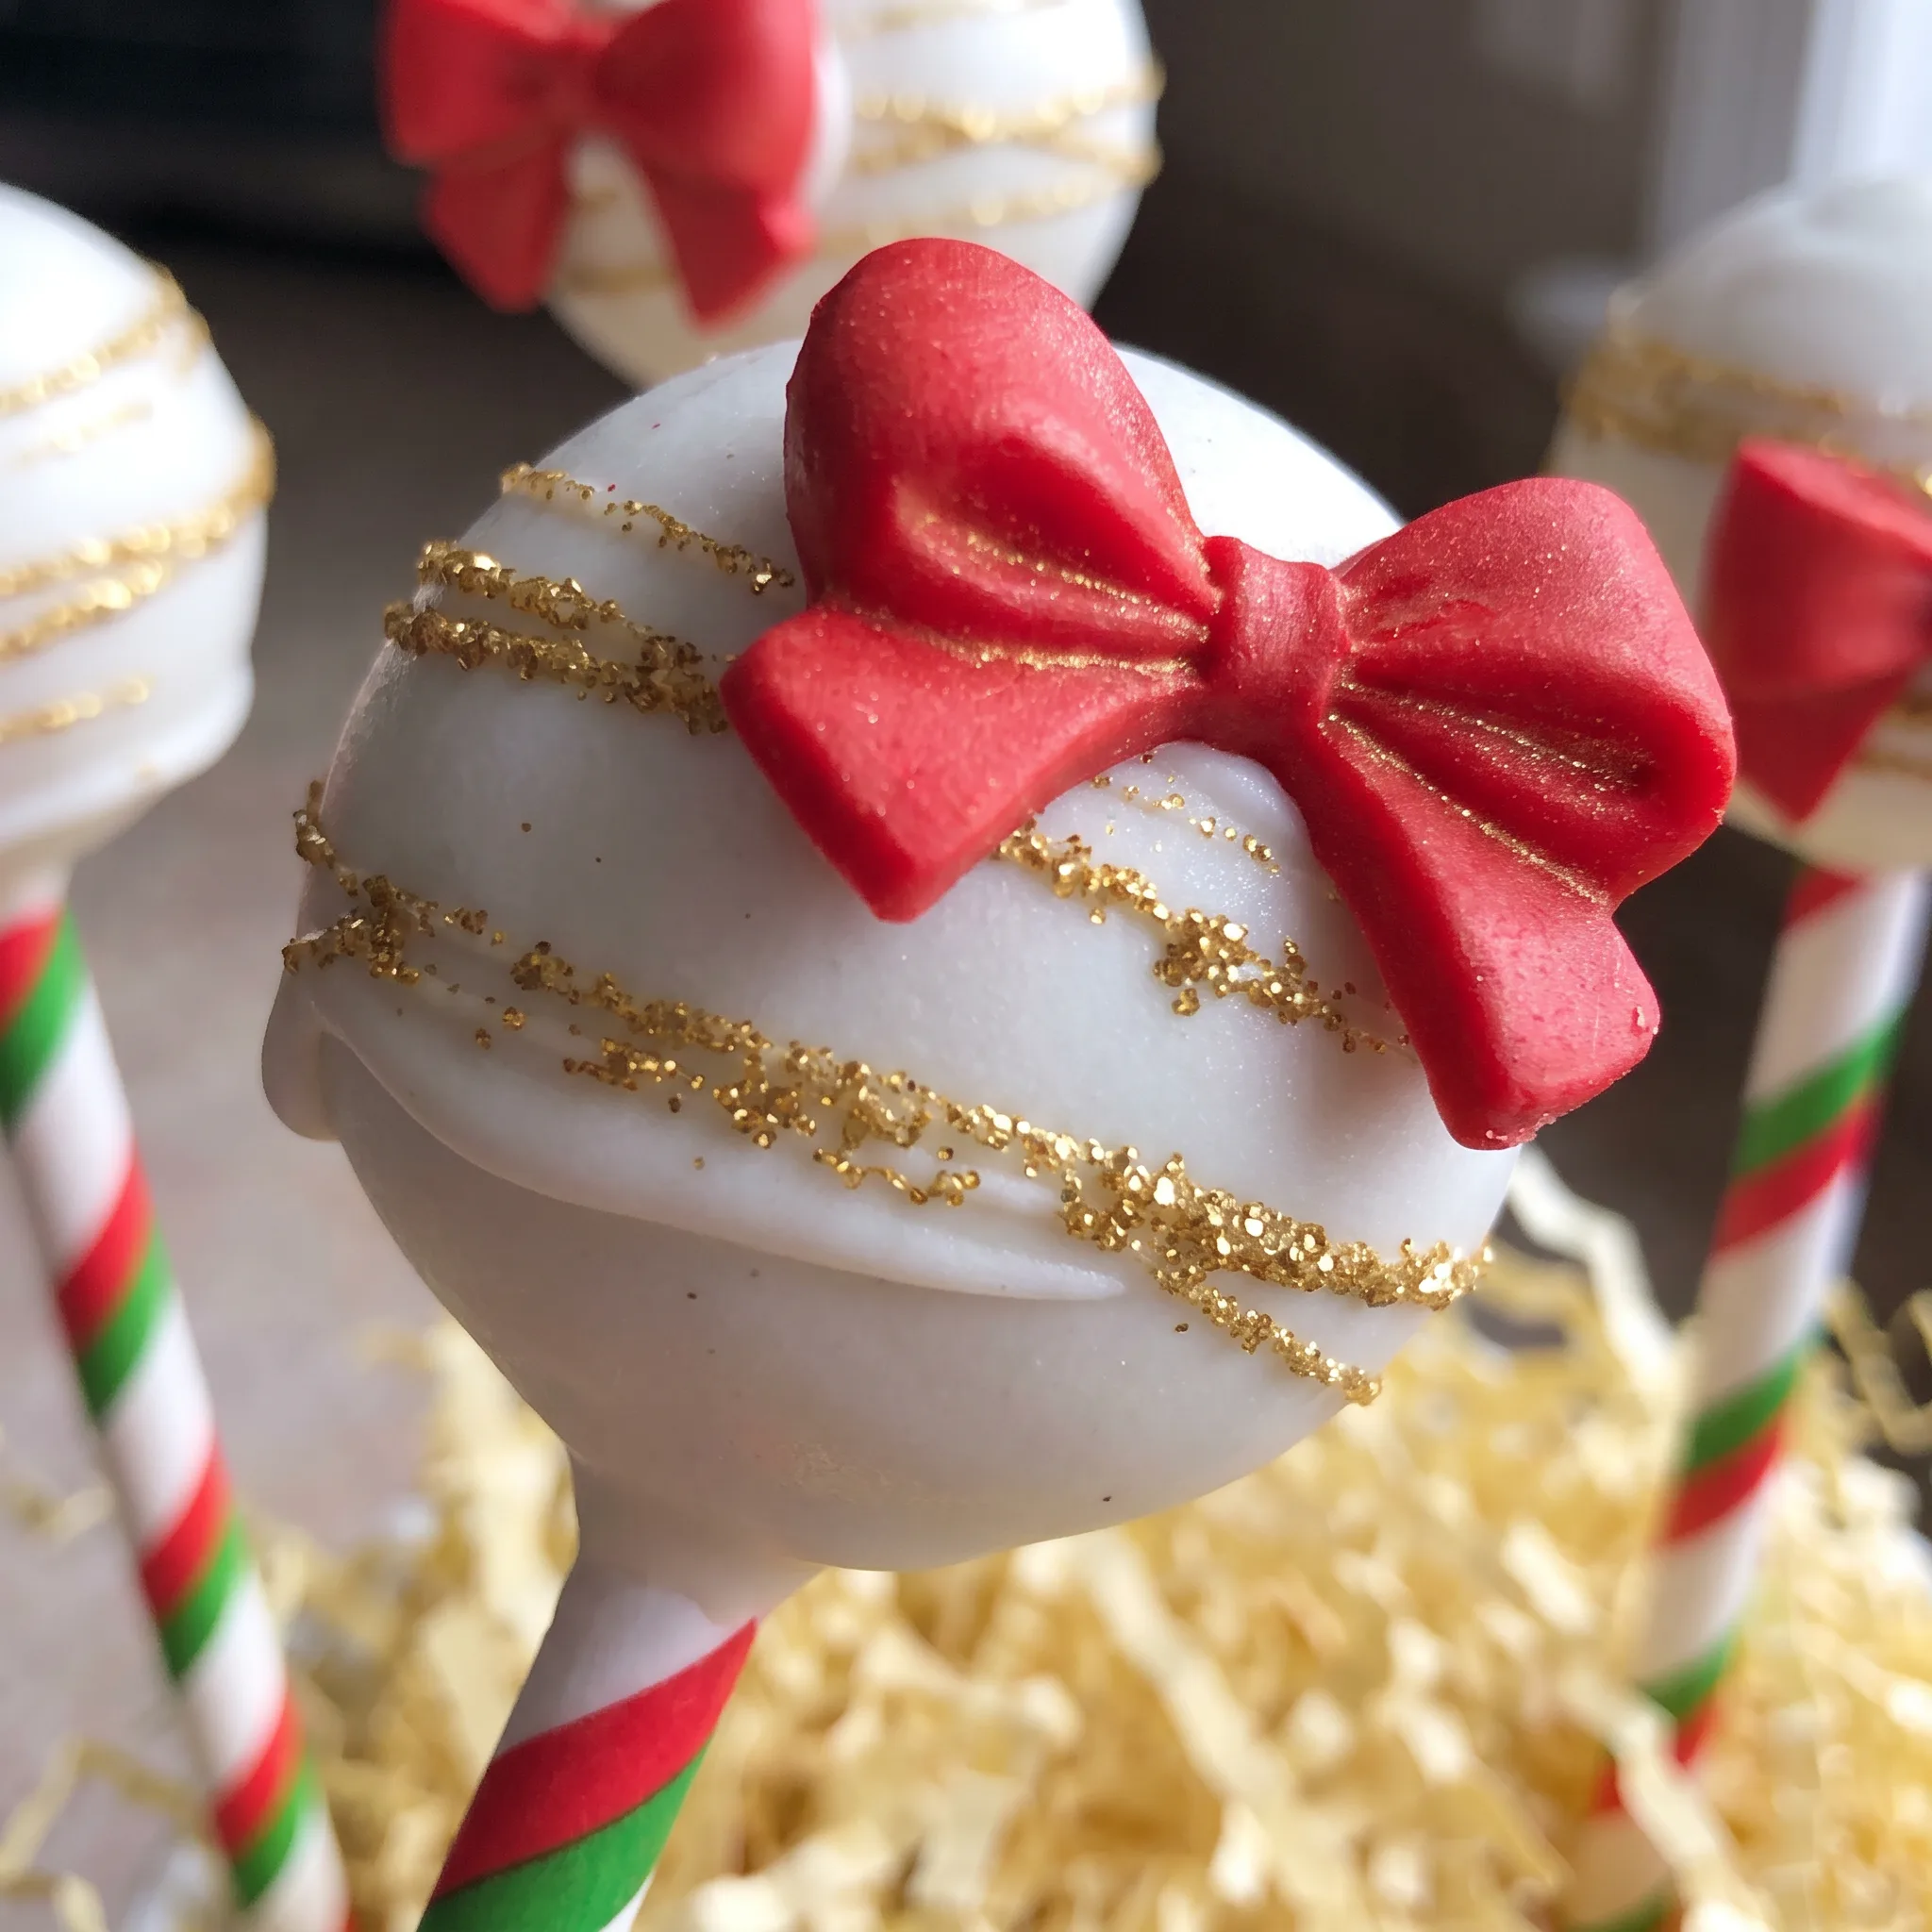
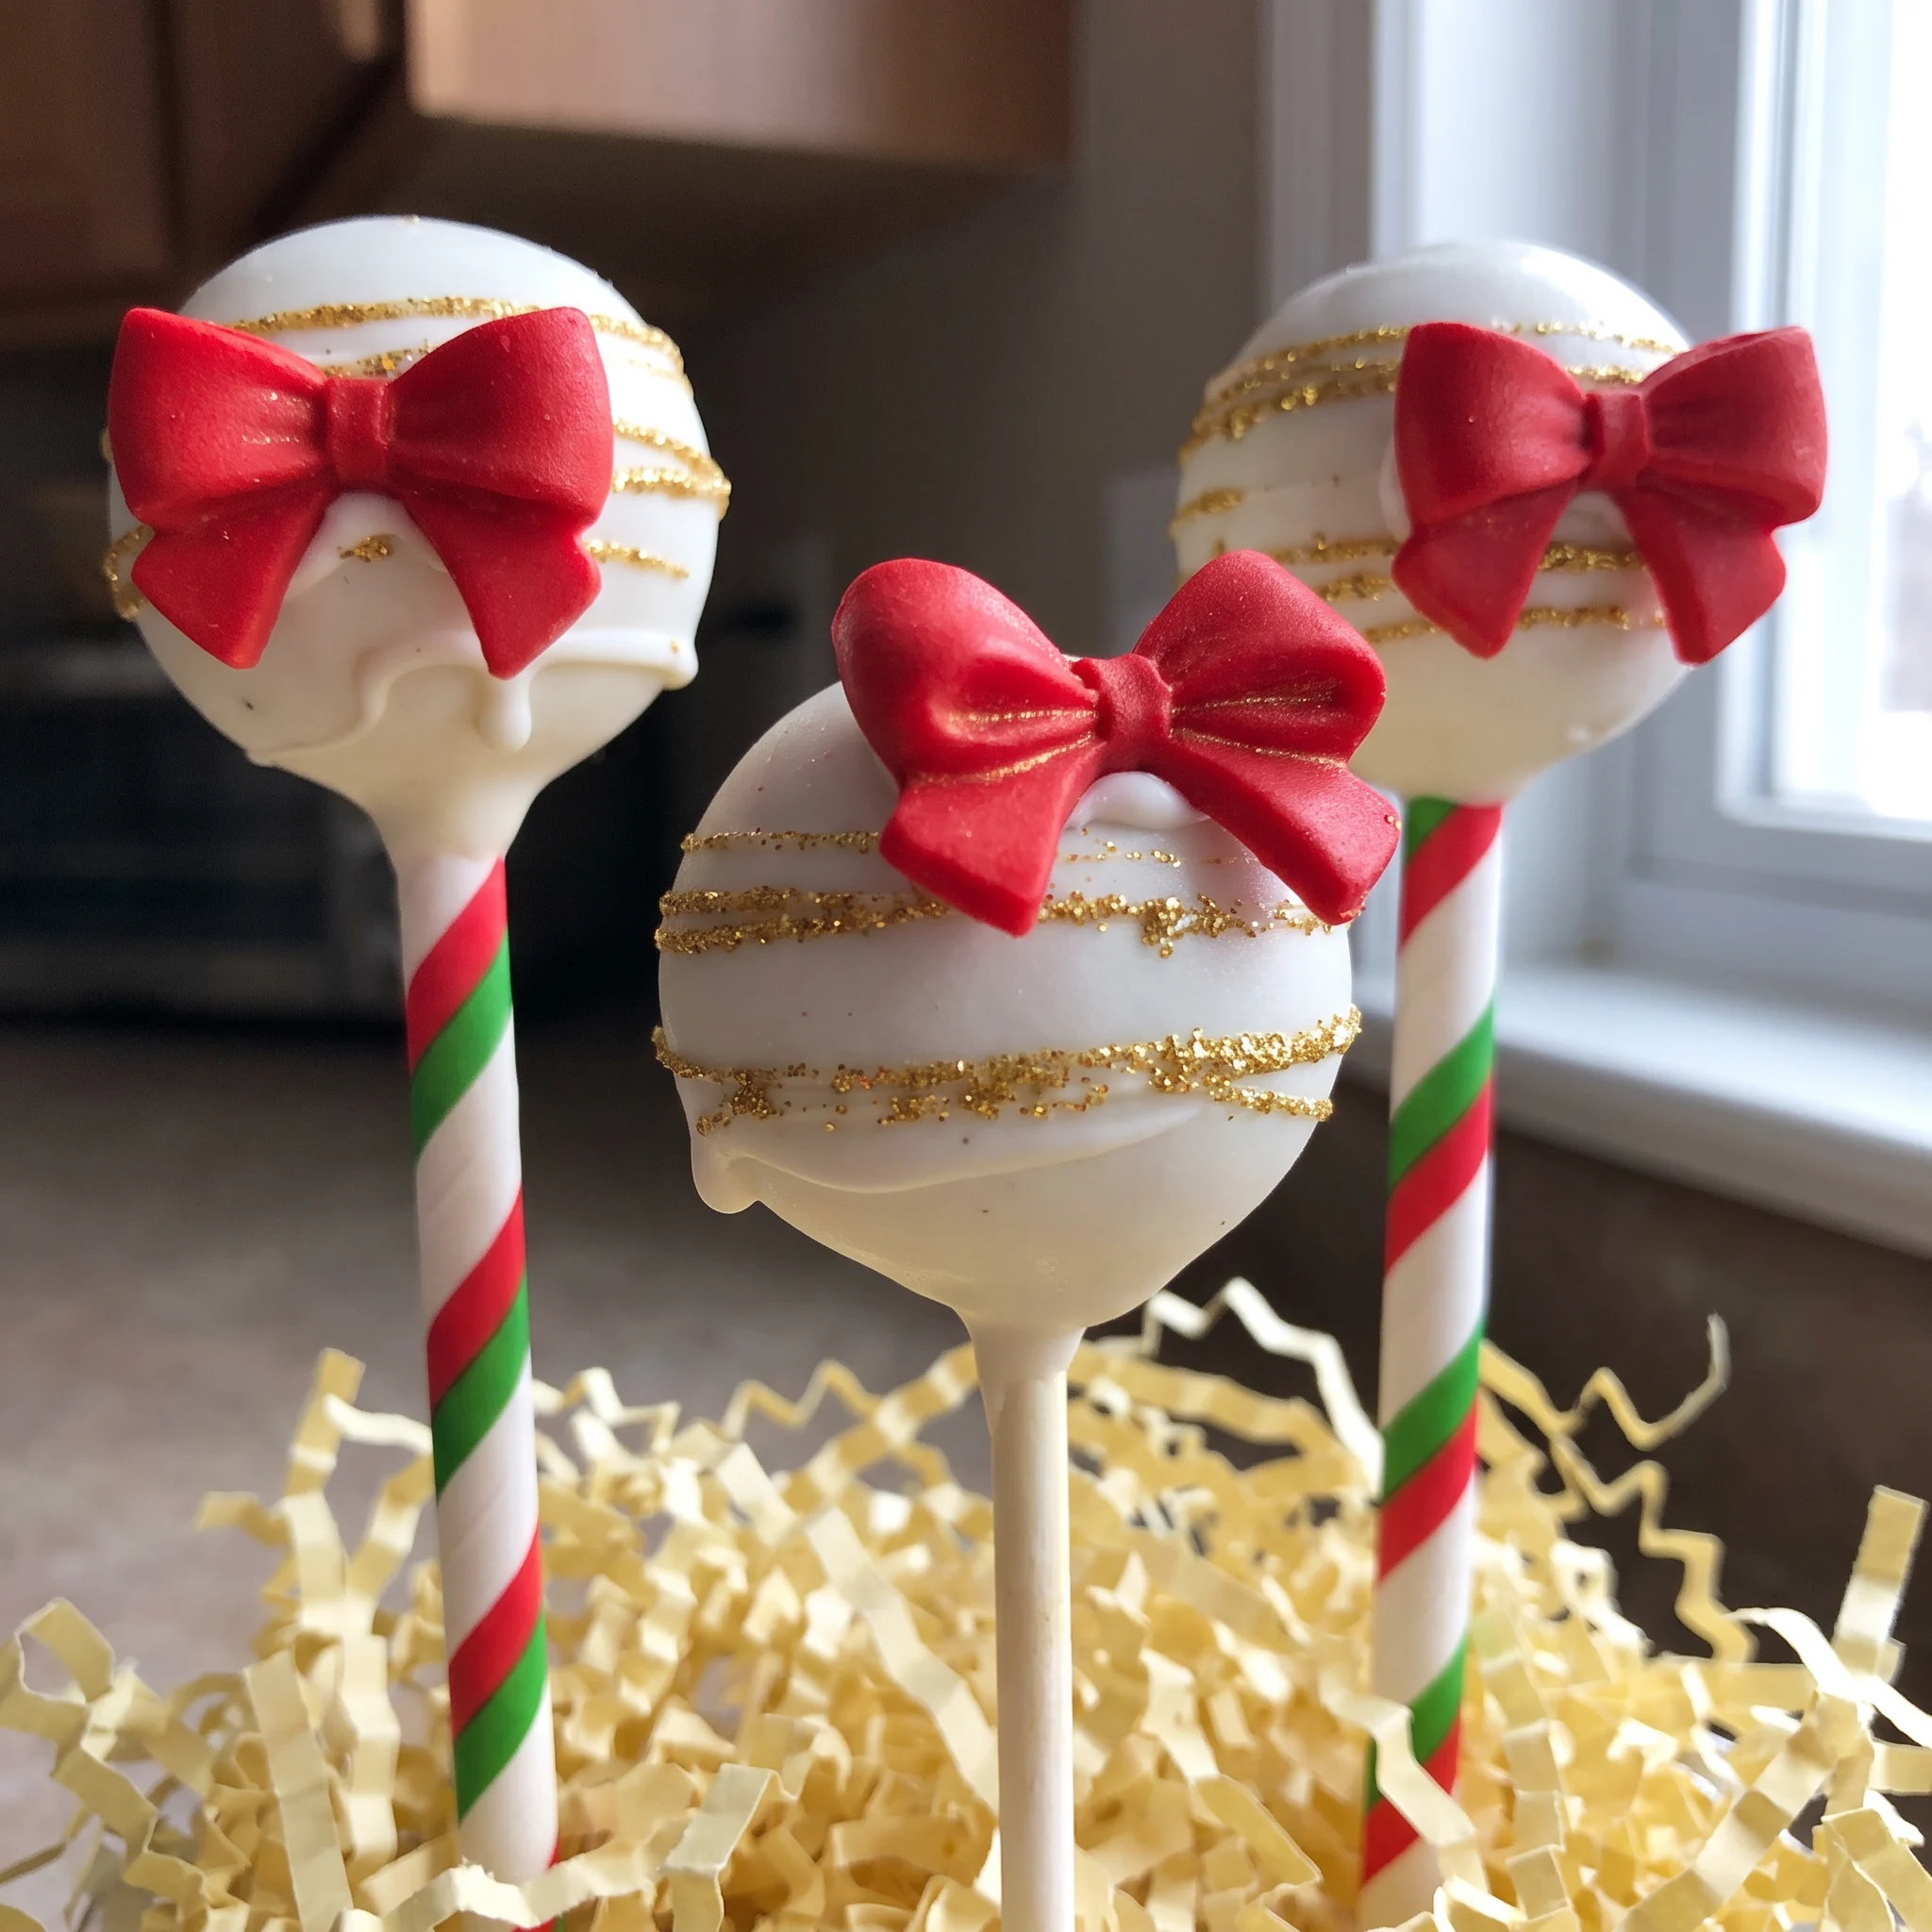
Only the white candy-coated pops receive piped white candy drizzles, gold disco dust, and red candy bows. The white coating acts as a clean canvas, so a thin drizzle reads as a deliberate line rather than a smudge. Let that coating harden fully first; if it’s still soft, the piped candy sinks and the lines blur.
A bow and a hit of disco dust create a focal point that would disappear against red or green. On those colored pops, sprinkles go on right after coating while the surface is still tacky.
Waiting would mean the sugar slides off or the coating dries and nothing sticks. So the red and green pops finish in one pass, while the white ones get a second stage. That split keeps every pop looking sharp, each in its own way.
The Dough Needs to Hold, Not Grease
Frosting mixed into each cooled cake turns crumbs into a dough that can be scooped, sliced, and pressed back together without cracking. Go by feel: the dough should hold its shape when you squeeze a scoop, but not leave a greasy film on your palms.
Too dry and it crumbles at the slice; too wet and the final pop turns lumpy and the coating may slide. When you divide each 1-tablespoon ball into three portions, those pieces need to stick to each other with light pressure. If they resist, a teaspoon more frosting brings them back.
The finished pop should feel firm but not stiff, with a smooth surface that takes the coating evenly. That texture is what lets the tricolor layers stay put through dipping and decorating.
What to Buy for the Tricolor Shell and the Bows
Vanilla cake mix: A standard box works, but keep the colored batters in small pans so the crumb stays moist enough to press into dough.
Gel food coloring: Gel, not liquid drops, gives red and green that hold their color once the cake is crumbled and mixed with frosting.
Vanilla frosting: The 3 tbsp is the binder, so a frosting that tastes good straight from the jar is worth the extra dollar.
Candy melts: Buy red, green, and white melts rather than chocolate chips, since melts set glossy and hold sprinkles without blooming.
Wilton Bow Candy decorations: The bows only go on the white pops, so one small package covers all twelve without leftovers.
When the cake-and-frosting dough is too wet, the moisture migrates into the candy coating and weakens the bond between shell and filling; the coating then cracks or slides off as it sets. The coating must also be thick enough and fully hardened before the pop is handled or decorated, because a thin or still-soft shell cannot resist the expansion and contraction of the filling underneath.
Judging Tricolor Cake Pops by Feel and Timing
When the colored batters are baked just enough
Three small pans bake faster than one full pan, so the window between done and dry is narrow. Watch for the edges pulling away and the centers springing back when pressed. A toothpick should come out with a few moist crumbs, not wet batter.
Overbake and the cakes turn dry, making the dough crumbly even after frosting. If that happens, add an extra tablespoon of frosting to bring it back.
Reading the dough for the right squeeze
After mixing frosting into the cooled cake, squeeze a scoop. It should hold its shape without leaving a greasy film on your hand.
Too dry and it cracks when you slice; too wet and the balls turn lumpy, and the coating may slide off during dipping. Add a teaspoon more frosting if it crumbles, or a bit more cake if it feels sticky. You want a texture that presses together with light pressure and stays put.
Slicing and pressing for clean color bands
Each 1-tablespoon ball gets cut into three equal portions. Uneven pieces mean one color dominates; overworking when you press them together blurs the lines.
Use a light touch to combine one portion of each color into a ball, rolling just until the surface smooths. If the layers smear, you’ve rolled too long. The goal is distinct bands that stay separate through dipping.
Testing the candy coating before you dust
After dipping, wait about twenty seconds. The coating should feel tacky, not wet. Touch a sprinkle to the surface: if it sinks, the candy is too warm; if it bounces off, the shell has set too far.
You want the sprinkle to stick without sliding. If it’s too warm, wait a few more seconds; if too set, you can’t fix it, so work quickly once the tack is right.
Knowing when the white pops are ready for their second stage
The white coating must harden completely before you pipe drizzles or add bows. If it’s still soft, the piped candy sinks and the lines blur.
Test by touching gently; it should feel firm with no give. Once hard, pipe thin drizzles, shake on disco dust while the drizzle is wet, and attach bows.
The red and green pops get sprinkles right after coating while tacky, so they finish in one pass.
Tri-Colored Christmas Cake Pops on Sticks
Ingredients
Method
- Mix the vanilla cake batter as directed on the package. Evenly distribute the batter among three bowls. To one bowl, incorporate 5 drops red gel food coloring; to another, add 5 drops green gel food coloring; keep the third bowl uncolored.
- Bake the cakes following the package instructions, but check them sooner because the pans will be less full. Let them cool completely.
- After cooling, mix 1 tbsp frosting into each cake. Work the cake and frosting together until a dough forms. If the dough is too crumbly, mix in another tablespoon of frosting.
- Scoop the dough into 1-tablespoon balls using a cookie scoop. Each cake should yield 10 to 12 balls.
- Slice each cake ball into three equal portions.
- Combine one portion of each color, press them together, and roll into a smooth ball.
- In separate microwave-safe bowls or mugs, melt the red, green, and white candy melts. Submerge each pop in the melted candy, let excess drip off, wait 20 seconds, then shower the pop with colored sugar. The coating should be sticky but neither too wet nor too dry when adding sprinkles. Insert the pops upright into a stand or set them candy-apple style to harden.
- For the white pops, let the candy coating harden fully before decorating. Put some melted white candy into a zip-top bag, cut off a corner, and squeeze a few drizzles around the center of each pop. Shake gold disco dust over the wet drizzles, then affix festive red candy bows.
How Long They Keep and How to Serve Them
Once the candy coating sets, these pops are at their best within a day. The shell is crisp, the cake inside is soft, and the contrast is what you want. After that, the frosting in the cake dough gradually softens the coating from the inside, and by day two or three the shell turns tacky and less snappy.
You can still eat them, but the texture won’t be the same. Store them in a single layer in an airtight container at cool room temperature, not the fridge. Refrigeration makes the coating sweat and can cause it to crack.
If you must stack, put a sheet of parchment between layers. For serving, let them sit at room temperature for about fifteen minutes if they’ve been in a cold spot.
The final drizzle on the white pops goes on after the base coating hardens completely, and once that drizzle sets, they’re ready to serve. Don’t add the bows until just before serving if you want them to stay crisp.
Tips
- Melt each color in its own narrow, deep mug rather than a wide bowl. A mug needs less candy to reach a depth that covers a whole pop, so you can submerge it in one straight dip instead of tilting and rolling the pop around. Stirring a shallow pool drags crumbs and the previous color back into the melt, and reheating to regain depth thins the coating so it runs off in sheets. One dip per pop keeps the red, green, and white shells clean and the fluid level steady across all twelve.
Three Swaps That Work Here, and the Ones That Don’t
Vanilla cake mix: A yellow or butter cake mix can stand in. For gluten-free, use a boxed GF blend and expect a slightly drier crumb; add frosting a teaspoon at a time until the dough holds. Yellow mix pushes the flavor toward butter and vanilla, which is fine since gel coloring and candy coating dominate.
GF cake often bakes up more crumbly, so the frosting becomes more critical. The tricolor layers still press together, but the final pop may feel a touch softer.
Gel food coloring: Liquid food coloring can be used, but it takes more drops and adds water. Start with 1/4 teaspoon per color and add more until you get the shade you want.
Liquid coloring thins the batter, so the baked cakes may turn out slightly more dense and the color can fade after baking. The red and green won’t be as intense, and the marbled look may be less crisp.
White candy melts: White chocolate chips or chopped white chocolate can be used for the white pops. Melt with a teaspoon of coconut oil or shortening if needed to get a dippable consistency. Real white chocolate tastes richer and less sweet than candy melts, but it sets softer and can bloom with temperature changes.
The coating may not harden as glossy, and sprinkles might slide if the chocolate stays tacky. For the red and green, stick with candy melts; chips tint poorly and set too soft.
Wilton Bow Candy decorations: Any small red candy or icing decoration that sticks to the coating will work. If you can’t find bows, a tiny red heart or star works. The bow is purely decorative, so swapping it doesn’t change flavor or texture.
Just make sure whatever you use is light enough that it doesn’t pull the coating down before it sets.

Frequently Asked Questions
Can I make these tri-colored Christmas cake pops ahead of time?
Make them no more than a day before you plan to serve them. The candy shell is crisp and the cake inside is soft on day one, but the frosting in the dough gradually softens the coating from the inside. By day two or three the shell turns tacky and loses its snap.
Store them in a single layer in an airtight container at cool room temperature, never in the fridge, and hold off on the bows until just before serving so they stay crisp.
Why did my candy coating crack or slide off the cake pops?
The cake dough was probably too wet. If the frosting amount left the dough greasy or sticky, the coating can’t grip and slides right off.
Squeeze a scoop: it should hold its shape without leaving a film on your palms. Another culprit is cold storage, since refrigeration makes the coating sweat and crack.
Keep them at cool room temperature instead, and if the dough is crumbly rather than greasy, that’s a different fix.
How are tri-colored Christmas cake pops different from classic cake pops?
Classic cake pops are one color of cake crumbled and mixed with frosting, then coated. Here you bake three separate batters, red, green, and plain, and each 1-tablespoon ball gets sliced into three equal portions.
One portion of each color is pressed together and rolled just until the surface smooths, so each bite carries all three colors. That extra step is what gives the pop its ribboned look instead of a single tone.
