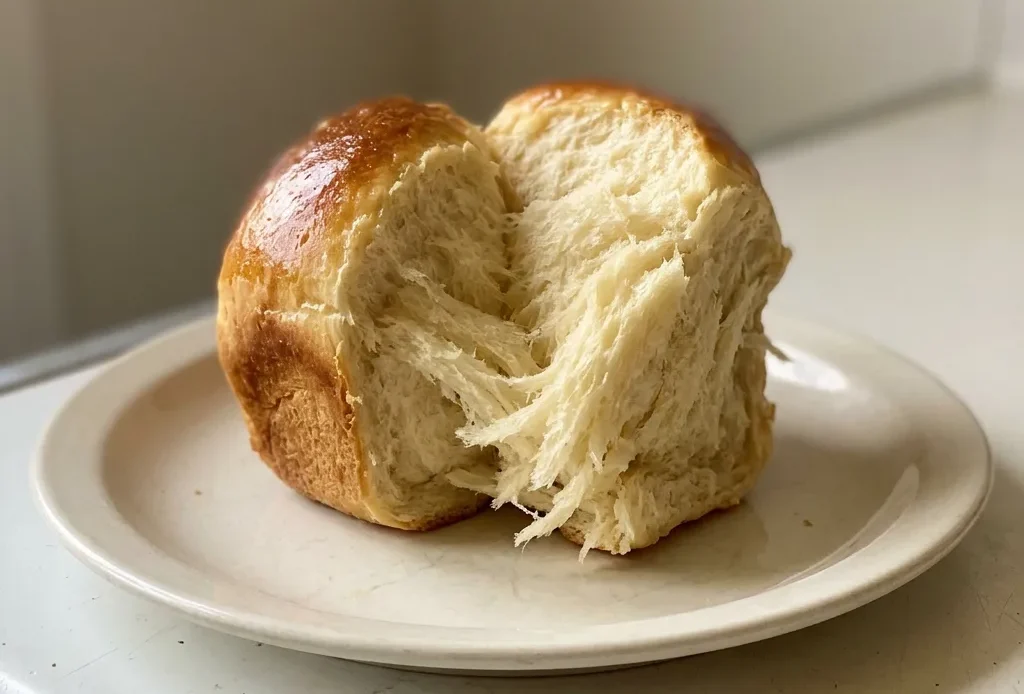
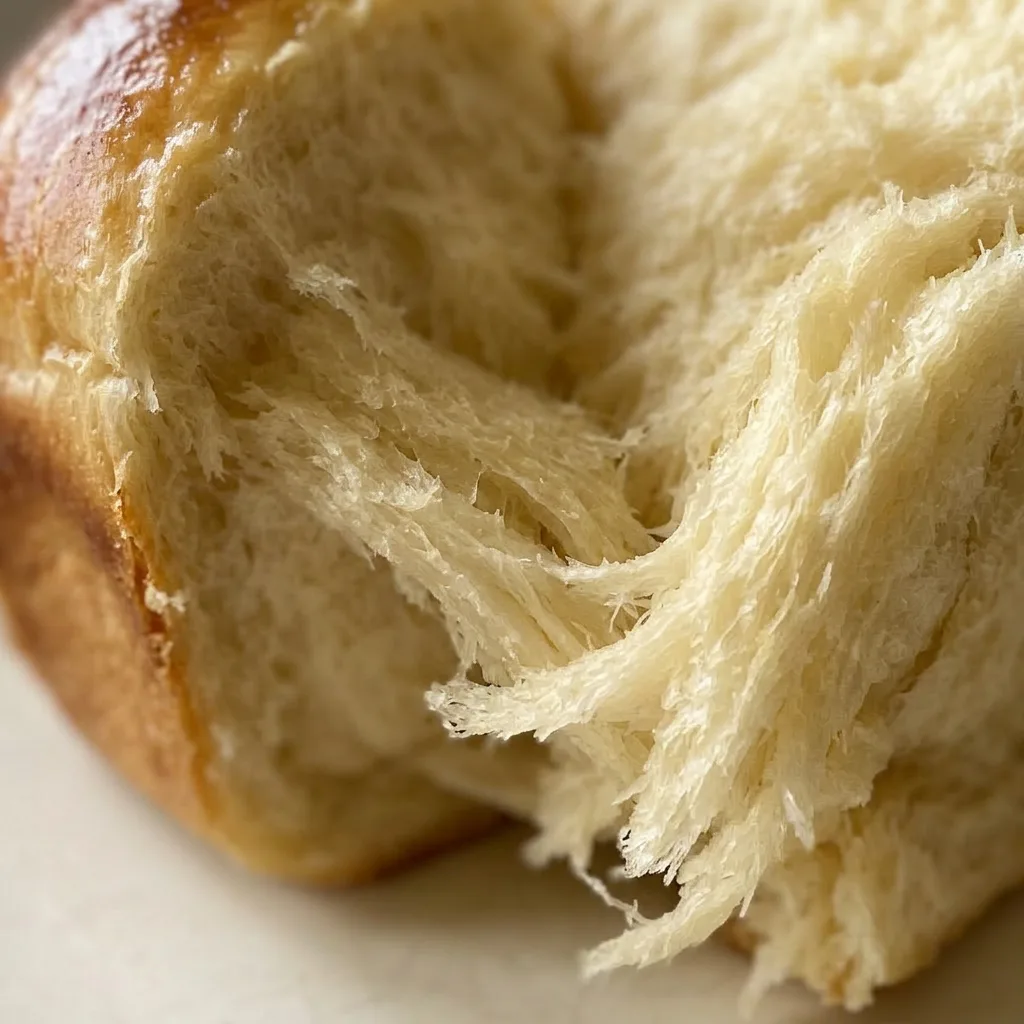
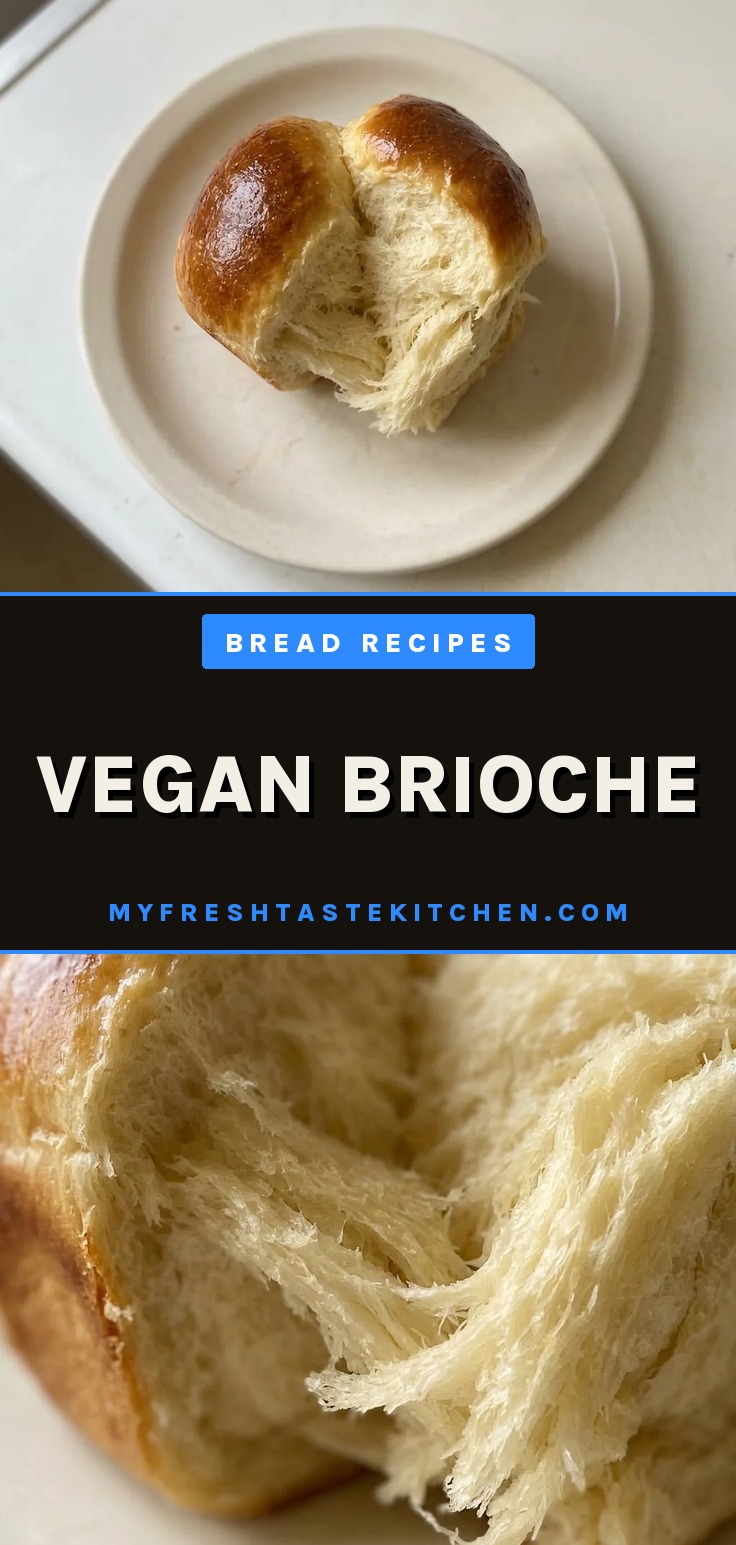
Most vegan brioche recipes trade richness for lightness, but this one doesn’t. It uses the same high-fat, slow-ferment approach as the classic, just with aquafaba and solid block butter standing in for eggs and dairy. The result is a loaf that’s tender, airy, and golden, without the compromise you might expect from vegan baking.
The catch: the dough is genuinely sticky, and it needs a full overnight chill to become manageable. That cold rest does double duty, building flavor and firming the dough so you can shape it without a fight.
If you’ve ever struggled with a vegan dough that felt more like batter, this recipe shows that patience, and the right fat, make all the difference in achieving real vegan brioche.
The first time I made this, I quit kneading when the butter was still streaky, and the loaf came out dense with greasy patches that never rose.
Let aquafaba work its magic for lift and structure
Aquafaba, the liquid from canned chickpeas, does what eggs normally do in brioche. It provides the protein framework that traps air during kneading and rising, giving the crumb its light, airy quality. The foaming ability of aquafaba mimics egg whites, when you whip or knead it, it aerates the dough.
This recipe uses 120 ml, which is just enough to build that structure without weighing the dough down. Without it, the loaf would be denser, more like a rich roll than true brioche. You can taste the difference: a proper brioche should feel tender yet springy, not heavy or tight.
Chill the dough overnight for flavor and easy handling
Overnight refrigeration does two things. First, it lets the yeast work slowly, developing deeper, more complex flavors you can’t get from a same-day rise.
Second, it firms up the dough. This dough starts very soft and sticky, almost batter-like, because of the high fat and liquid.
Chilling solidifies the butter or oil, making the dough stiff enough to shape without sticking to everything. The cold also relaxes the gluten, so the final crumb isn’t tough. You’ll see the difference when you handle it: the next day, the dough is pliable and cooperative, not a sticky mess.
Use solid vegan block butter, not spreadable margarine
Spreadable margarine has more water and less fat than block butter. That extra water steams during baking, making the dough greasy and the crumb dense instead of tender.
Block butter, with its higher fat content, gives brioche its signature tender, flaky texture. Now I keep kneading until the dough is completely smooth and silky, no matter how long it takes, because that integrated fat is what gives brioche its lift. Olive oil works as a substitute, but the result is noticeably different, the crumb is denser and the flavor shifts toward fruity, not buttery.
For the classic brioche character, stick with block butter.
Shape into balls for even baking and neat portions
Dividing the dough into 6 or 8 equal balls isn’t just for looks, it ensures each piece bakes at the same rate. The taut ball technique, where you gather the edges to the center and roll smooth, traps gas inside, creating an even, airy crumb throughout each roll.
When you press the balls together in the pan, they rise into a cohesive loaf that still pulls apart easily. This shape also means the loaf browns evenly, with no raw spots in the center. The result is a loaf that’s as practical as it is good: each slice is a, consistent portion.
Prep: 1 hr · Cook: 45 min · Total: 16 hr 45 min · Servings: 1
Pick the right fat and aquafaba for brioche texture
aquafaba: From one can of chickpeas, reduces the dough density and gives that egg-like lift.
vegan block butter: Solid block butter, not spreadable, has less water for a tender, flaky crumb.
non-dairy milk: Soy milk has the most protein, which helps structure; unsweetened avoids extra sugar.
Knead until the dough tells you it’s ready, smooth, stretchy, and cohesive.
Mix the dry and wet ingredients
Whisk flours together, then stir in yeast on one side, salt and sugar on the other. Pour in aquafaba, milk, vanilla, and mix until a shaggy dough forms. It’ll look rough and torn at first.
Knead to develop gluten
Knead on medium speed until the dough becomes smooth and stretchy. When you pull a piece, it should stretch thin without tearing, that’s the windowpane. If it tears, keep kneading.
Add the fat gradually
Drop in softened block butter or drizzle oil while kneading. The dough will break apart and look greasy, that’s normal.
Keep mixing until it comes back together into one smooth, soft mass. Persist; it takes time.
Check for full incorporation
Once the fat is in, continue kneading until the dough cleans the bowl sides and feels silky. It will still be soft and sticky, but no longer greasy. Stop there; overworking can make it tough.
Overnight chill for flavor and firmness
Transfer the dough to a bowl, cover, and refrigerate overnight. Next day, it should be at least doubled. The cold firms it up so you can handle it without a mess, and the flavor deepens.
Deflate and divide
Turn out the dough and deflate it gently. For a pull-apart loaf, cut into 8 equal pieces. Weigh them if you want, but eyeballing is fine.
Each piece should feel uniform.
Shape each into a taut ball
Gather edges to the center, pinch shut, then cup your hand around the ball on a lightly floured surface and roll until smooth and tight. The surface should feel springy, not slack.
Arrange in the pan
Place the balls in two rows inside the lined loaf pan, pressing them together gently. They should fill the pan snugly. If gaps remain, the loaf won’t hold its shape.
Second rise until doubled
Cover loosely and let rise until doubled, about 1 to 2½ hours. Test with a finger: if the indentation springs back slowly, it’s ready. If it springs back fast, let it go longer.
If it collapses, you’ve over-proofed.
Glaze and bake
Mix the glaze and brush gently onto the loaf. Bake at 180°C for 20 minutes, then brush again, lower to 160°C, and bake 25 to 30 minutes more.
Internal temp should hit 94°C. If top darkens too fast, tent with foil.
Cool before slicing
Cool in the pan for 15 minutes, then turn out onto a wire rack. Let it cool completely before cutting. If you slice warm, the crumb will compress and feel gummy.
Vegan Brioche
Ingredients
- 300 g white bread flour
- 200 g all-purpose flour
- 10 g instant yeast
- 50 g granulated sugar
- 1 tsp salt
- 120 ml aquafaba (from 1 can chickpeas)*
- 200 ml unsweetened non-dairy milk (soy is best)**
- 1 Tbsp vanilla extract
- 200 g vegan block butter (NOT spreadable; e.g., Naturli Vegan Block) OR 160 ml (⅔ cup) mild olive oil
- 1 Tbsp non-dairy milk
- 1 Tbsp maple syrup
- ½ tsp sunflower or vegetable oil
Instructions
Mix dry ingredients:
Begin the day prior to baking. In a stand mixer bowl with dough hook attachment, whisk together white bread flour and all-purpose flour. Add yeast on one side, salt and sugar on the other; stir until blended.Add wet ingredients:
Pour in aquafaba, non-dairy milk, and vanilla extract; mix until a shaggy dough forms. Knead on medium speed until smooth and stretchy. If kneading by hand, do so on a surface without extra flour.Incorporate fat:
Incorporate softened vegan block butter or olive oil, mixing until fully integrated and dough becomes smooth again; the dough will be soft and sticky. Hand mixing (in a bowl, not on a surface if using olive oil) may be easier. Persist as it takes time to combine.Refrigerate overnight:
After fat is thoroughly mixed, continue kneading until dough cleans the bowl sides (still soft and sticky). Transfer dough to a bowl, cover, and refrigerate overnight for its first rise.Prepare loaf pan:
The following day, dough should have at least doubled. Line a 2–2½ lb loaf pan (roughly 11.5 x 21.5 cm / 4.5 x 8.5 in; a 13 x 23 cm / 9 x 5 in pan also works) with parchment paper.Divide dough:
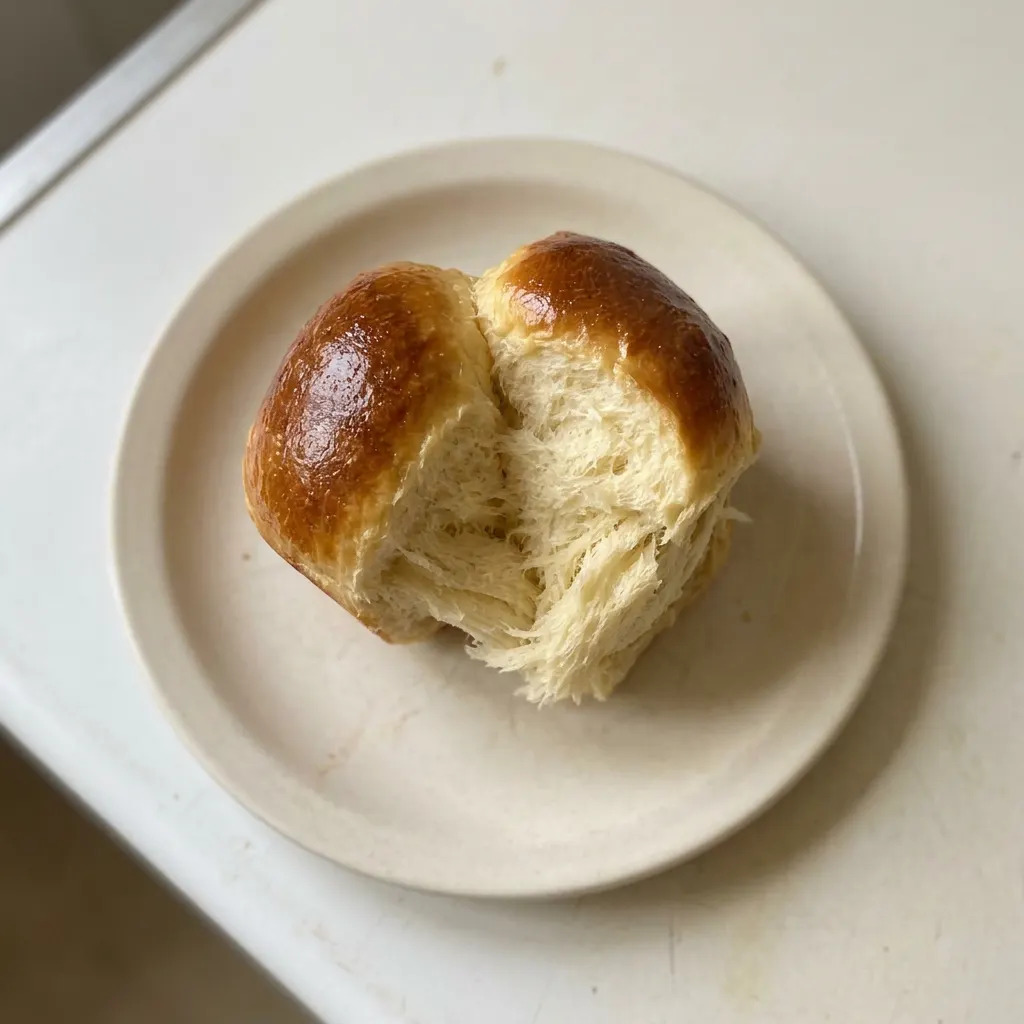
Deflate dough. For a standard loaf, shape into a log and place in pan. For a pull-apart loaf (as shown), cut dough into 6 or 8 equal pieces (8 recommended).Shape dough balls:
Form each piece into a taut ball: gather edges to center, pinch shut, flip onto a lightly floured surface, cup hand around ball, and gently roll to smooth. Repeat for all pieces.Arrange in pan:
Place balls in two rows inside the loaf pan, pressing together to fill.Second rise:
Cover loosely and let rise until doubled, about 1–2½ hours depending on temperature. Ready when puffy and a gentle finger poke leaves a slow spring-back. If it rebounds quickly, let rise longer; if it collapses, deflate, reshape, and re-ris.Make glaze:
When loaf is almost ready, preheat oven to 180°C/350°F (175°C)/gas 4. Make glaze by whisking 1 Tbsp non-dairy milk, 1 Tbsp maple syrup, and ½ tsp oil in a small bowl.Brush glaze:
Brush loaf gently with some glaze; avoid letting it drip down sides (which can cause sticking and hinder rising).Bake loaf:
Bake for 20 minutes, then brush with more glaze. Lower oven to 160°C/320°F (160°C)/gas 3 and bake another 25–30 minutes until internal temperature hits 94°C/201°F (95°C) on a probe thermometer, or a skewer inserted in center comes out clean. If top browns too fast, tent loosely with foil.Cool and store:
Cool in pan for 15 minutes, then turn out onto a wire rack to cool fully before slicing. Store in an airtight container.
Notes
Storage and Serving
This brioche is best eaten the day it’s baked, when the crust is crisp and the crumb is tender. For the next few days, store leftovers in an airtight container at room temperature. The crust will soften, but the interior stays moist.
To revive a day-old slice, warm it in a 300°F oven for 5 minutes or toast it lightly. Do not refrigerate; it accelerates staling. Freeze the whole loaf or slices tightly wrapped for up to a month.
Thaw at room temperature, then refresh in the oven. The glaze is applied just before baking, so no finishing touch is needed after cooling.
Tips
- Use a probe thermometer to check the internal temperature (94°C/201°F) rather than relying on visual cues like color or a skewer test. Vegan dough can brown early while still underbaked inside, and the skewer may come out clean even if the center is dense and gummy.
Swap the butter, aquafaba, or milk, but know what changes
vegan block butter: Refined coconut oil or coconut butter (solid, not jarred). Use the same weight (200 g).
Coconut oil gives a slightly denser crumb and a faint coconut flavor, even if refined. The loaf won’t feel as tender or flaky, but it holds together fine.
Avoid spreadable margarine; its higher water content makes the dough greasy and the crumb heavy.
aquafaba: Flaxseed gel: mix 2 tablespoons ground flaxseed with 6 tablespoons water, let sit 15 minutes until thick. Or use a commercial egg replacer (follow package for 3 eggs). Flax gel produces a tighter, less airy crumb, the loaf rises less and feels more like a rich roll than brioche.
Commercial replacer works closer to aquafaba but may add a slight starchiness. The protein structure isn’t as strong, so the dough won’t trap as much gas during kneading.
non-dairy milk: Oat milk or almond milk (unsweetened). Avoid low-fat or thin milks; they reduce structure. Soy milk has the highest protein, which helps the dough hold its rise.
Oat or almond milk yields a slightly softer, less springy crumb. The difference is subtle if you bake by feel, just expect a loaf that feels a little more delicate when sliced.
Frequently Asked Questions
Can I make the dough ahead and bake it later?
You can refrigerate the dough after the first rise (the overnight chill) for up to 24 hours before shaping and baking. The recipe already calls for an overnight rest; extending it a few extra hours is fine.
Beyond that, the dough may over-proof and lose structure, so bake within 24 hours. Freezing baked brioche is a better option for longer storage.
Why did my brioche turn out dense or not rise enough?
Most likely the dough hadn’t developed enough gluten before the fat was added. Knead until you see a smooth, stretchy windowpane before adding the butter or oil. Another common cause: the second rise went too short, the balls should double and leave a slow-springing indent.
If the dough was too cold from the fridge, let it sit at room temperature for 15 to 20 minutes before shaping.
How is vegan brioche different from traditional brioche?
Vegan brioche uses aquafaba for lift and structure instead of eggs, so the crumb is slightly less rich and the crust may be a touch softer. The fat comes from vegan block butter or olive oil rather than dairy butter, which shifts the flavor, block butter gives a closer buttery taste, while olive oil adds fruitiness. The texture remains tender and airy, but the dough is stickier and requires overnight chilling for manageable handling.
Can I freeze the baked brioche, and how should I reheat it?
Yes, freeze the whole loaf or slices tightly wrapped for up to a month. Thaw at room temperature, then refresh in a 300°F oven for 5 minutes or toast lightly. Avoid microwaving, which makes the crumb tough.
The glaze was applied before baking, so no extra finishing is needed after thawing.
