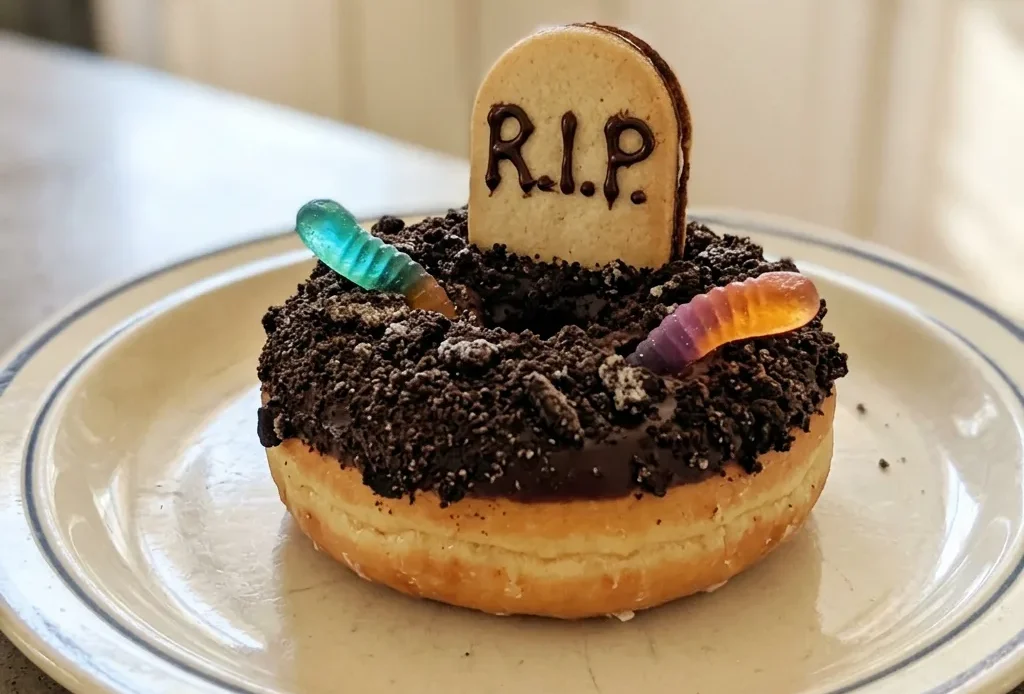
The trick to these Halloween donuts isn’t the gummy worms or the cookie headstones, it’s getting the frosting tacky enough to hold them. Canned frosting is the cheat here because it’s already stable; a few seconds in the microwave loosens it for dipping without turning it into a drip.
Too hot and the coating slides right off, taking your decorations with it. Too cold and the Oreo crumbs won’t stick. You want that just-warm, still-thick consistency where the frosting grabs onto the donut and stays put.
That’s the make-or-break moment. Everything else is assembly: press, pipe, push, and let them set. The result looks like a miniature graveyard, but it’s really just a store-bought shortcut done right.
Use canned chocolate frosting for the coating
Canned frosting comes already smooth and stable. That’s exactly what you need here.
It coats the donuts evenly without thinning out too much. A brief 20-second heat loosens it just enough for a clean dip, but not so much that it runs off. The frosting firms up quickly once on the donut, and that’s what traps the Oreo crumbs and gummy worms securely.
You get a solid, non-sticky surface that holds the decorations in place. Homemade frosting can be too soft or grainy for this job. Canned is the reliable choice.
Crush Oreos into fake dirt for texture
Oreo crumbs look exactly like soil, which sells the graveyard theme visually. But they do more than that. The crunch against the soft donut and creamy frosting gives each bite a textural contrast.
That crumb coating also helps anchor the gummy worms and cookie headstones. Without it, the decorations might slide off the slick frosting. The crumbs create a grippy surface that holds everything in place.
It’s a simple way to add both theme and texture.
Cut Milano cookies into headstones
Milano cookies have a flat, rectangular shape that naturally resembles a headstone. Cutting them in half across the middle gives you two smaller stones per cookie.
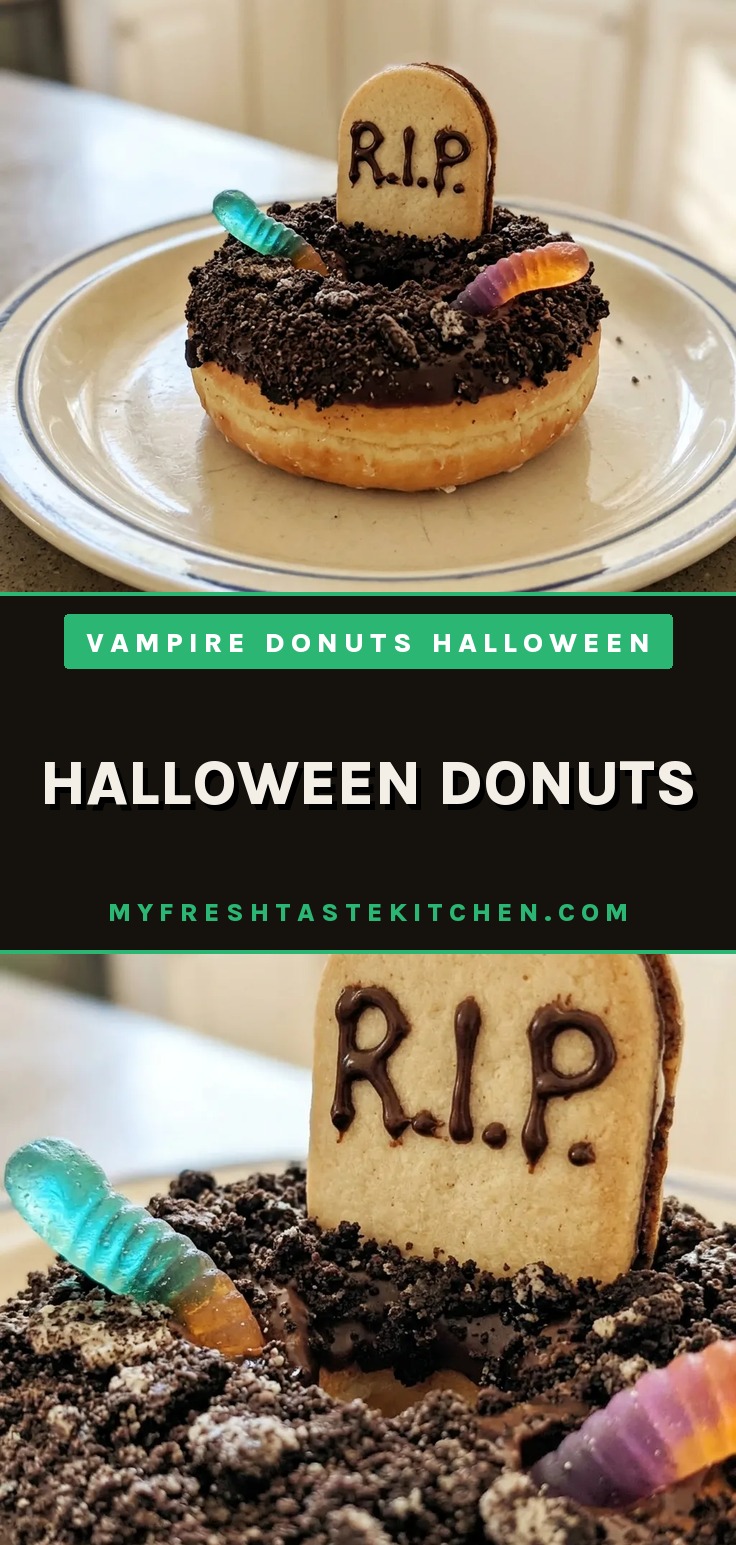
The cookie is sturdy enough to push into the frosted donut without crumbling. Piping ‘RIP’ in chocolate onto each half completes the graveyard look. The chocolate sets firm, so the letters stay legible.
The cookie provides a solid base that stands upright in the donut, adding height and a clear thematic element.
Let the donuts set for 20 minutes before serving
That 20-minute rest is not optional. It lets the frosting and chocolate firm up enough so that the gummy worms and headstones stay put when you pick up a donut. If you serve them right away, the toppings slide off or sag.
The set time ensures a clean presentation. You can see the frosting has dulled slightly, and the chocolate is no longer wet. That’s the visual cue that they’re ready to serve.
Baked donuts need this step too.
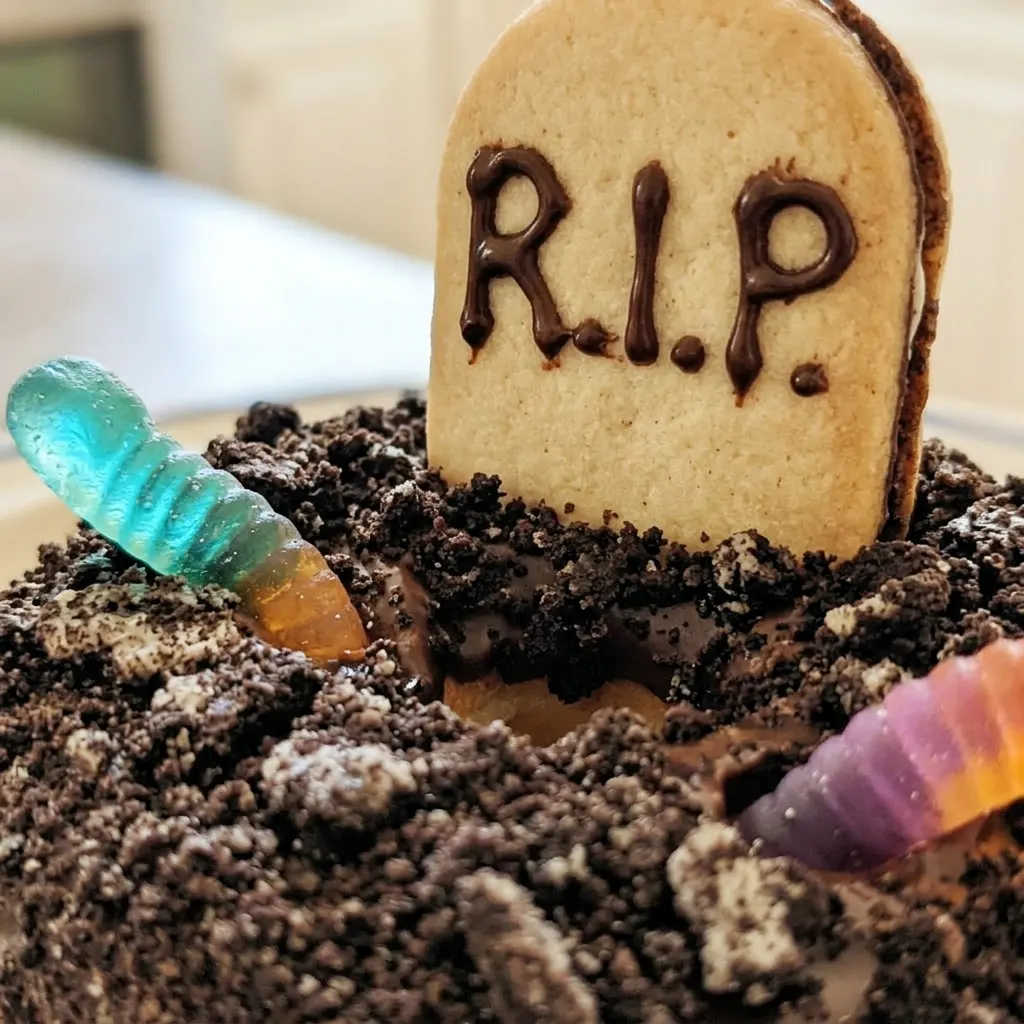
Prep: 10 min · Total: 30 min · Servings: 12 · Calories: 490 kcal
Ingredient notes for Halloween donuts
Canned chocolate frosting: It’s already smooth and stable, so it coats evenly and holds decorations well after a brief heat.
Oreo crumbs: Crush them fine so they look like dirt and stick to the frosting for texture and decoration grip.
Mini gummy worms: Press them into the frosting while it’s still tacky so they stay upright like worms emerging from soil.
Milano Cookies: Cut each cookie in half across the middle to get two flat, sturdy headstone shapes per cookie.
Chocolate chips: Melt them gently in short bursts and stop when mostly glossy to avoid seizing the chocolate.
I once served these right after decorating, and the headstones toppled into a graveyard soup. Now I hide them from hungry kids for the full 20 minutes.
Assemble the graveyard donuts
Soften the frosting
Heat the canned chocolate frosting for 20 seconds. It should be pourable but still thick. If it’s runny, you’ve overheated it; let it cool a minute until it thickens slightly.
Dip the donuts
Submerge the top of each donut in the warm frosting. Tilt to let excess drip off.
The coating should be even, not gloppy. If it slides off too fast, the frosting is too thin, let it cool.
Add Oreo crumb coating
Press the frosted top into Oreo crumbs, covering it completely. The crumbs should stick firmly. If they fall off, the frosting isn’t tacky enough; let it sit 30 seconds before dipping.
Insert gummy worms
Push two mini gummy worms into the frosting on each donut so they stick out like emerging from dirt. They should hold upright; if they droop, the frosting is too soft, let it set a few minutes.
Melt the chocolate for piping
Microwave chocolate chips for 30 seconds, stir, then in 15-second bursts until smooth. Stop when most chips are glossy; residual heat will finish melting. Overheating seizes the chocolate.
Prepare the piping bag
Spoon melted chocolate into a zip-top bag, seal, and snip a tiny corner. The opening should be small for controlled lettering. Test on a plate, if the line spreads, let the chocolate cool slightly.
Make ‘RIP’ headstones
Pipe ‘RIP’ onto each Milano cookie half. The chocolate should flow steadily; if it’s too thick, reheat 5 seconds. Let the letters set for a minute so they don’t smudge when handled.
Insert headstones
Gently push a cookie headstone into the frosting of each donut, near the edge. It should stand firm. If it tilts, the frosting is too soft; let the donuts rest 5 minutes first.
Let everything set
Allow the donuts to sit at least 20 minutes. The frosting should feel dry to the touch, not sticky, and the chocolate letters should be firm. If the donuts still feel tacky, wait another 10 minutes.
Easy Halloween Donuts (Graveyard Donuts)
Ingredients
- 16 oz canned chocolate frosting
- 12 plain glazed donuts
- 1 cup Oreo crumbs
- 24 mini gummy worms
- 1 cup chocolate chips
- 6 Milano Cookies
Instructions
Soften Chocolate Frosting:
Place the chocolate frosting in a medium microwave-safe bowl and heat in the microwave for roughly 20 seconds to soften it.Dip Donuts in Frosting:
Immerse the tops of the donuts in the melted frosting, tilting them to allow excess to drip off.Coat with Oreo Crumbs:
Pour the Oreo crumbs into a medium bowl. Press the frosted donut tops into the crumbs until fully coated.Insert Gummy Worms:
Insert two mini gummy worms into the frosting on each donut, pressing them in.Melt Chocolate Chips:
Put the chocolate chips into a small microwave-safe bowl. Microwave for 30 seconds, then stir. Repeat heating in 15-second bursts until the chocolate is smooth and completely melted.Prepare Piping Bag:
Pour the melted chocolate into a zip-top bag, seal it, and snip off a tiny corner.Halve Milano Cookies:
Slice each Milano cookie in half across the middle.Pipe RIP Letters:
Pipe the letters ‘RIP’ onto each cookie half to create headstone shapes.Insert Cookie Headstones:
Gently push the cookie headstones into the donuts.Let Set 20 Minutes:
Allow the frosting and chocolate to set for a minimum of 20 minutes prior to serving.Check Blog for Ideas:
Check the blog post for other Halloween donut ideas: vampire, mummy, spiderweb, etc.
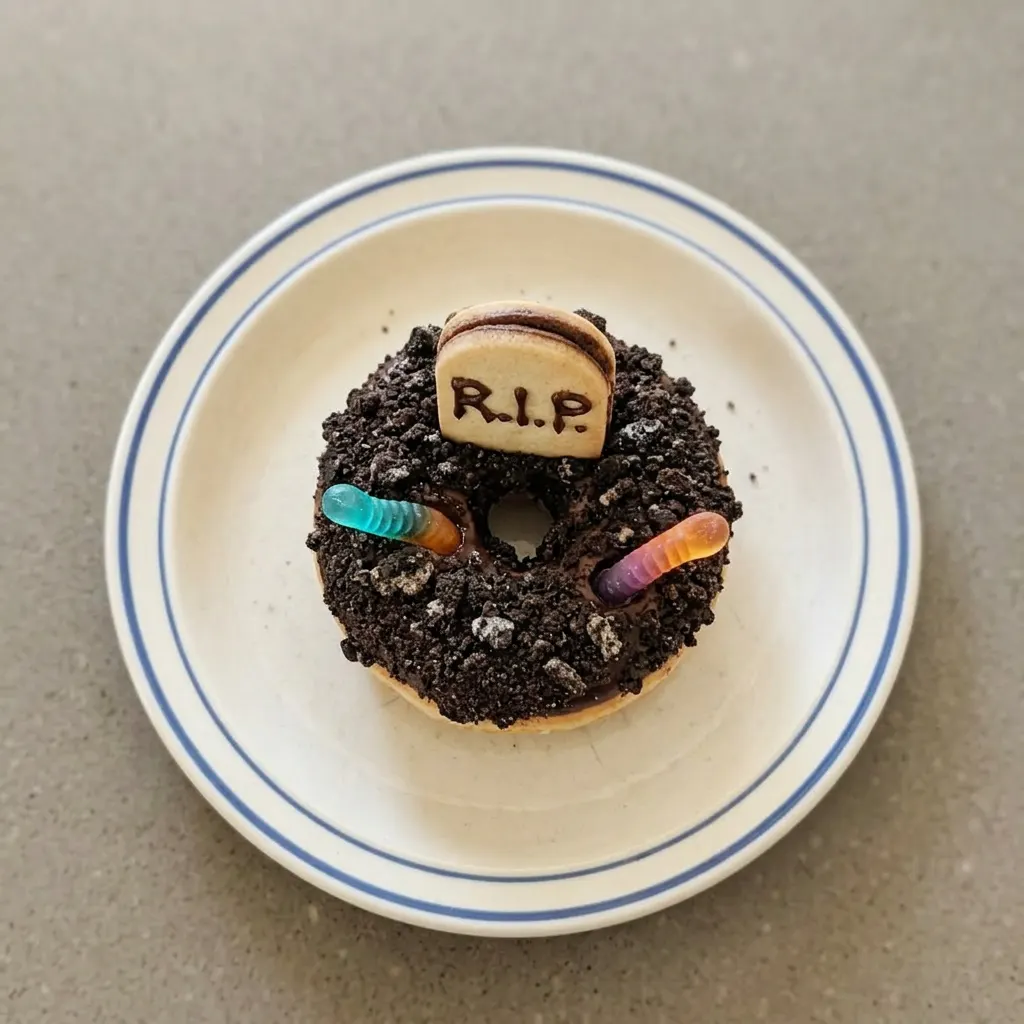
Storage and Serving
These donuts are best served within a few hours of assembly, after the 20-minute set. The cookie headstones stay crisp and the gummy worms remain chewy. If you need to make them ahead, assemble but don’t add the headstones or worms; store the frosted crumb-covered donuts in an airtight container at room temperature for up to 2 days.
The coating stays tacky enough to hold the decorations when you add them just before serving. Refrigeration is not recommended, as it softens the cookies and makes the gummy worms tough. For leftovers, keep in an airtight container at room temperature for up to 2 days, but note the cookies will lose crunch and the worms will soften.
To restore some texture, you can set the donuts on a baking sheet in a 300°F oven for 3 to 5 minutes, but the headstones may darken. Freezing is not advised; the frosting and chocolate will bloom, and the donuts become soggy upon thawing.
Swap the frosting, change the grip
Canned chocolate frosting: Homemade chocolate buttercream. Use a stiff buttercream, not a runny one.
If it’s too thin, crumbs and gummy worms slide off. Thick buttercream holds the dirt coating and decorations just as well, but it may not be as smooth to dip.
Oreo crumbs: Crushed chocolate wafers or graham crackers. Wafers give a finer, darker dirt look. Graham crackers are lighter and sweeter.
Both stick to the frosting and provide the same crunch. Grind them fine so they adhere evenly.
Plain glazed donuts: Homemade donuts. If you make homemade donuts, skip the glaze or brush it off.
The glaze is slick and prevents the frosting from sticking. Use a bare, dry donut. The frosting needs a surface it can grab.
Milano Cookies: Shortbread fingers or graham cracker rectangles. Shortbread is sturdy enough to push in and holds piped chocolate. Graham crackers are thinner and may soften from the frosting; push them in right before serving.
Cut them to a rectangular headstone shape.
Tips
- If the chocolate in the piping bag starts to harden while you work, microwave the sealed bag for 5 seconds and knead it before continuing. This prevents clogging and keeps lines consistent.
Frequently Asked Questions
Can I make these donuts a day ahead?
You can, but with a catch. Assemble the donuts through the Oreo crumb coating, then store them in an airtight container at room temperature for up to two days. Add the gummy worms and cookie headstones just before serving so they stay chewy and crisp.
How do I keep the gummy worms from falling off?
Press them into the frosting while it’s still tacky, right after dipping in crumbs. If they still droop, the frosting is too soft; let the donuts sit for a few minutes before inserting the worms so the frosting firms up.
Can I use homemade frosting instead of canned?
Yes, but use a stiff buttercream. If it’s too thin, the crumbs and gummy worms will slide off. Canned frosting is already smooth and stable, which is why the recipe calls for it.
What if I don’t have Milano cookies for the headstones?
Swap in shortbread fingers or graham cracker rectangles cut into headstone shapes. Shortbread is sturdy and holds piped chocolate well; graham crackers are thinner and may soften from the frosting, so push them in right before serving.
