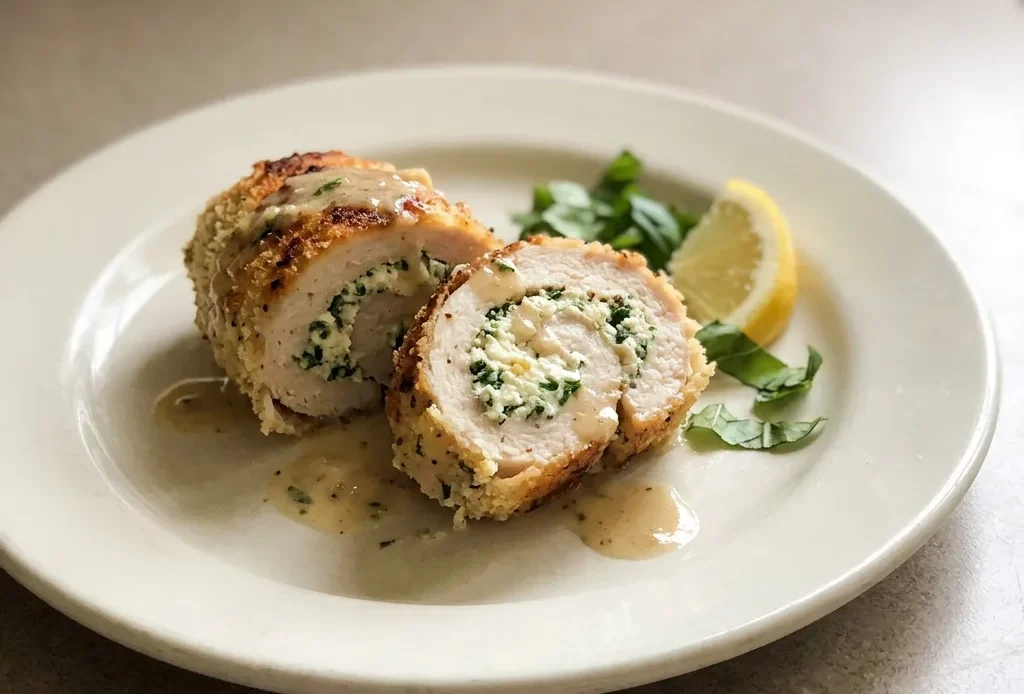
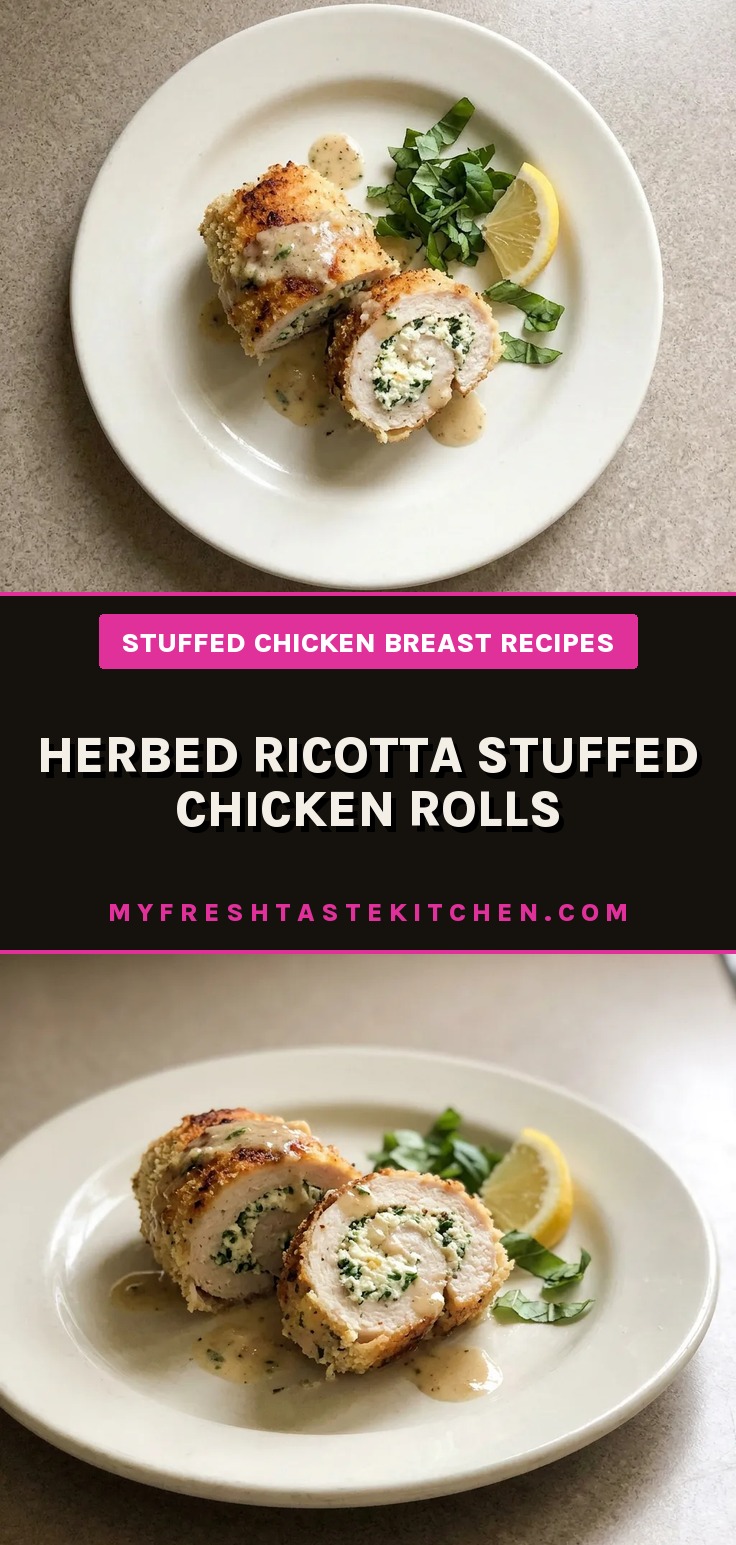
Golden and shatter-crisp on the outside, the first slice reveals a creamy, herb-flecked center that stays put, not oozing across the plate. These chicken rolls look like something from a restaurant menu, but the process is more forgiving than the classic stuffed-and-breaded cutlet routine.
The trick is in the assembly: a tight roll and a thorough breading keep everything together through the sear, so you don’t end up with filling leaking into the pan. The herbed ricotta stuffed chicken rolls come out evenly cooked, with a crust that actually stays crunchy after baking.
The first time I made these, my rolls looked like exploded sausages, filling was seeping out through the seams and the breading couldn’t stick properly, leaving bald patches.
Butterfly and pound for even rolls
You’re not just flattening meat. Butterflying with a hinge keeps the breast in one piece, so the filling stays put. Pounding to an even ½-inch thickness does two things: it guarantees the chicken cooks through at the same rate, and it makes rolling easy without gaps or bulges.
A thick end would undercook; a thin spot would dry out. Uniformity is the goal. You’ll see it when you can roll the chicken without it tearing or resisting.
Build a filling that cuts the richness
Ricotta brings creaminess without heaviness. Fresh herbs, parsley, chives, thyme, and lemon zest add brightness that cuts through the fat. Parmesan gives savory depth.
The combination keeps the filling from tasting flat or cloying.
Three-step breading for a crust that stays
Flour first gives the egg something to cling to. Egg wash then binds the panko.
Panko stays crisp during baking because it’s coarse and doesn’t absorb as much moisture as fine crumbs. The result: a golden crust that doesn’t peel off or turn soggy.
You’ll feel the crunch when you slice.
Sear then bake, moist inside, browned outside
Searing creates a crust that seals in juices and builds fond for the pan sauce. The browning adds flavor that baking alone can’t. Finishing in the oven cooks the chicken through gently, so the interior stays moist.
You’ll see the fond on the pan bottom, that’s where the sauce’s flavor starts.
Prep: 40 min · Cook: 45 min · Total: 1 hr 25 min · Servings: 4
What to look for in each ingredient
Whole milk ricotta: Buy full fat and drain it in a fine mesh sieve for 30 minutes. Excess water makes the filling loose.
Panko breadcrumbs: Use the coarse, flaky kind. Fine crumbs turn dense and don’t stay as crisp after baking.
Fresh herbs (parsley, chives, thyme): Dried won’t give the same brightness. Wash and dry them well before chopping so they don’t clump.
Non-alcoholic white wine alternative: White grape juice or extra broth works. Avoid cooking wine; it’s salty and harsh.
Chicken breasts: Look for 6 to 8 oz each. Smaller ones are hard to roll; larger ones may need pounding thinner.
Lemon zest: Only the yellow part. White pith is bitter and will dull the filling’s freshness.
Roll and bread chicken tightly, then sear and bake for a crisp crust
Form the rolls
Spoon a quarter of the filling onto one end of a pounded cutlet, leaving a half-inch border. Roll tightly, tucking in the sides as you go.
Secure with toothpicks. The roll should feel firm, not squishy.
Dredge, egg, and crumb
Coat each roll in flour, tap off excess. Dip in egg wash, let drip. Roll in panko, pressing gently.
The coating should look dry and pebbly, not wet. If spots are damp, add more panko.
Sear the rolls
Heat oil and butter in skillet until shimmering. Sear rolls seam-side down first, 3 to 4 minutes per side, until deep golden brown. The crust should crackle when you nudge it.
Don’t rush; color equals flavor.
Bake to finish
Transfer skillet to 375°F oven. Bake 18 to 25 minutes until thickest part hits 165°F.
The rolls should feel firm when pressed. Overcooking dries them out, so check early.
Rest and slice
Let chicken rest 5 to 10 minutes on a cutting board. Remove toothpicks.
Slice each roll on the bias into 2-3 thick rounds. The filling should be set, not runny, and the crust should shatter.
Make pan sauce while chicken rests
Deglaze the same skillet with white wine alternative, scraping up fond. Reduce by half, about 2 to 3 minutes.
Add broth, simmer 5 to 7 minutes until lightly thickened. Stir in cream, simmer 1 to 2 minutes.
Sauce should coat the back of a spoon.
Herbed Ricotta Stuffed Chicken Rolls
Ingredients
Herbed Ricotta Filling
- 15 oz whole milk ricotta cheese drained
- ½ cup freshly grated Parmesan cheese plus extra for serving
- ¼ cup fresh Italian parsley finely chopped
- 2 tbsp fresh chives finely chopped
- 1 tbsp fresh thyme leaves finely chopped
- 1 tsp dried oregano
- 2 cloves garlic minced
- 1 large egg yolk
- 1 tsp lemon zest
- ½ tsp salt or to taste (for filling)
- ¼ tsp black pepper or to taste (for filling)
Chicken Rolls
- 4 large boneless, skinless chicken breasts 6-8 oz each
- ½ cup all-purpose flour for dredging
- 2 large eggs lightly beaten with splash of water/milk
- 1 ½ cups Panko breadcrumbs
- ½ tsp salt for seasoning (for chicken/breadcrumbs)
- ¼ tsp black pepper for seasoning (for chicken/breadcrumbs)
- 3 tbsp olive oil for searing
- 2 tbsp unsalted butter for searing
Pan Sauce
- ½ cup non-alcoholic white wine alternative e.g., white grape juice or additional chicken broth
- 1 cup low-sodium chicken broth
- ¼ cup heavy cream
- 1 tbsp fresh Italian parsley chopped (for garnish)
- Fresh basil leaves or additional chopped parsley for serving
- Lemon wedges for serving
Instructions
Herbed Ricotta Filling
Preheat and Setup Breading:
Preheat oven to 375°F (190°C). Arrange a three-station breading setup: one shallow dish with seasoned flour, a second with egg wash, and a third with seasoned Panko breadcrumbs. Cover a large baking sheet with parchment paper.
Chicken Rolls
Mix Ricotta Filling:
In a medium bowl, mix together drained ricotta, Parmesan, parsley, chives, thyme, oregano, garlic, lemon zest, and egg yolk. Add ½ tsp salt and ¼ tsp black pepper. Stir until uniform. Sample and adjust seasoning as needed.Butterfly and Pound Chicken:
Set each chicken breast on a cutting board. Butterfly by cutting horizontally almost through, leaving a ½-inch hinge. Put between two sheets of plastic wrap and pound to an even ½-inch thickness. Sprinkle both sides lightly with salt and pepper.Fill and Roll Chicken:
Place one pounded cutlet flat. Spoon roughly ¼ of the filling near one end, leaving a ½-inch margin. Roll tightly into a cylinder, folding in the sides. Fasten with one or two toothpicks. Repeat with remaining chicken.Bread Chicken Rolls:
Coat each roll in seasoned flour, tapping off excess. Dip into egg wash, letting extra drip away. Then coat completely with Panko, pressing lightly. Transfer to the prepared baking sheet.Sear and Bake Chicken:
Heat olive oil and butter in a large oven-safe skillet over medium-high heat until shimmering. Sear rolls seam-side down for 3-4 minutes per side until golden brown. Move skillet to the oven or transfer rolls to the baking sheet. Bake for 18-25 minutes until internal temperature hits 165°F (75°C).Rest Cooked Chicken:
Take chicken out of oven and place on a cutting board. Allow to rest for 5-10 minutes.Make Pan Sauce:
While chicken rests, put the same skillet over medium heat. Deglaze with non-alcoholic white wine alternative, scraping up browned bits. Reduce by half (2-3 minutes). Add chicken broth and simmer for 5-7 minutes to reduce. Stir in heavy cream and simmer for 1-2 minutes until thickened. Season with salt and pepper. Mix in fresh parsley just before serving.
Pan Sauce
Slice and Serve Chicken:
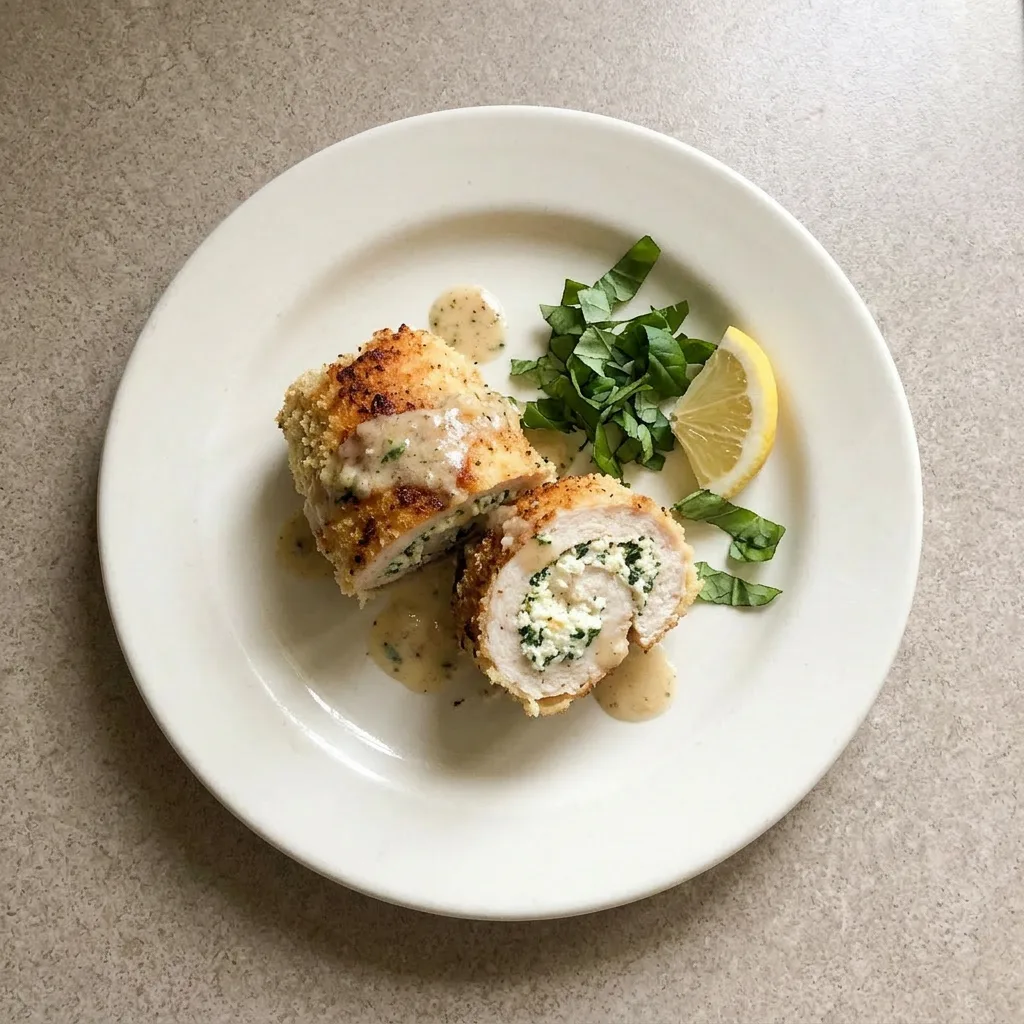
Remove toothpicks from rested chicken. Slice each roll diagonally into 2-3 thick rounds. Arrange on plates. Spoon pan sauce over chicken. Garnish with additional parsley, basil, or Parmesan. Serve with lemon wedges.
Storage and Serving
For the best texture, serve the chicken rolls within 30 minutes of slicing. The crust stays crisp and the filling is still set. If you have leftovers, store the rolls and pan sauce separately.
Refrigerate the rolls in an airtight container for up to 3 days; the sauce keeps for 2 days. The crust will soften over time, but separating them slows it down. To reheat, arrange rolls on a wire rack over a baking sheet at 350°F for 10 to 15 minutes until warmed through.
Avoid the microwave; it turns the crust soggy. Reheat the sauce gently on the stove, adding a splash of broth to loosen it. Freezing the assembled rolls is not recommended because the ricotta filling can become grainy and the crust loses its crunch.
Instead, freeze the unbreaded pounded chicken and make the filling fresh. The pan sauce does not freeze well due to the cream.
For make-ahead, prepare the filling up to 2 days ahead and stuff the rolls the day you plan to cook.
Stick with whole milk ricotta and fresh herbs; swap the breading and booze instead
Whole milk ricotta: Cottage cheese (blended smooth in a food processor until creamy, then drained) or a thick dairy-free ricotta alternative (e.g., Kite Hill). Blended cottage cheese mimics the texture but tastes tangier and less rich, you’ll notice a lighter, more acidic filling. Dairy-free versions are often starch-thickened and may turn slightly grainy when baked; drain them well and add an extra pinch of salt to compensate.
Panko breadcrumbs: Gluten-free panko (such as Ian’s or Aleia’s) or finely crushed pork rinds (for keto). GF panko browns a shade faster and feels a bit more fragile, check the crust at 15 minutes. Crushed pork rinds give a crunchy, savory coating that stays crisp but won’t brown as deeply; sear a minute longer per side to develop color.
Non-alcoholic white wine alternative: Dry vermouth (alcoholic, but cooks off) or 1 tablespoon white wine vinegar + enough chicken broth to make ½ cup. Vermouth adds a herbal complexity that grape juice lacks. The vinegar-broth combo brightens the sauce with acidity, but simmer an extra minute to mellow the sharpness.
Chicken breasts: Turkey breast cutlets (pounded thin) or large chicken thighs (boneless, skinless, pounded to even thickness). Turkey tastes milder and dries out faster, check temp at 18 minutes. Thighs stay juicier but are trickier to roll evenly; they may need 2-3 extra minutes in the oven to reach 175°F.
Tips
- Insert the thermometer horizontally through the side of the roll to reach the center without poking through the filling; this avoids false readings from the ricotta.
- Rest the rolls for the full 10 minutes before slicing; this allows carryover cooking to raise the internal temperature by 5 to 7°F, ensuring the chicken stays moist.
Frequently Asked Questions
Can I make these chicken rolls ahead of time and bake later?
You can assemble and bread the rolls up to a day ahead, but don’t bake them until you’re ready to serve. Refrigerate the breaded rolls uncovered on a baking sheet so the coating stays dry. Bake straight from the fridge, adding 5 to 7 minutes to the oven time since they start cold.
The crust won’t be as shatteringly crisp as freshly breaded, but it’ll still brown.
How do I prevent the chicken rolls from unrolling during cooking?
Secure each roll with one or two toothpicks pushed through the seam. Tuck the sides in as you roll so the filling doesn’t bulge out. Seam-side down in the skillet first locks the edge in place.
If a roll still tries to open, it’s probably understuffed, next time leave a clean half-inch border.
What’s the best way to check if the chicken is fully cooked without a thermometer?
The internal temperature target is 165°F, but if you’re going by touch, press the thickest part of a roll, it should feel firm with a little spring, not squishy. Or make a small cut into the center; the juices should run clear and the meat should no longer look pink. The filling will be hot and set, not runny.
How is this different from traditional chicken cordon bleu?
Instead of ham and Swiss cheese, the filling here is a herbed ricotta-Parmesan mixture that’s lighter and brighter. The chicken is breaded in panko for extra crunch and seared before baking, so you get a deep golden crust and a pan sauce built from the fond. It’s a fresher take without the heavy melted cheese.
