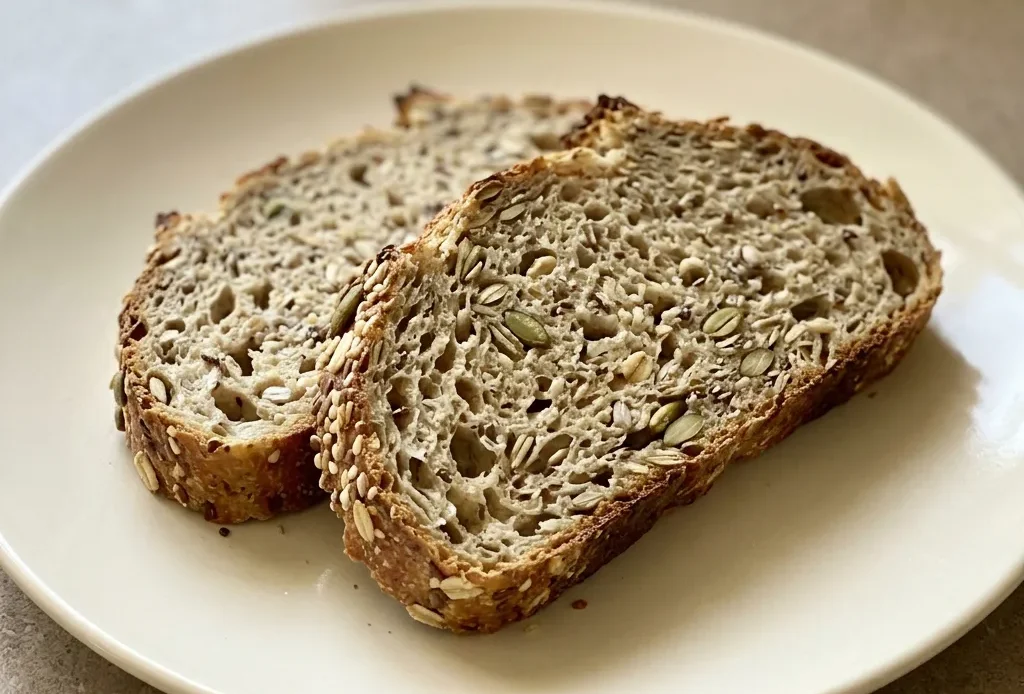
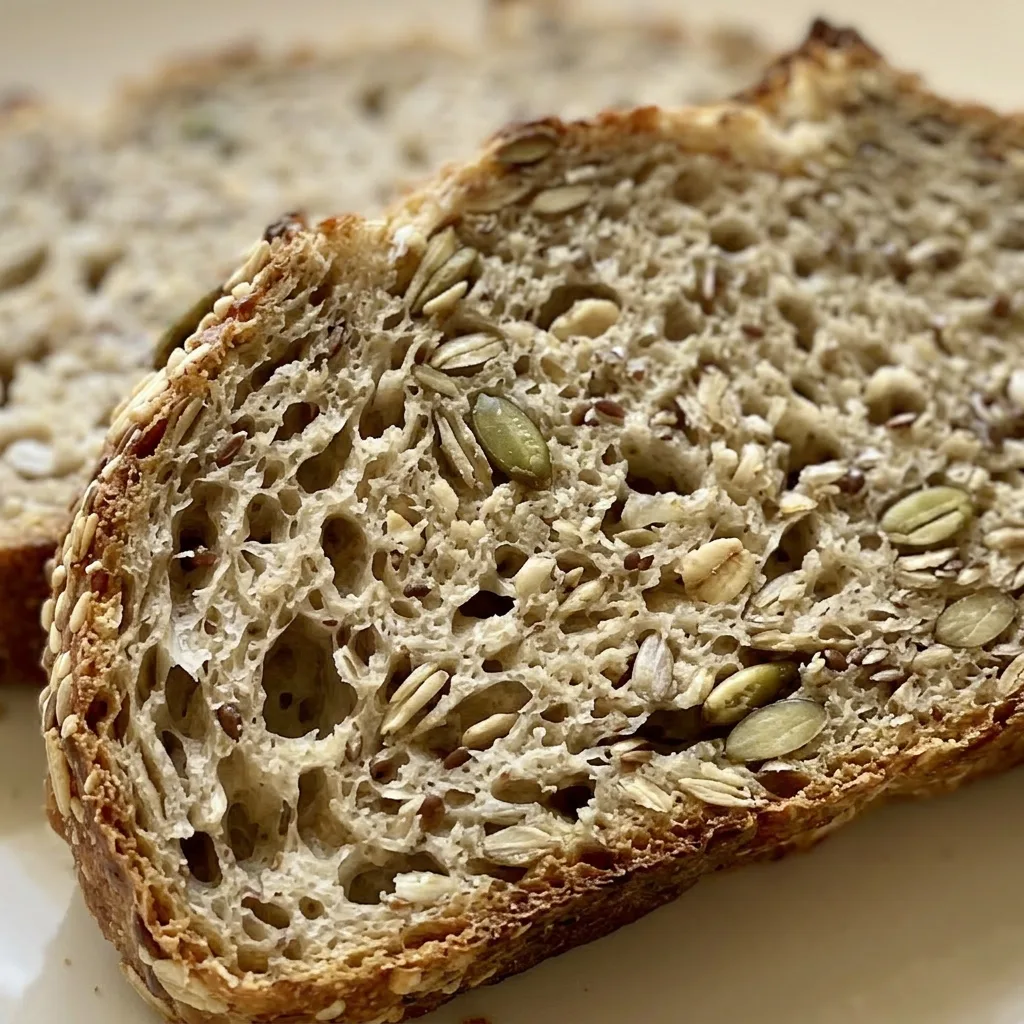
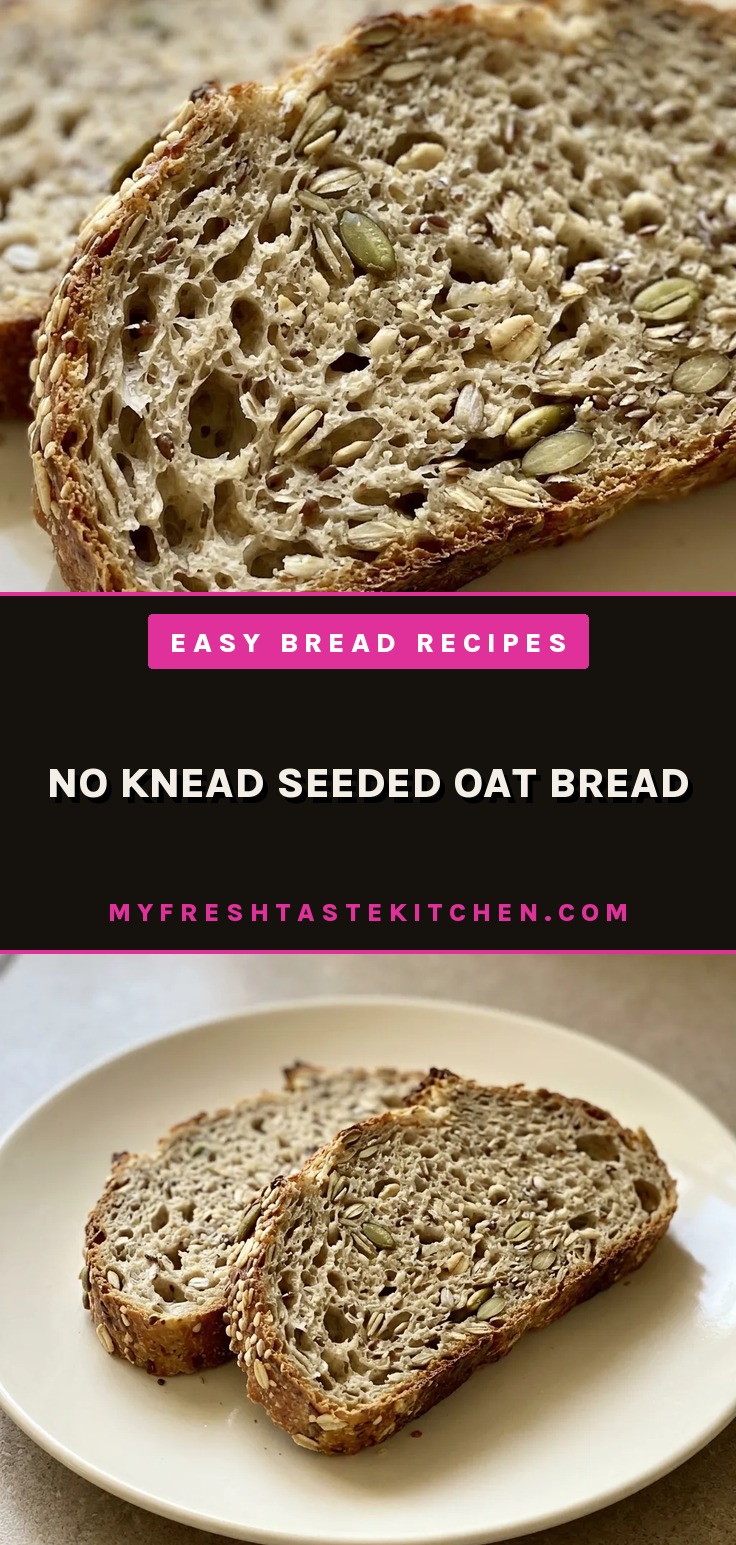
A deep brown crust crackles when you tap it, and the slice reveals a tender, open crumb speckled with softened oats and crunchy seeds. This no knead seeded oat bread gets its texture from a very wet dough that develops gluten slowly over hours, no arm work required.
The long rest in the fridge is worth making room for; it deepens the flavor without adding effort. The dough stays sticky right up to shaping, which can surprise you if you’re used to stiffer doughs, but that wetness is what gives the interior its airy chew.
Long, wet rise builds gluten without kneading
This dough starts wet and shaggy, so sticky it’s unusable in a mixer. That’s intentional. A high hydration level lets gluten strands form as flour absorbs water over time, not from mechanical work.
The three-hour room-temperature rise doubles the dough and fills it with air bubbles, evidence that the gluten network is developing. For even better flavor and texture, a long cold rest (12 hours or more) continues that development slowly. Enzymes break down starches into sugars, deepening the taste.
The dough may deflate slightly after two days in the fridge; that’s normal and doesn’t hurt the final loaf. This hands-off approach produces open crumb and chewy crust, no kneading required.
Oats and seeds shape crumb and crunch
Whole rolled oats absorb a lot of water, swelling during the rise and bake. They add a tender, hearty crumb without weighing down the structure, the bread stays light, not dense.
The seeds (pumpkin, sunflower, flax) do double duty: mixed into the dough, they absorb moisture and contribute to the wetness that drives gluten development. They also provide pops of crunch and nutty flavor throughout the crumb.
A separate seed-and-oat topping creates contrast, crisp, toasted seeds against the soft interior. The seeds in the dough soften slightly from hydration, so you get two textures in one slice.
Scoring and steam give the crust its crackle
A slash or X on top before baking controls where the bread splits as it expands. Without scoring, the crust might burst randomly, leaving uneven cracks. Steam is just as critical.
Pouring boiling water into a hot pan in the oven creates a burst of steam that keeps the crust moist during the first part of baking. That moisture allows the loaf to spring fully, maximum oven spring, before the crust sets. The high heat (425°F) then dries and browns the surface, producing a golden, crisp shell.
Tap the baked loaf: a hollow sound tells you it’s done. The combination of controlled expansion and steam is what gives this bread a bakery-style crust.
Prep: 4 hr · Cook: 40 min · Total: 5 hr · Servings: 1
What to look for in oats, seeds, and yeast
old-fashioned whole rolled oats: Use rolled oats, not quick or steel cut. Quick oats turn mushy; steel cut stay too crunchy.
Pumpkin seeds (pepitas): Buy unsalted pepitas so you control the salt. Salted ones can make the loaf too salty.
Platinum Yeast from Red Star instant yeast: Instant yeast is fine; active dry needs proofing. This brand is just a recommendation.
Flax seeds: Whole flax seeds work here. Ground flax absorbs more liquid and changes the texture.
I still use way more flour on my hands than the recipe says, patting the dough gently into a ball rather than trying to knead it.
Mix a shaggy, sticky dough, then walk away
Combine dry ingredients
Whisk flour and yeast together in a large bowl. Add oats, seeds, and salt, then whisk again. This distributes seeds evenly so every slice gets a mix.
Add wet ingredients
Stir honey into warm water until dissolved, then pour over dry mix. Fold with a spatula, dough will look dry and shaggy. Keep working until no flour patches remain; the dough should be very sticky, almost batter-like.
First rise (room temperature)
Cover bowl tightly with plastic wrap and let sit at room temperature for 3 hours. You’re looking for the dough to roughly double, stick to the bowl sides, and show lots of air bubbles. That’s the gluten network forming without kneading.
Cold rest (optional but recommended)
For deeper flavor and better texture, move covered bowl to the fridge for at least 12 hours, up to 3 days. Dough may puff more then slowly deflate after 2 days, that’s normal, not a problem.
Shape the loaf
Dust a large nonstick baking sheet with flour or cornmeal. Flour your hands well and gently coax the dough into a ball right in the bowl or on a floured surface. Work lightly, you want to keep as much air inside as possible.
Add topping and second rest
Transfer dough ball to prepared sheet. Mix the reserved seeds and oats, then sprinkle on top. If seeds don’t stick, press them in gently.
Loosely cover and let rest 45 minutes. Meanwhile, preheat oven to 425°F.
Score and bake
Just before baking, cut a slash or X about 1/2 inch deep on top with a sharp knife or lame. If the loaf flattened during the rest, use floured hands to reshape it first. Bake on center rack 40 minutes.
For a crisper crust, pour boiling water into a hot pan on the bottom rack when you put the bread in, then shut the oven quickly.
Check doneness
After 40 minutes, the crust should be golden brown. Tap the bottom, if it sounds hollow, it’s done. For certainty, an instant-read thermometer inserted into the center should read 195°F.
Tent with foil if browning too fast.
Cool before slicing
Let the bread cool on a rack for at least 10 to 20 minutes. Cutting too early compresses the crumb and makes it gummy.
No Knead Seeded Oat Bread
Ingredients
- 3 cups bread flour (spooned & leveled), plus more as needed for shaping and pan 390g
- 2 teaspoons Platinum Yeast from Red Star instant yeast about 6g
- 1 cup old-fashioned whole rolled oats 85g
- 1/4 cup unsalted pumpkin seeds (pepitas) 30g
- 1/4 cup salted or unsalted sunflower seeds 30g
- 2 Tablespoons flax seeds or sesame seeds 18g
- 2 teaspoons coarse salt
- 2 Tablespoons honey 43g
- 1 and 1/2 cups warm water (about 95°F (35°C)) 360ml
- optional: cornmeal for dusting pan
- 1 Tablespoon old-fashioned whole rolled oats 5g
- 1 Tablespoon pumpkin seeds (pepitas) 8g
- 1 Tablespoon sunflower seeds 8g
- 1 teaspoon flax seeds or sesame seeds
Instructions
Watch Video Guide:
Watch the video below before you begin, and let that be your visual guide for this recipe.Mix Dry and Wet Ingredients:
In a large un-greased mixing bowl, whisk the flour and yeast together. Add the oats, pumpkin seeds, sunflower seeds, flax seeds, and salt and whisk to combine. Mix the honey and water together, and then pour over the dry ingredients. Using a silicone spatula or wooden spoon, gently mix together. The dough will seem dry and shaggy, but keep working it until all the flour is moistened. If needed, use your hands to work the dough ingredients together. The dough will be very sticky. Shape into a ball in the bowl as best you can. (Tip: Stir dough by hand. Dough is too sticky for a mixer.)Let Dough Rise 3 Hours:
Keeping the dough in the bowl, cover the dough tightly with plastic wrap or aluminum foil and set on the counter at room temperature (honestly any normal room temperature is fine). Allow to rise for 3 hours. The dough will just about double in size, stick to the sides of the bowl, and have a lot of air bubbles.Refrigerate for Best Flavor:
You can continue with step 5 immediately, but for absolute best flavor and texture, I strongly recommend letting this risen dough rest in the refrigerator for at least 12 hours and up to 3 days. (Even just a couple hours is good!) Place covered dough in the refrigerator for up to 3 days. The dough will puff up during this time, but may begin to deflate after 2 days. That’s normal and nothing to worry about.Shape Dough into Ball:
Lightly dust a large nonstick baking sheet (with or without rims, and make sure it’s nonstick) with a little flour and/or cornmeal. Using generously floured hands and gentle pressure so as to not deflate the dough too much, shape the risen dough into a ball. (I just do this right inside the bowl it’s in, or you can do this on a lightly floured work surface.) Dough is very sticky.Transfer to Baking Sheet:
Transfer ball to prepared baking sheet. Mix topping ingredients together. Sprinkle on top of dough, and if the seeds aren’t sticking, press them into the dough as best you can. Loosely cover and allow dough to rest for 45 minutes. You will bake the dough on this prepared baking sheet. See recipe note if you want to use a pizza stone or dutch oven.Preheat Oven to 425°F:
During this 45 minutes, preheat the oven to 425°F (220°C).Score Dough with Knife:
When ready to bake, using a very sharp knife or bread lame (you could even use kitchen shears), score the dough with a slash or X about 1/2 inch deep. (“Score” = shallow cut.) If the shaped loaf flattened out during the 45 minutes, use floured hands to reshape.Place Dough in Oven:
Place the shaped and scored dough (on the flour/cornmeal-dusted pan) in the preheated oven on the center rack.Add Steam for Crisp Crust:
Optional for a slightly crispier crust: Place a shallow metal or cast iron baking pan or skillet (I usually use a metal 9×13-inch baking pan) on the bottom oven rack. Carefully and quickly pour 3–4 cups of boiling water into the shallow pan. Quickly shut the oven to trap as much steam inside. The steam helps create a crispier crust.Bake Until Golden Brown:
Bake for 40 minutes or until the crust is golden brown. If you notice the exterior browning too quickly, tent the bread with aluminum foil. How to test for doneness: Give the warm bread a light tap. If it sounds hollow, it’s done. For a more accurate test, the bread is done when an instant read thermometer reads the center of the loaf as 195°F (90°C).Cool Before Slicing:
Remove the bread from the oven and allow to cool for at least 10–20 minutes before slicing and serving.Store Leftovers Properly:
Store leftovers loosely covered at room temperature for up to 3 days or in the refrigerator for up to 10 days.
Storage and Serving
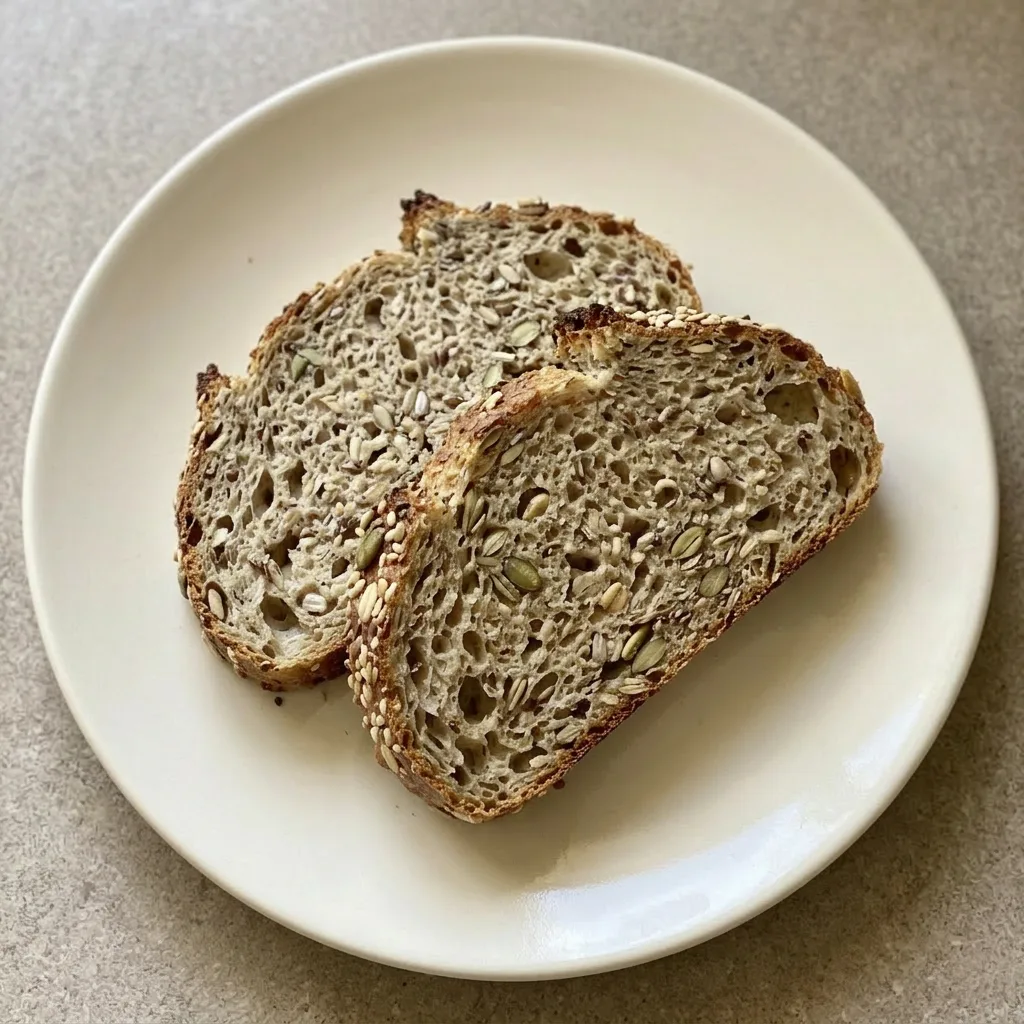
Cool the loaf for at least 10 to 20 minutes before slicing; cutting sooner compresses the crumb. For the best texture, serve within a few hours of baking, when the crust is crispiest. Store leftovers loosely covered at room temperature for up to 3 days; the crust will soften as the bread sits.
For longer storage, refrigerate for up to 10 days. To restore crunch, reheat slices in a toaster, skillet, or 350°F oven for 5 to 7 minutes. The bread also freezes well: wrap the whole loaf or slices tightly in plastic wrap and foil, then freeze for up to 3 months.
Thaw at room temperature, then reheat. The seeds and oats keep their texture through freezing and reheating.
Tips
- When shaping the sticky dough, wet your hands with water instead of flour. The water creates a thin barrier that prevents sticking without adding excess flour, which can make the dough stiff and reduce oven spring.
- Use a bench scraper to lift and fold the dough during the final shape. It helps handle the sticky dough without deflating it, keeping the air bubbles intact for a lighter crumb.
Swap seeds and sweetener freely, but don’t touch the flour or oats
Pumpkin seeds, sunflower seeds, flax seeds: Any seed or chopped nut (sesame, chia, hemp, chopped walnuts, pecans, almonds). Use the same total weight (about 1/2 cup seeds in dough + 1/4 cup for topping). Chia or hemp seeds stay soft; nuts add crunch but don’t soften the same way.
The bread still works, just a different texture and flavor.
Honey: Maple syrup or agave nectar. Use the same 2 tablespoons (43g). Maple syrup adds a subtle woodsy sweetness; agave is neutral.
The dough will be slightly thinner, but the rise still works. No change in structure.
Bread flour: Do not swap. All-purpose flour makes a denser loaf with less rise. Whole wheat flour absorbs more water, drying out the dough, you’d need to add extra water and risk a gummy crumb.
Stick with bread flour for the open crumb and chewy crust this recipe is designed for. Bread flour’s higher protein builds the gluten network that traps gas during the long wet rise.
Swap it and the loaf won’t spring or hold its shape.
Old-fashioned rolled oats: Do not swap. Quick oats turn mushy, steel-cut oats stay crunchy and don’t hydrate properly. The recipe relies on rolled oats absorbing water and swelling to create a tender, hearty crumb.
Swap them and the texture breaks. Rolled oats have just the right size and absorption.
Quick oats dissolve into the dough; steel-cut oats remain hard little pellets. Neither gives the intended soft chew.
Frequently Asked Questions
Can I skip the refrigeration step and bake right after the 3-hour rise?
Yes, you can bake right after the 3-hour rise. The bread will still rise and bake, but the flavor will be milder and the crumb less open. The cold rest develops deeper taste and a better texture by letting enzymes slowly break down starches.
If you skip it, you’ll get a good loaf, just not the complex flavor and airy crumb you’d get from a longer rest.
Why is my dough so sticky and how do I handle it without adding too much flour?
The dough is deliberately sticky because it’s high-hydration, which builds gluten without kneading. Keep your hands well-floured when shaping, and work gently to avoid deflating the dough. If the dough is sticking to the bowl or your hands excessively, you can lightly oil your hands instead of adding more flour to the dough itself.
The stickiness is normal and necessary for the open crumb.
How do I know when the bread is fully baked without a thermometer?
Tap the bottom of the loaf after 40 minutes, if it sounds hollow, it’s done. The crust should be deep golden brown, and the loaf will feel firm when you squeeze the sides gently. If the top is browning too fast but the bottom isn’t hollow, tent with foil and bake a few more minutes.
