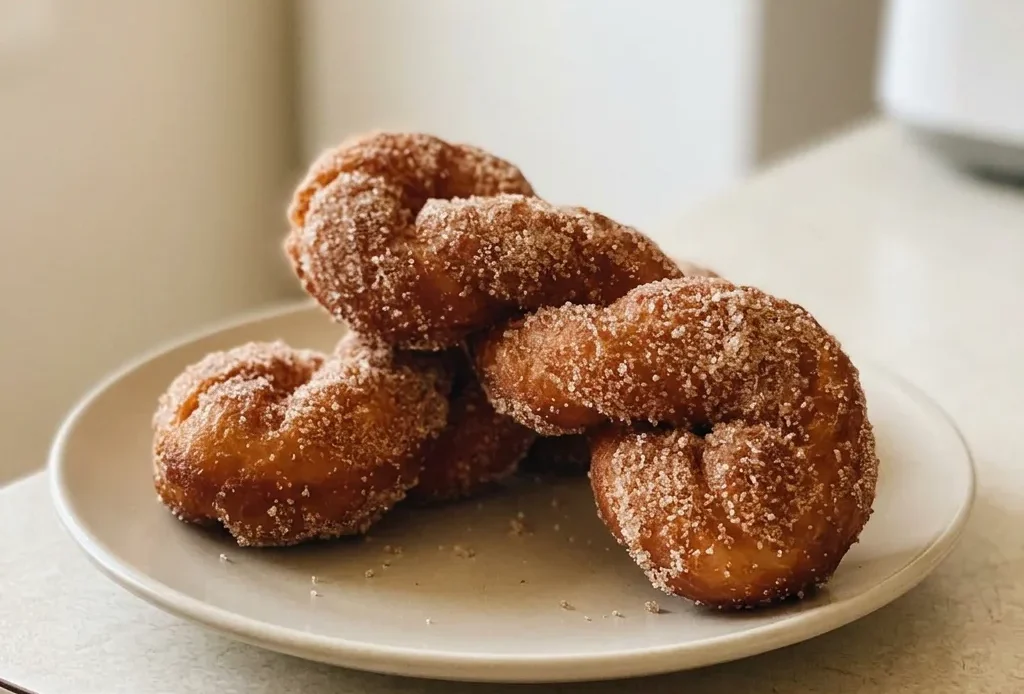
The twist isn’t just for looks, it locks in even frying. Rolling a 12-inch rope and turning the ends opposite directions builds tension that keeps the spiral intact through the hot oil. That’s the trick that gives every bite the same crisp shell and airy interior.
Without it, thinner sections burn before the middle cooks. If you’ve ever had a doughnut that was half greasy, half burnt, this shaping is what fixes it. The korean twisted doughnut recipe depends on that tension as much as the enriched dough, and it’s where most home attempts slip.
Get the twist right, and the rest, the plush crumb, the cinnamon sugar crunch, falls into place.
I let them proof too long one time, and they puffed up, then sank like rocks in the oil. Now I set a timer for 25 minutes and watch for that slight puff, not a full rise.
Enriched Dough for Tender Crumb
Butter, milk, and egg each pull weight in this dough. Butter adds richness and tenderness, you feel it in how the crumb almost melts. Milk provides moisture and a subtle dairy flavor that rounds out the sweetness.
Egg contributes structure and color; the yolk gives a golden hue and the protein helps the dough hold its shape during frying. Together, they produce a soft, plush interior that contrasts with the crisp exterior. Without these enrichments, the dough would be leaner and chewier, more like bread than a doughnut.
Double Rise for Structure and Air
The first bulk fermentation develops gluten and flavor. As the dough sits, the yeast produces gases that stretch the gluten network, building strength for the final shape.
After shaping, a second proof ensures light, airy texture, the twisted strands puff up, becoming plump and tender. Over-proofing risks collapse; the dough loses its ability to hold gas, and the fried doughnuts turn dense and greasy. The key here is consistency: a warm spot for the first rise until doubled, then a shorter proof until puffy but still springy to the touch.
Twisting for Shape and Even Fry
Twisting builds tension that locks the spiral in place. As you twist the ends in opposite directions, the dough tightens, creating a defined pattern that holds during proofing and frying.
Even thickness ensures uniform cooking; thin sections brown too quickly, thick ones remain underdone. Three loops strike a balance, enough to show the twist clearly without becoming a tangle. The result is a doughnut that fries evenly, with a consistent golden crust all around and a soft, airy interior in every bite.
Cinnamon Sugar While Warm
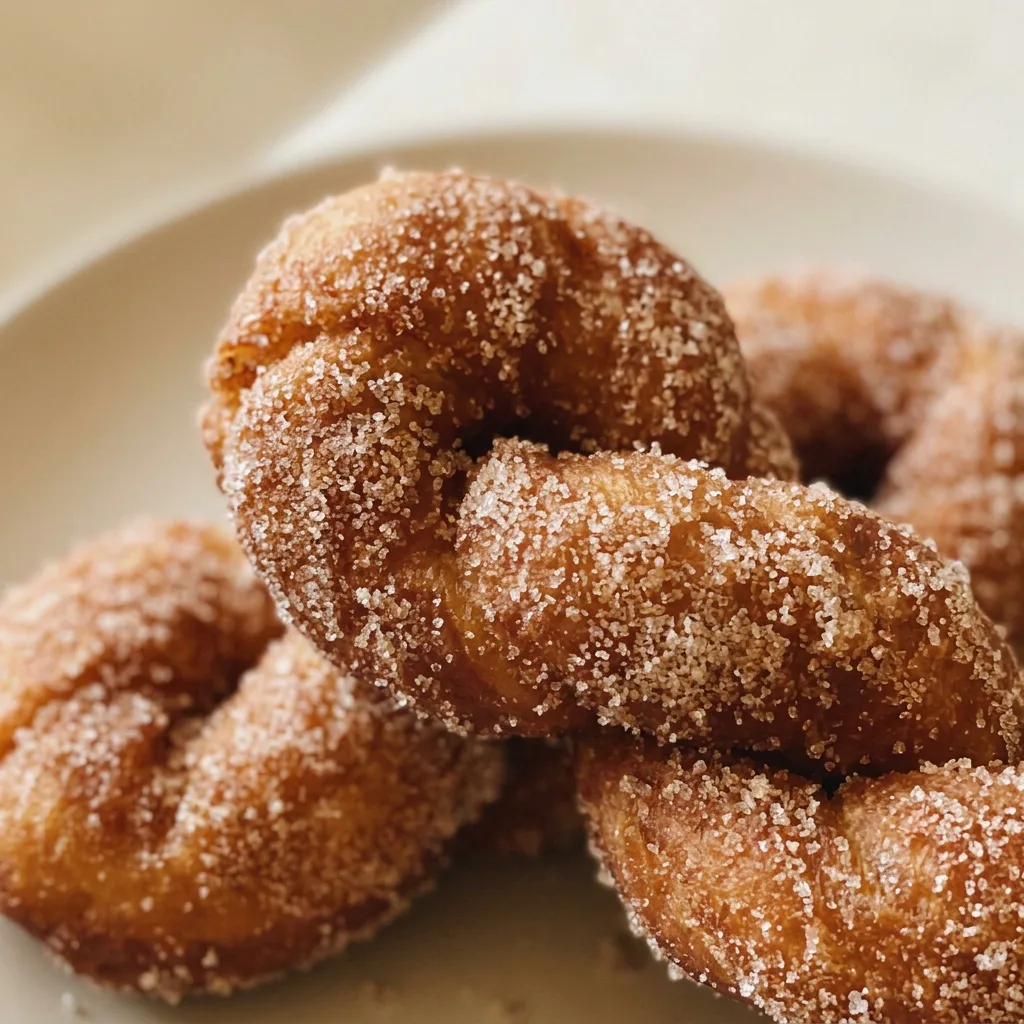
Warm doughnuts absorb the coating better. The residual heat melts the sugar slightly, creating a thin, crunchy shell that clings evenly. Cinnamon complements the sweet, enriched dough without overwhelming it, the spice cuts through the richness and adds a warm finish.
The coating also adds texture contrast: a crisp, sugary crust against the soft, airy interior. Roll them right after draining, while they’re still hot; that’s when the sugar sticks best and forms that satisfying crackle.
Prep: 20 min · Cook: 30 min · Total: 2 hr 20 min · Servings: 16 · Calories: 160 kcal
What to Look For in Each Ingredient
Bread Flour: Use bread flour for structure; all-purpose makes a softer, less chewy doughnut.
Instant Yeast: Instant yeast mixes right in; active dry needs proofing first, so stick with instant.
Butter: Use unsalted butter to control salt; soften it fully so it incorporates smoothly.
Milk: Lukewarm milk, around 100°F, wakes the yeast without killing it.
Cinnamon: Fresh cinnamon has more punch; stale cinnamon will taste flat.
Working the Dough: From Shaggy to Silky
Mix the Dry Base
Whisk the salt, flour, sugar, and yeast evenly. No dry pockets remain. Yeast needs even distribution to activate uniformly.
Add Wet Ingredients
Pour milk and egg into the well, then stir with a wooden spoon until a shaggy mass forms. It’ll be sticky, that’s fine, the flour hasn’t fully hydrated yet.
Knead Until Smooth
On a floured surface, push the dough away with your palm, fold, and rotate. After 10 minutes, it should feel smooth, less sticky, and spring back when poked.
Incorporate Butter
Work the softened butter into the dough a bit at a time. It will feel greasy and slack at first, then gradually become supple and elastic. Knead until it no longer sticks to the counter.
First Rise
Place dough in an oiled bowl, cover, and let it rise in a warm spot. After 1 hour, it should double in volume, press a finger in; the indentation stays.
Divide and Shape
Punch down the dough, then cut into 16 equal pieces (about 52g each). Roll each into a ball; cover any you’re not working with to prevent drying.
Form the Twists
Roll each ball into a 12-inch rope. For the twist, hold both ends, rotate them in opposite directions until tension builds, then bring ends together, the rope coils naturally. Pinch to seal.
Second Proof
Arrange twists on a parchment-lined sheet, cover, and let proof 20 to 30 minutes. They should puff up noticeably but still feel springy when lightly pressed, not deflate.
Heat the Oil
Fill a pot with 2 inches of oil and heat to 350°F. Test with a dough scrap: it should float to the surface with steady, gentle bubbles. Too hot, and the outside burns before the inside cooks.
Fry Until Golden
Gently lower doughnuts into oil, upside down first. Fry 2 to 3 minutes per side until deep golden brown.
The dough will puff and the twist pattern will hold. Drain on paper towels.
Coat While Warm
Toss the hot doughnuts in cinnamon sugar immediately. The residual heat melts the sugar slightly, creating a thin, crunchy shell that clings evenly. Serve right away.
Korean Twisted Doughnut Recipe
Ingredients
Dough
- 1 tsp Salt
- 4 cups Bread Flour (480 g)
- 3 tbsp Sugar
- 2 tsp Instant Yeast
- 1 Egg
- 1 cup Lukewarm Milk (250 g)
- 3 tbsp Butter
Cinnamon Sugar Coating
- Sugar and cinnamon for coating (amount not specified)
Frying
Instructions
Dough
Whisk Dry Ingredients:
In a big bowl, whisk together salt, bread flour, sugar, and instant yeast until uniform.Add Milk and Egg:
Create a depression in the dry mixture. Pour in the milk and crack the egg into it. Blend using a wooden spoon or spatula until a ragged dough emerges; it will be sticky initially.Knead Dough:
Transfer the dough onto a lightly floured work surface. Knead by pressing the dough away with your palm, folding it over, rotating, and repeating. Continue for roughly 10 minutes.Incorporate Butter:
Slowly work the softened butter into the dough, kneading another 6-8 minutes until the dough feels smooth, elastic, and slightly sticky.First Rise:
Set the dough in a lightly oiled bowl, cover with a towel or plastic wrap, and allow to rise in a warm spot for about 1 hour, or until doubled in volume.Divide Dough:
After rising, deflate the dough by punching it down. Split into 16 equal portions, each around 52 grams.Shape Strands:
Shape each portion into a long strand, roughly 12 inches long.Twist Doughnuts:
Technique 1: Twist the two ends in opposite directions—one forward, one backward—to build tension. Lift by the ends; the dough will coil naturally. Guide it into a neat twist.Alternate Twist:
Technique 2: Form a 12-inch rope with ends slightly thicker than the middle. Cross the ends over each other to create spirals, pressing them together firmly. Aim for three loops to produce an elongated twisted doughnut.Proof Doughnuts:
Arrange the twisted doughnuts on a parchment-lined baking sheet. Cover with a towel and let proof for 20-30 minutes until puffy.
Cinnamon Sugar Coating
Mix Cinnamon Sugar:
Combine sugar and cinnamon in a wide bowl or plate; set aside.Heat Oil:
Fill a deep fryer or heavy pot with oil to a depth of about 2 inches. Heat to 350°F (175°C). Without a thermometer, test with a dough scrap: it should ascend slowly with steady small bubbles.
Frying
Fry Doughnuts:
Gently lower the doughnuts upside down into the hot oil, one by one. Fry each side for 2-3 minutes until light golden brown.Drain Excess Oil:
Using a slotted spoon, lift the doughnuts from the oil and place on a paper-towel-lined plate to drain.Coat in Cinnamon Sugar:
While still warm, roll the doughnuts in the cinnamon-sugar mixture.Serve Immediately:
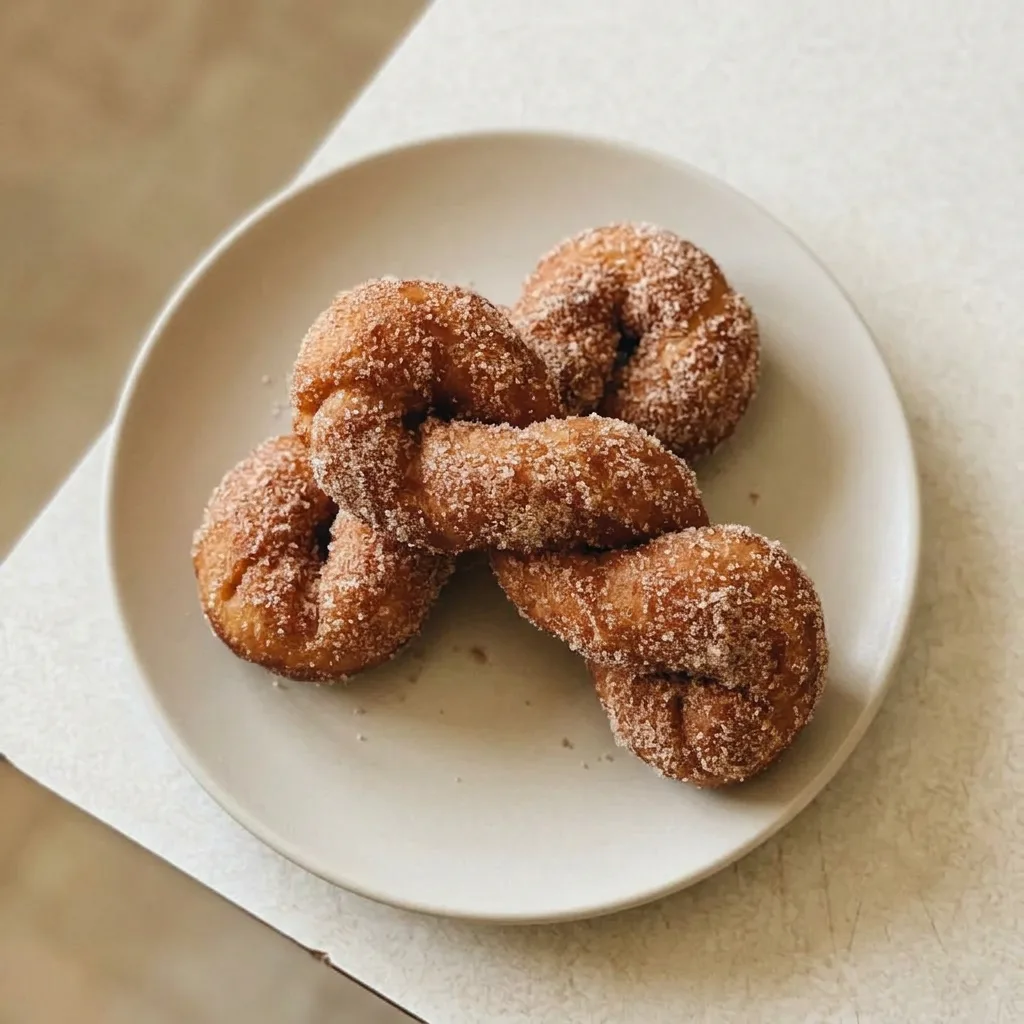
Serve immediately for the best texture—spongy, airy inside with a crisp exterior.
Swapping Flours and Yeast Without Losing the Twist
Bread flour: All-purpose flour. The doughnuts come out softer, less chewy, with a tender crumb that still holds the twist shape. Expect a slightly less structured interior, but the difference is subtle.
Instant yeast: Active dry yeast. Proof it first in a portion of the warm milk with a pinch of sugar until foamy, about 5 to 10 minutes. Use the same weight (about 7g).
The dough may need a few extra minutes to rise, but the final texture is identical.
Butter: Vegan butter or refined coconut oil. Use a stick-for-stick swap for vegan butter. For coconut oil, use 2½ tablespoons solid, room-temperature coconut oil in place of 3 tablespoons butter.
The dough will be slightly less tender and rich, but still plush. Coconut oil can make the dough a bit firmer when cool; fry and serve immediately.
Milk: Oat milk or soy milk. Use the same volume. The dough may feel slightly less extensible and proof a touch slower.
The flavor is leaner, less creamy, but the structure holds. Avoid almond milk, too watery, gives a denser crumb.
Tips
- Use a digital scale for the dough portions: each 52g piece ensures uniform frying time and even doneness across all doughnuts.
Storage and Serving
For the best texture, serve doughnuts within 2 hours of frying. The crisp exterior softens quickly as moisture migrates from the crumb. To store leftovers, place them in an airtight container at room temperature for up to 2 days.
They will lose their crunch and become chewy. To restore some crispness, reheat in a 350°F oven for 3 to 4 minutes, then re-coat with cinnamon sugar if desired.
Do not refrigerate; the cold speeds staling. Freezing is not recommended the fried dough becomes soggy upon thawing.
If you must freeze, do so before coating: wrap cooled, unfried doughnuts tightly and freeze for up to 1 month. Thaw in the refrigerator overnight, proof at room temperature for 30 minutes, then fry and coat as directed.

Frequently Asked Questions
Can I make the dough ahead and fry later?
Yes, after the first rise (about 1 hour), punch down the dough, wrap it tightly, and refrigerate overnight. The next day, let it sit at room temperature for 30 minutes before shaping and proofing. The cold slows yeast activity, so the second proof may take closer to 40 minutes, look for the dough to puff up and feel springy, not dense.
Why did my doughnuts turn out dense and not airy?
Most likely the dough was under-proofed during the second rise; it should visibly puff and hold a light indentation when poked. Over-kneading after adding butter can also tighten the gluten too much, stop when the dough is smooth, elastic, and slightly tacky, not stiff. If the oil was below 350°F, the dough absorbs fat instead of puffing, so test with a scrap: it should rise with steady small bubbles.
How is this different from a classic American doughnut?
Classic American doughnuts are usually round with a hole, often yeasted but sometimes cake-style, and glazed or iced. These are twisted, giving more surface area for a crisp, golden crust, and rely on a cinnamon-sugar coating instead of a thick glaze. The dough is enriched with butter, milk, and egg for a tender, plush crumb that contrasts with the crunchy exterior.
